
Self-built kitchen in our Mercedes Sprinter Campervan with everything you need: cooker, sink, fridge, storage and fresh running water!
The most difficult thing about a self-built campervan is the planning prior to the building. You have to know beforehand which device, cable, wire or water hose goes where so you can build the furniture accordingly. The measurements and dimensions of most elements are predetermined by other elements – one thing you have to think about leads to another and to the next and so on 😉 That’s what it was like with our kitchen!
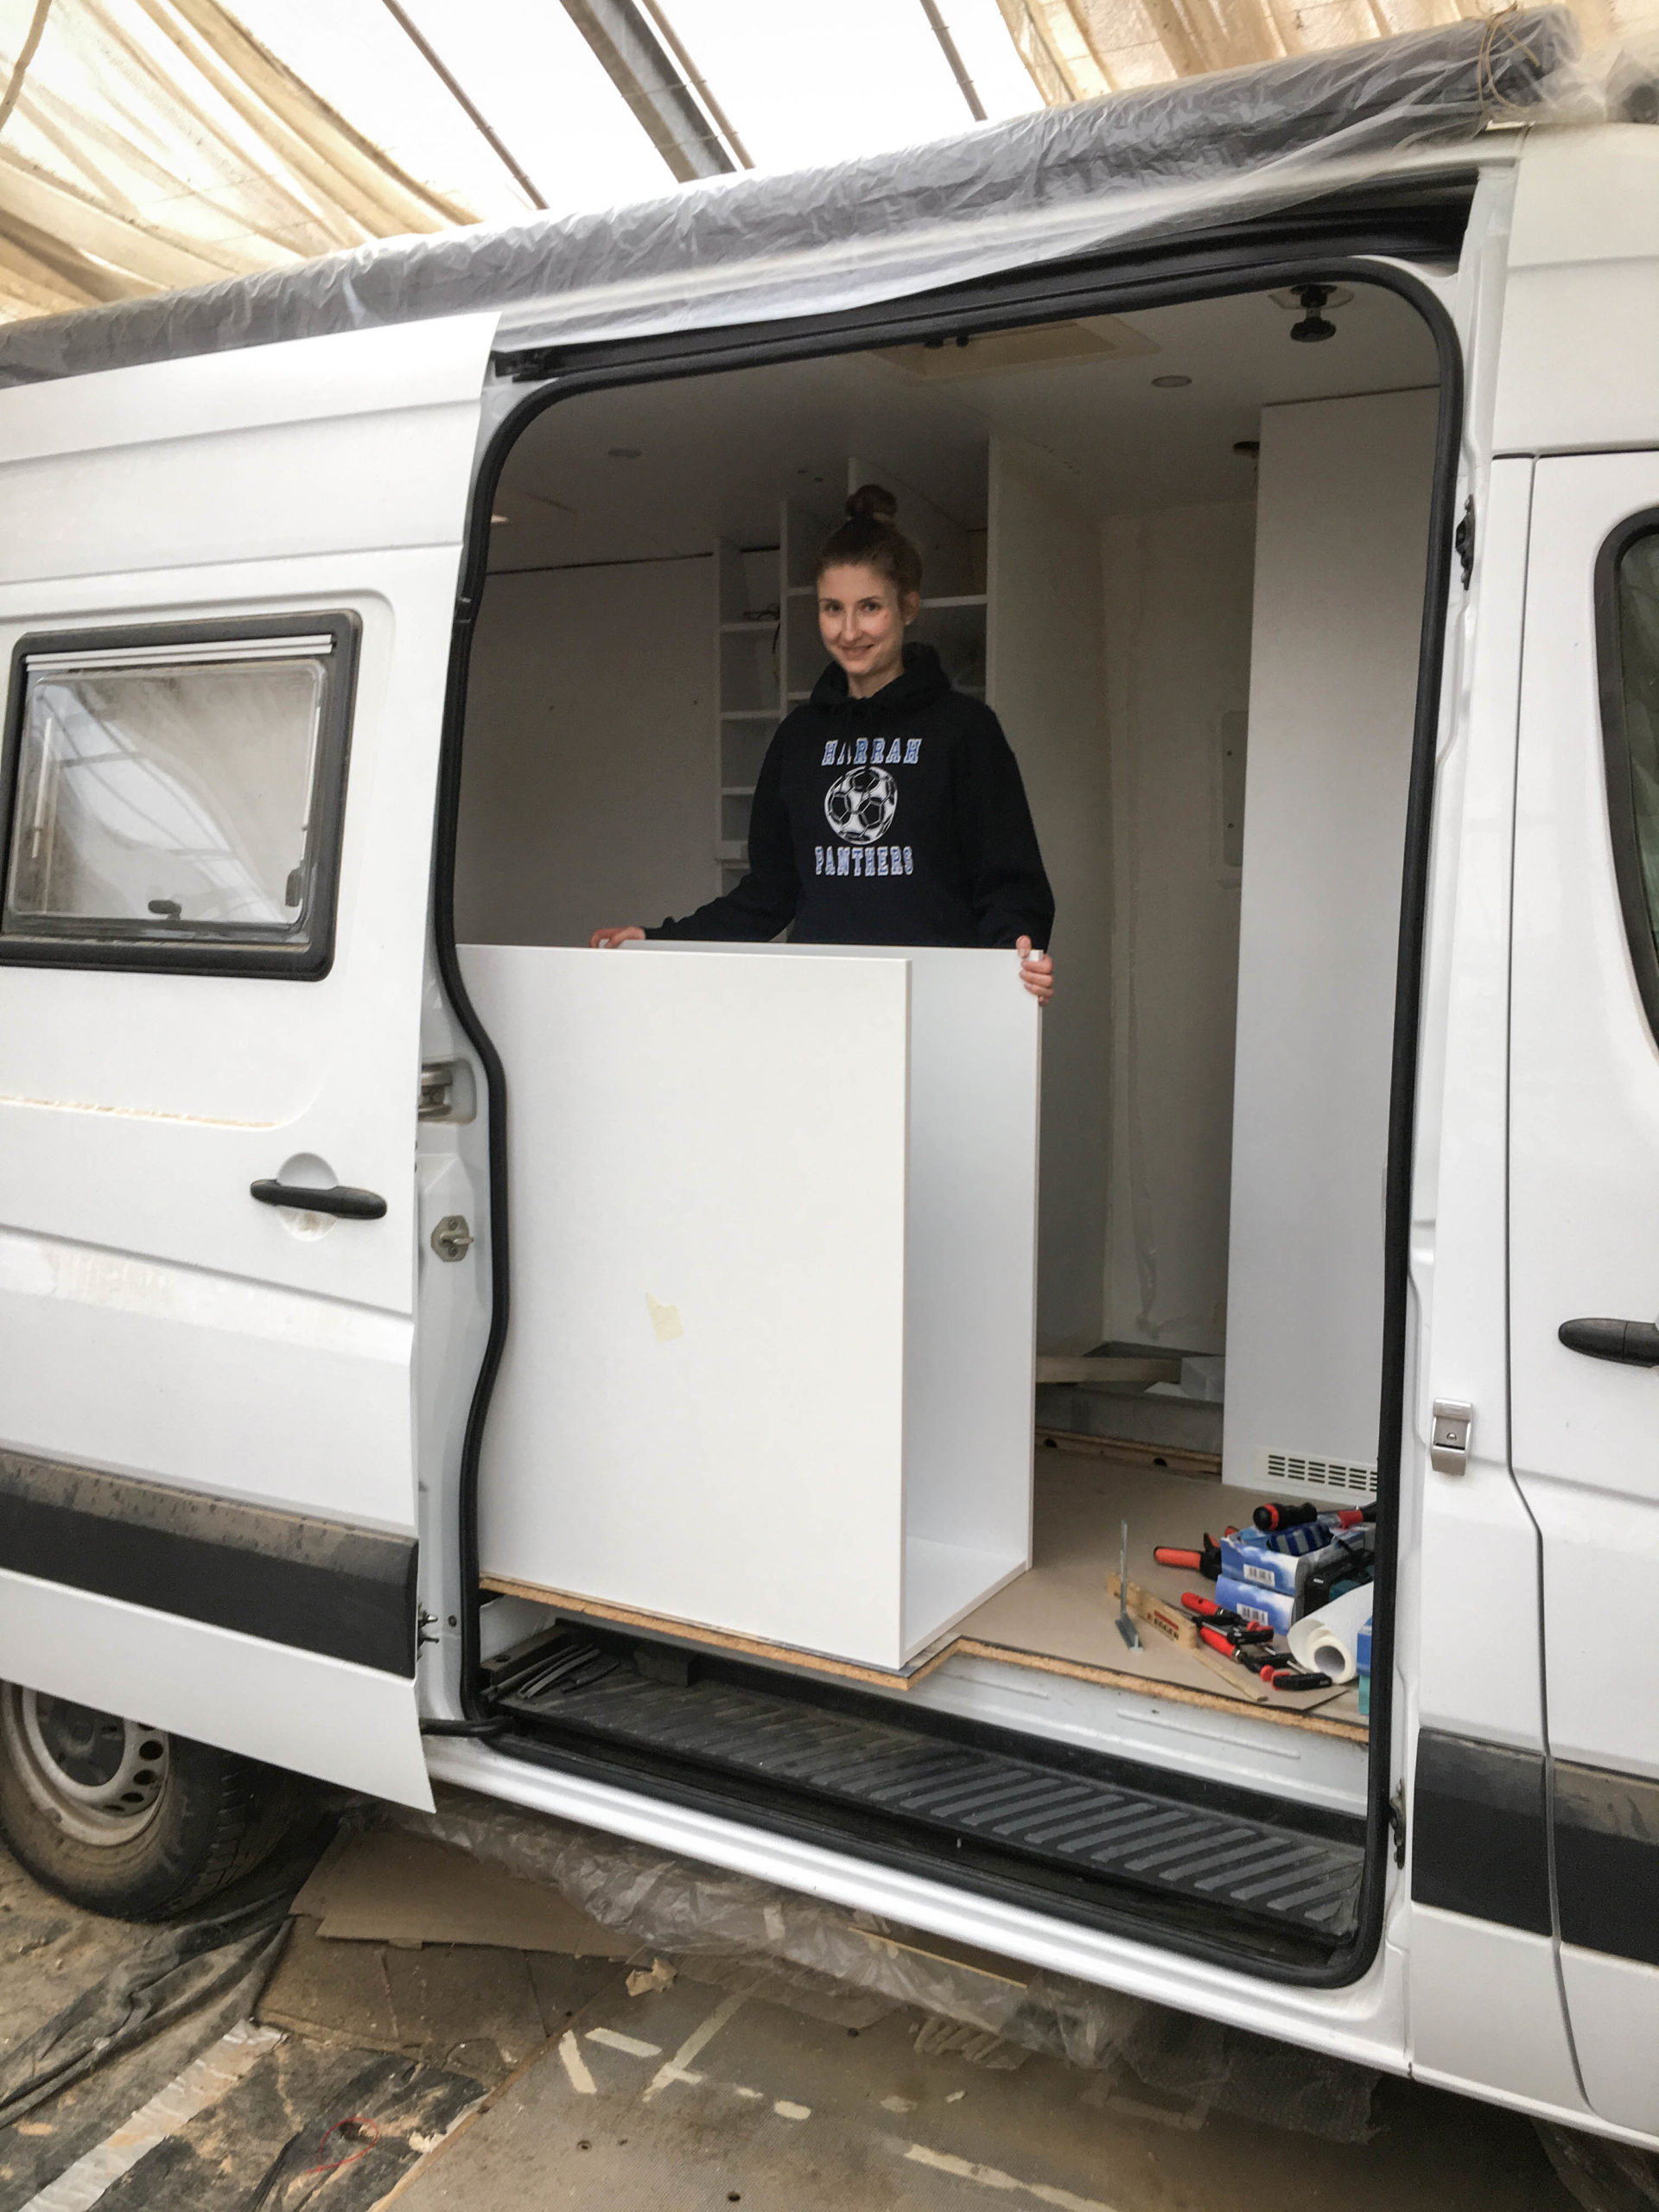
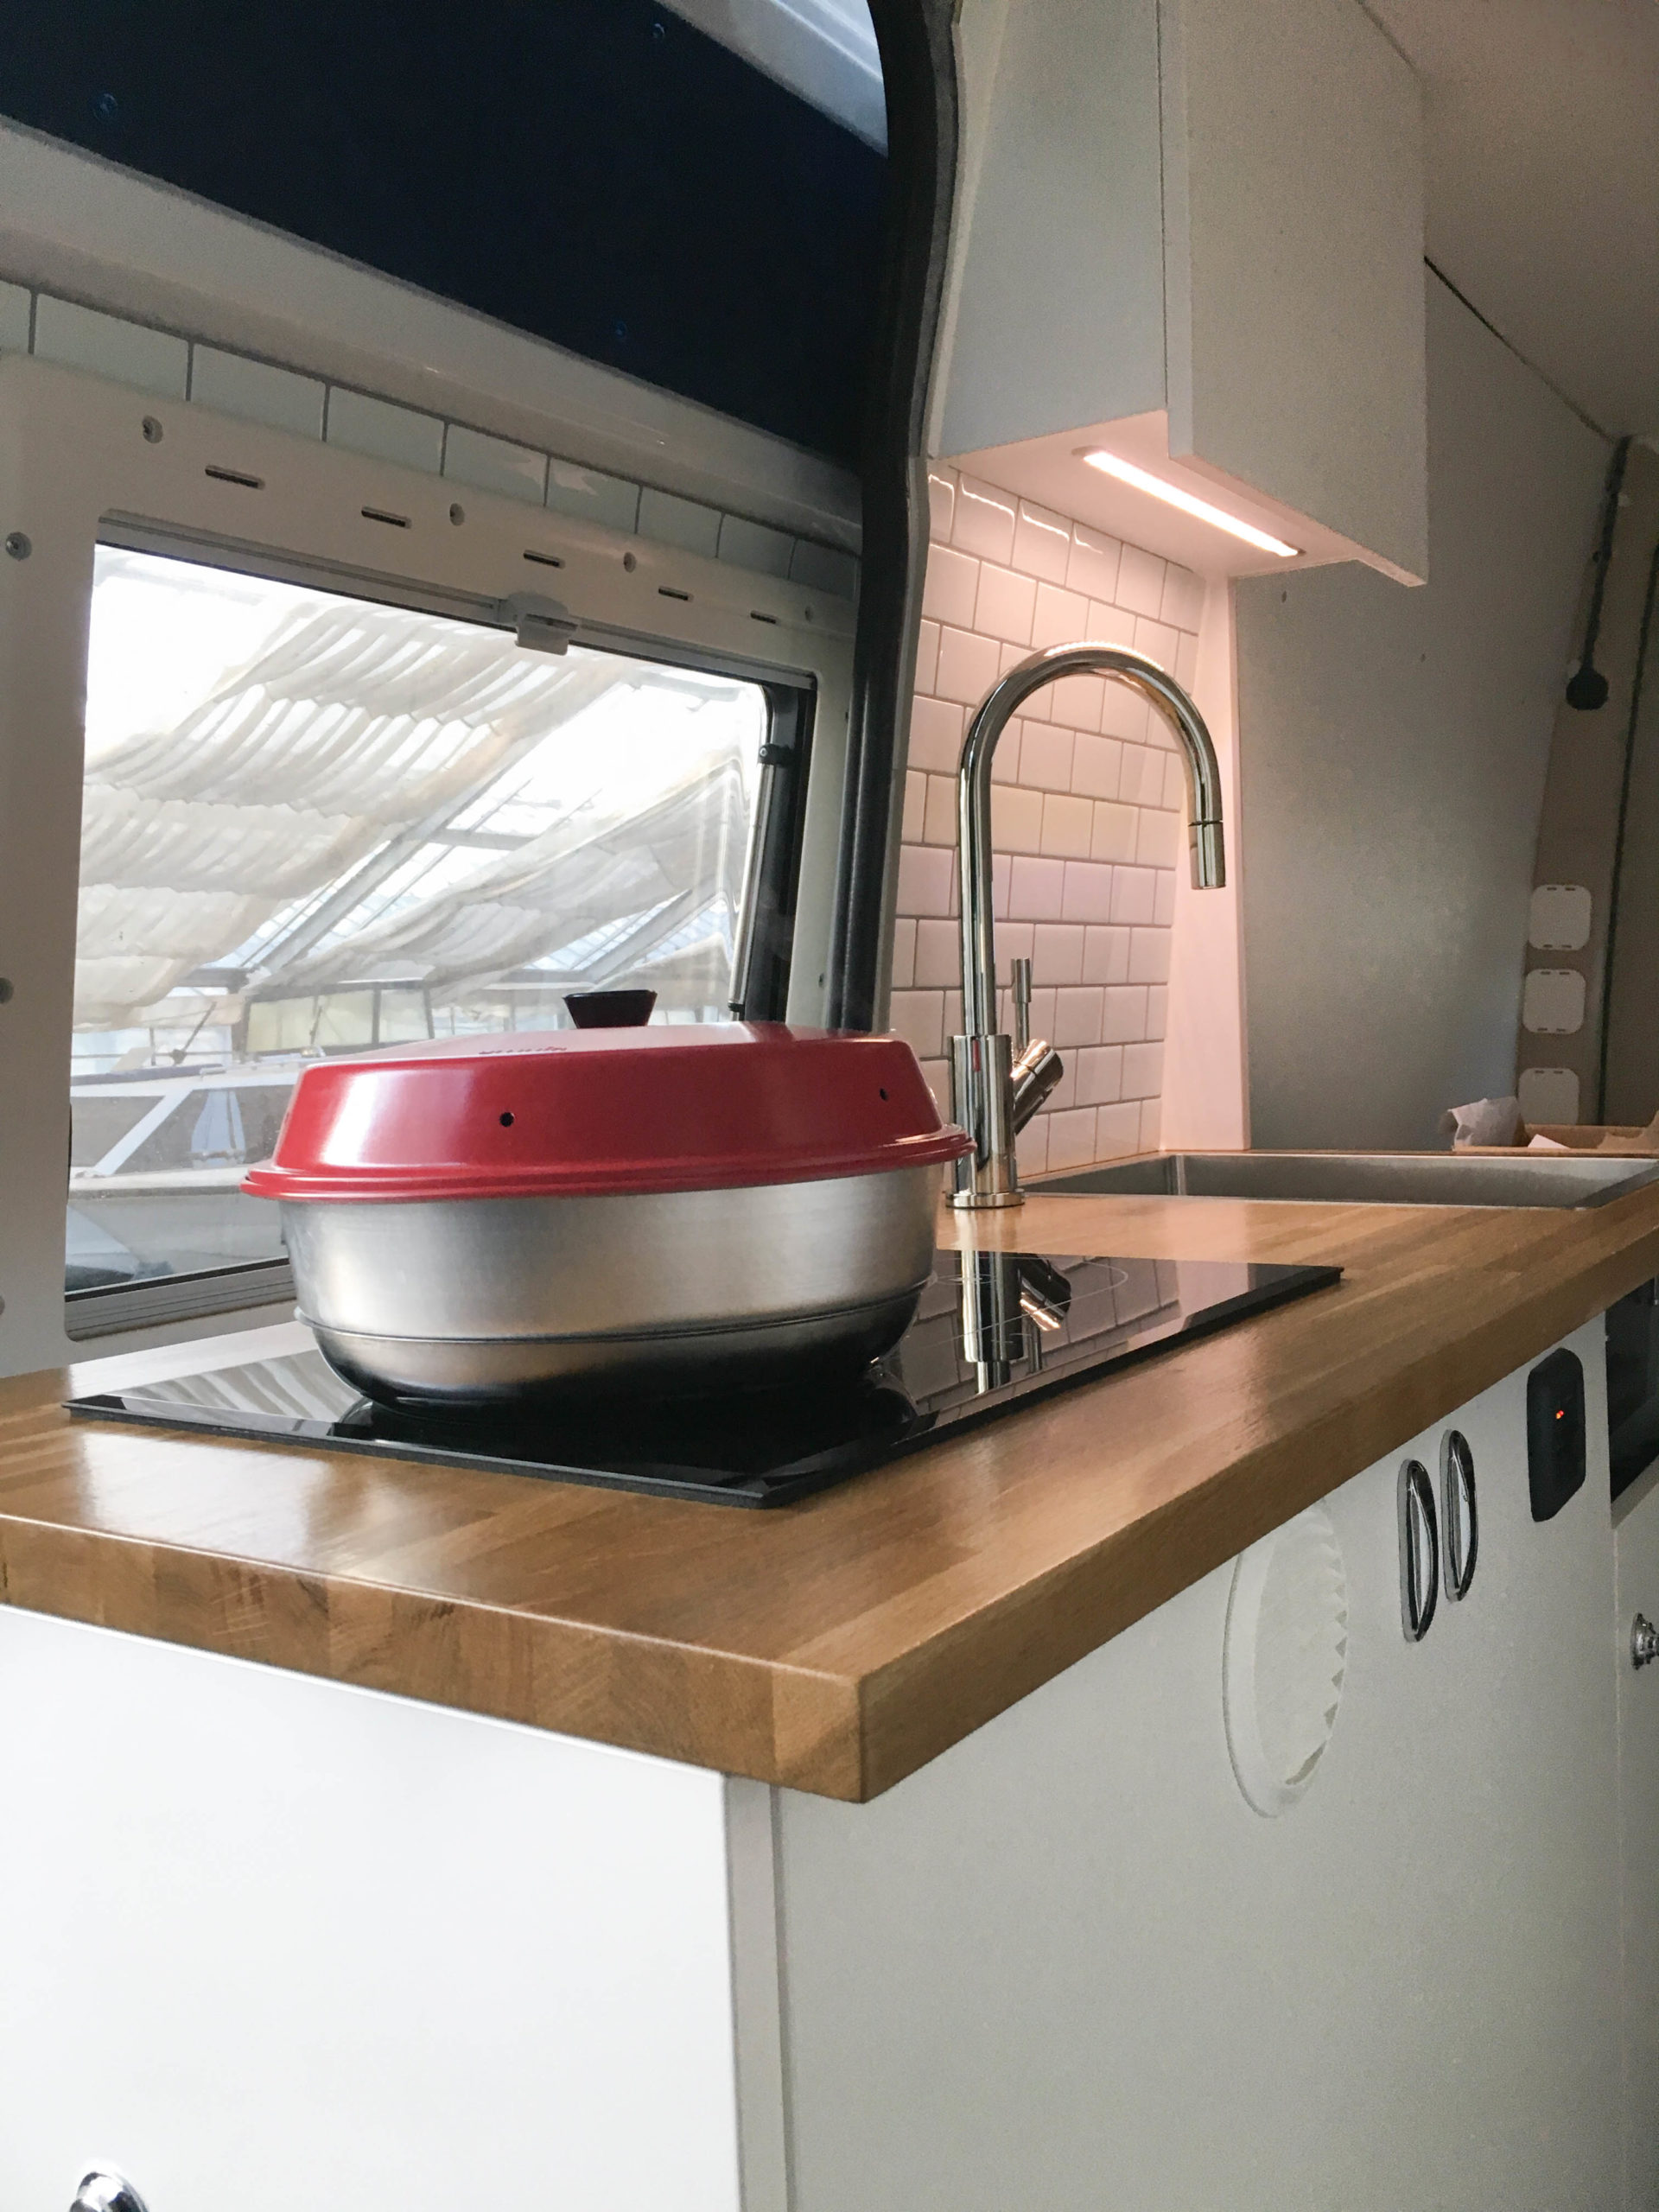
This is an overall view about the elements of our DIY Camper Kitchen!
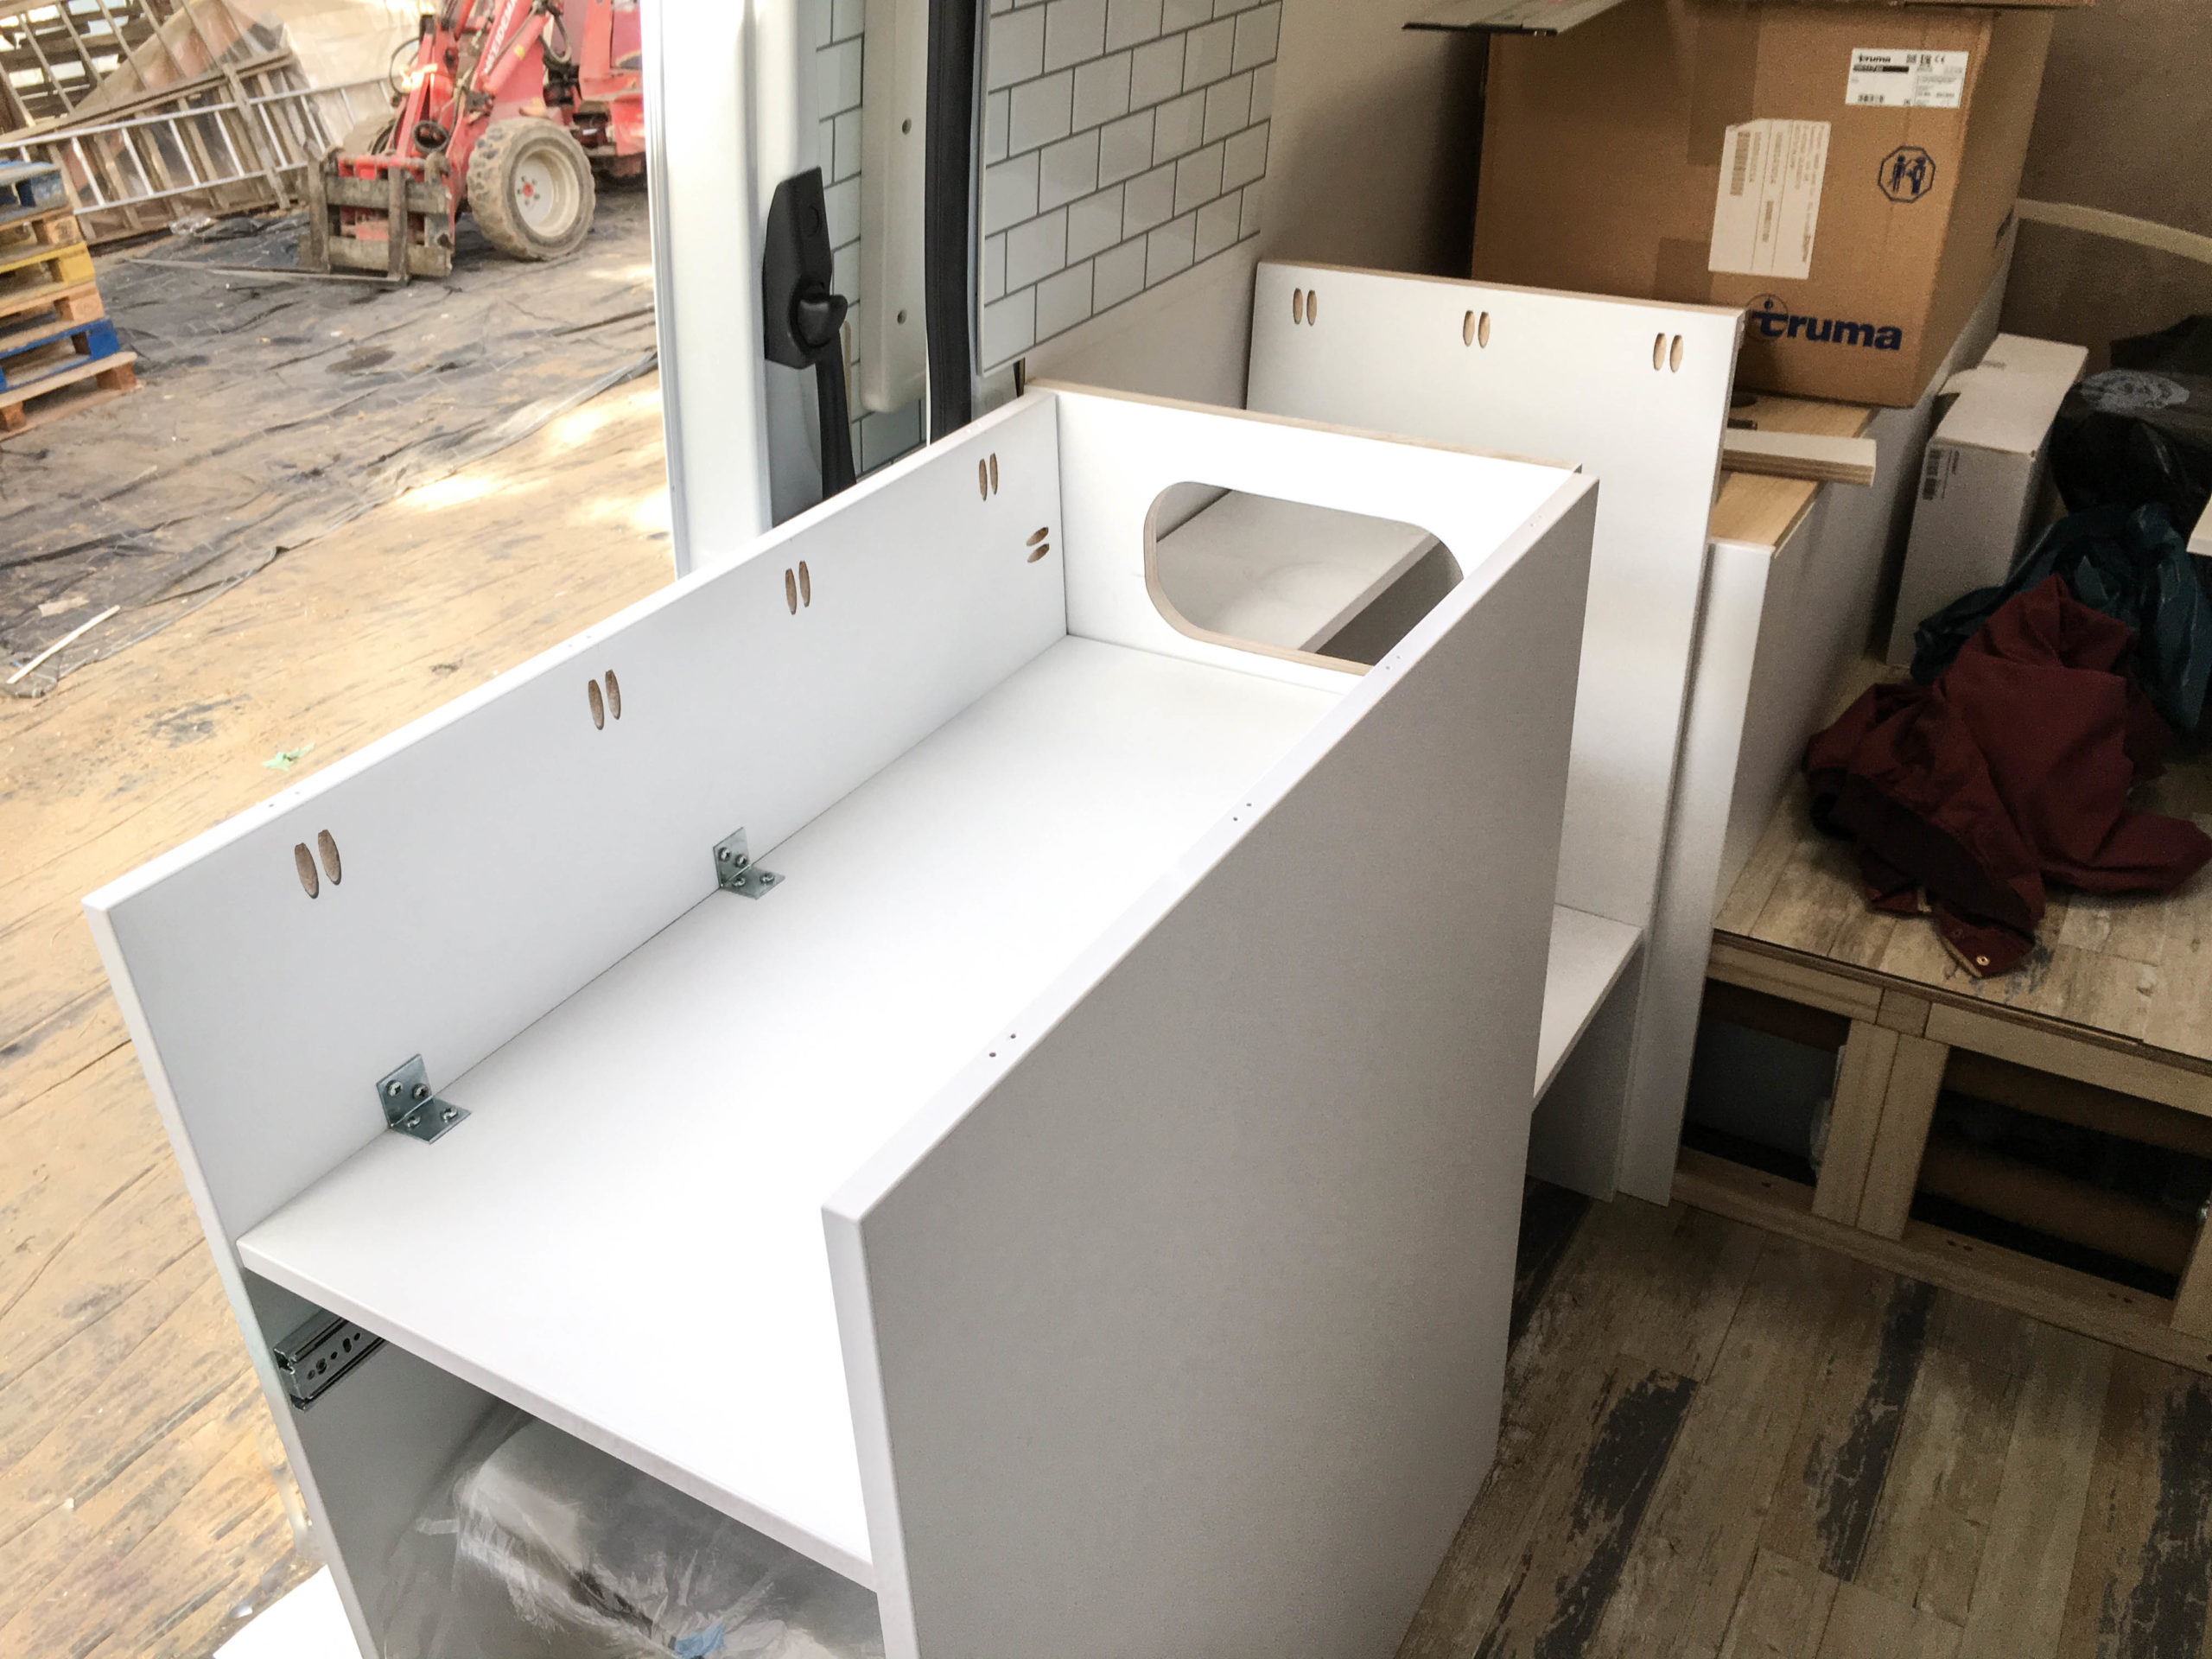
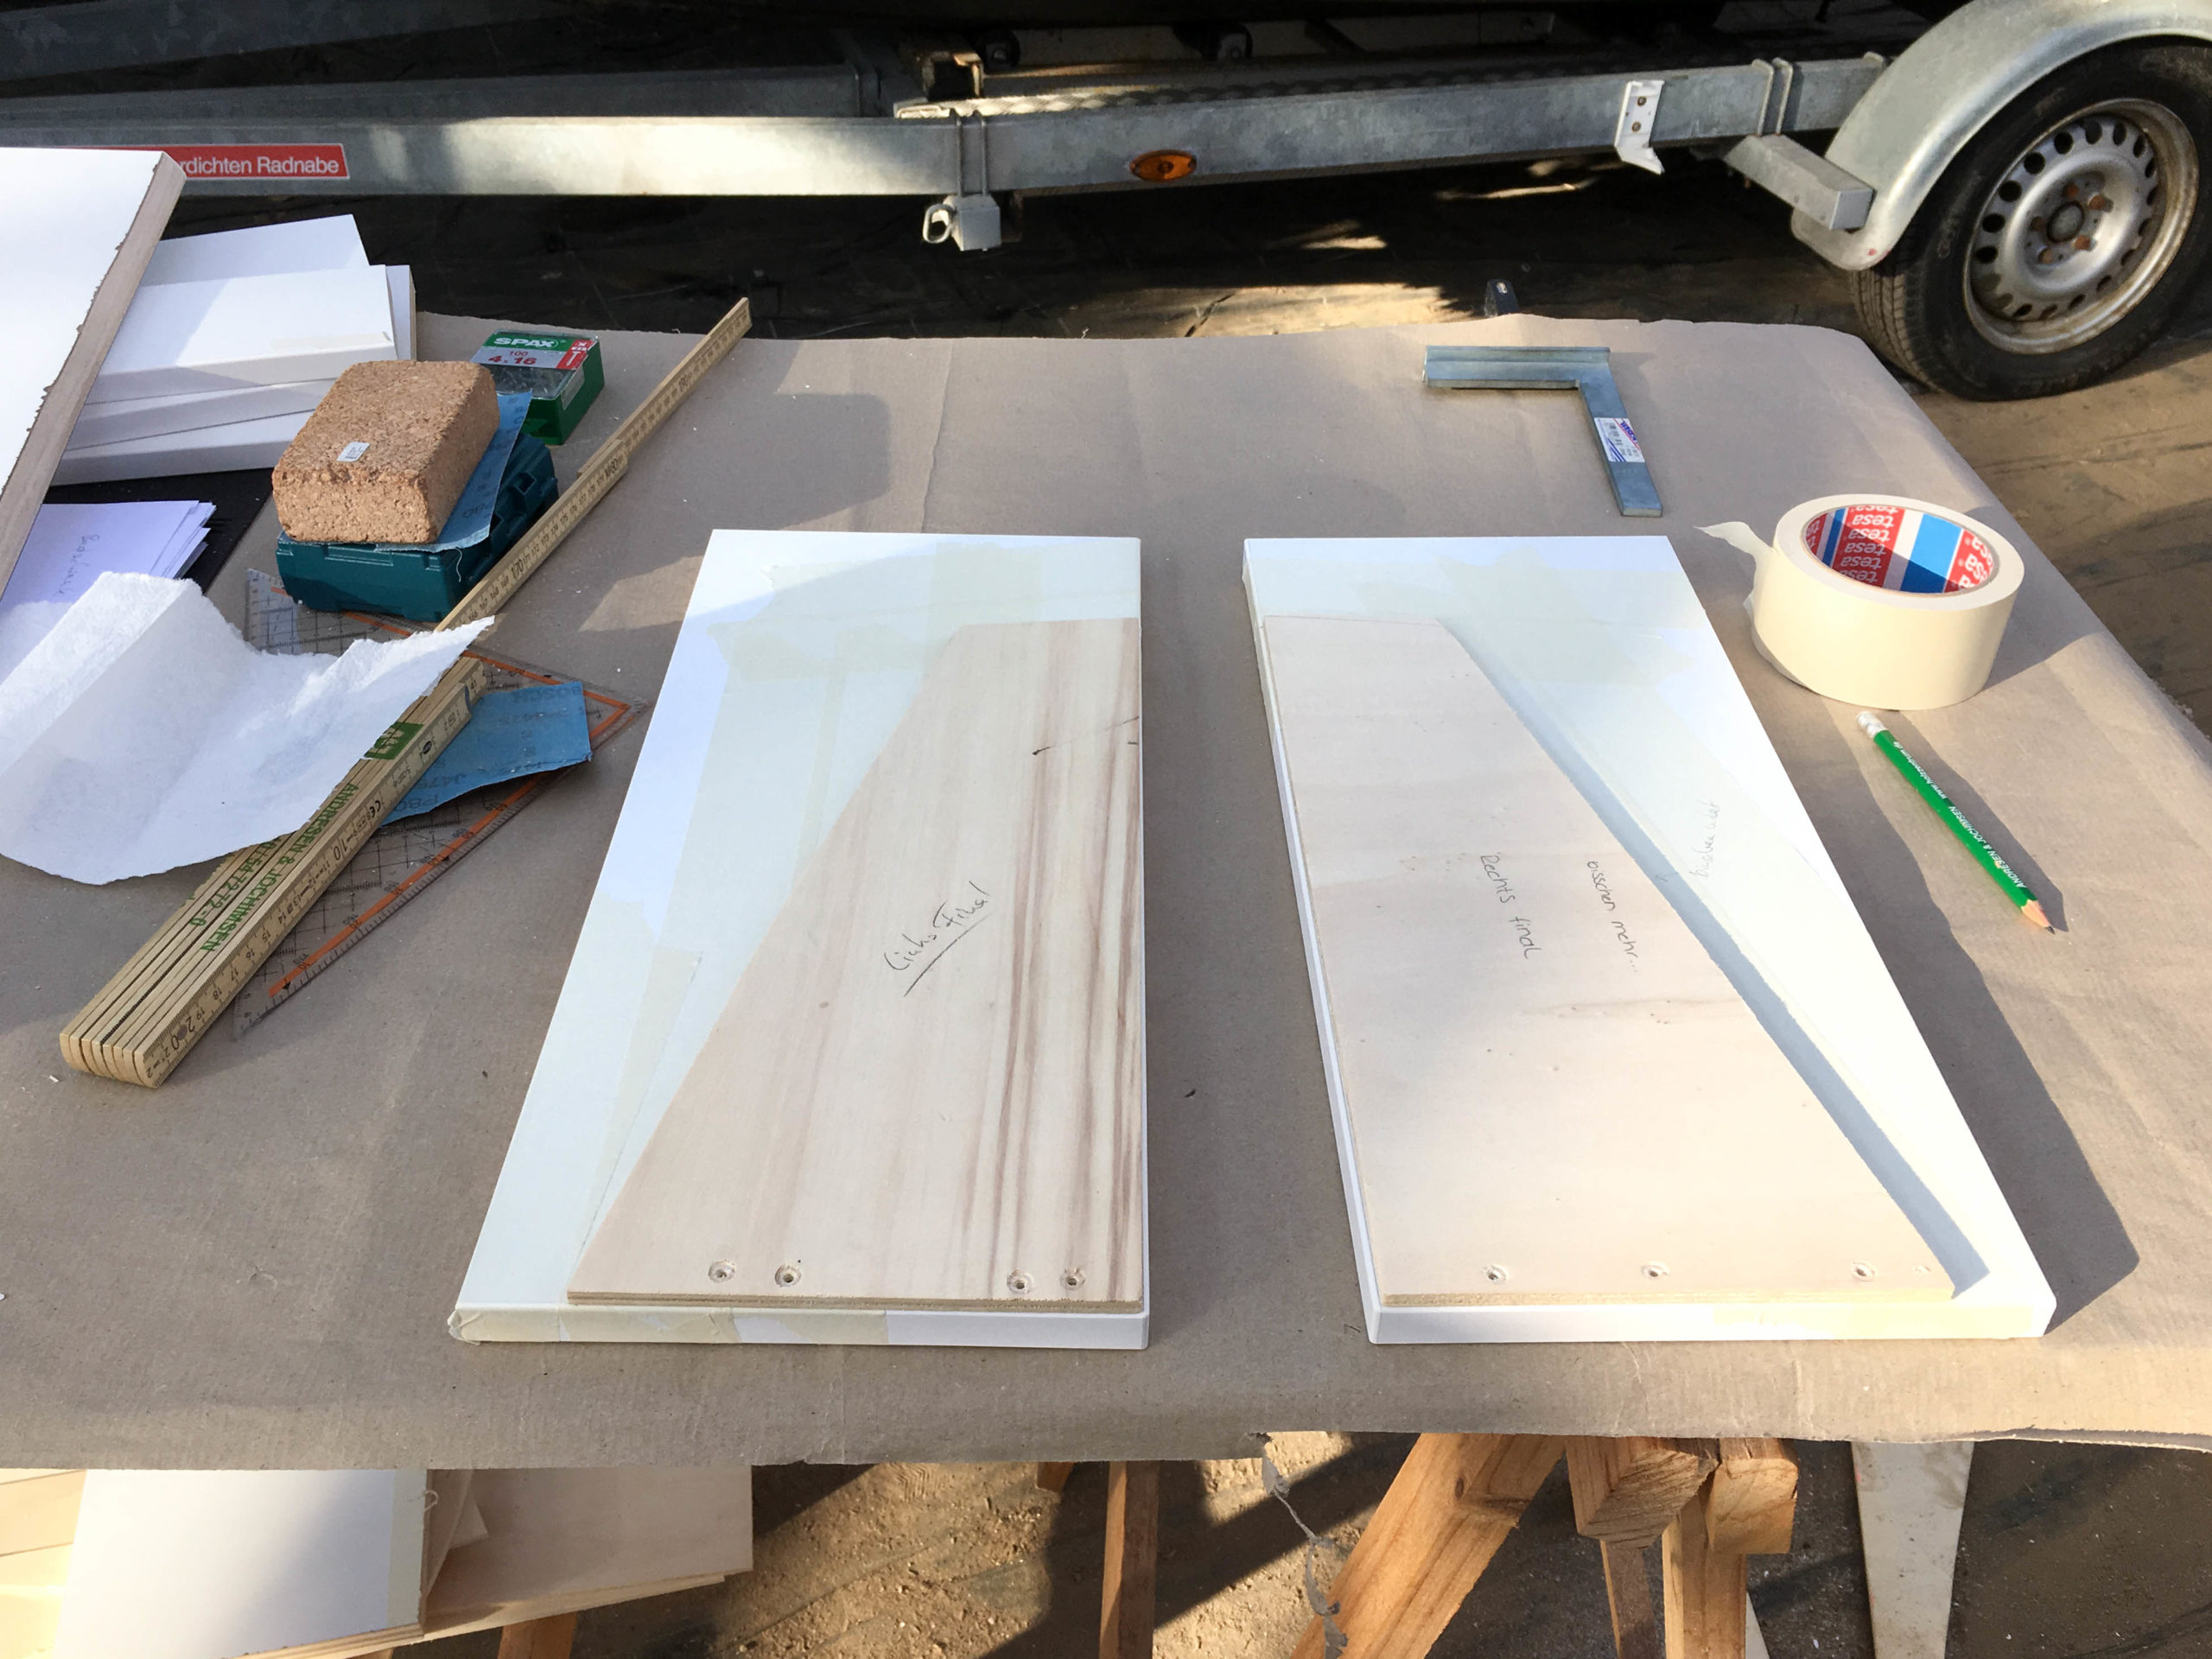
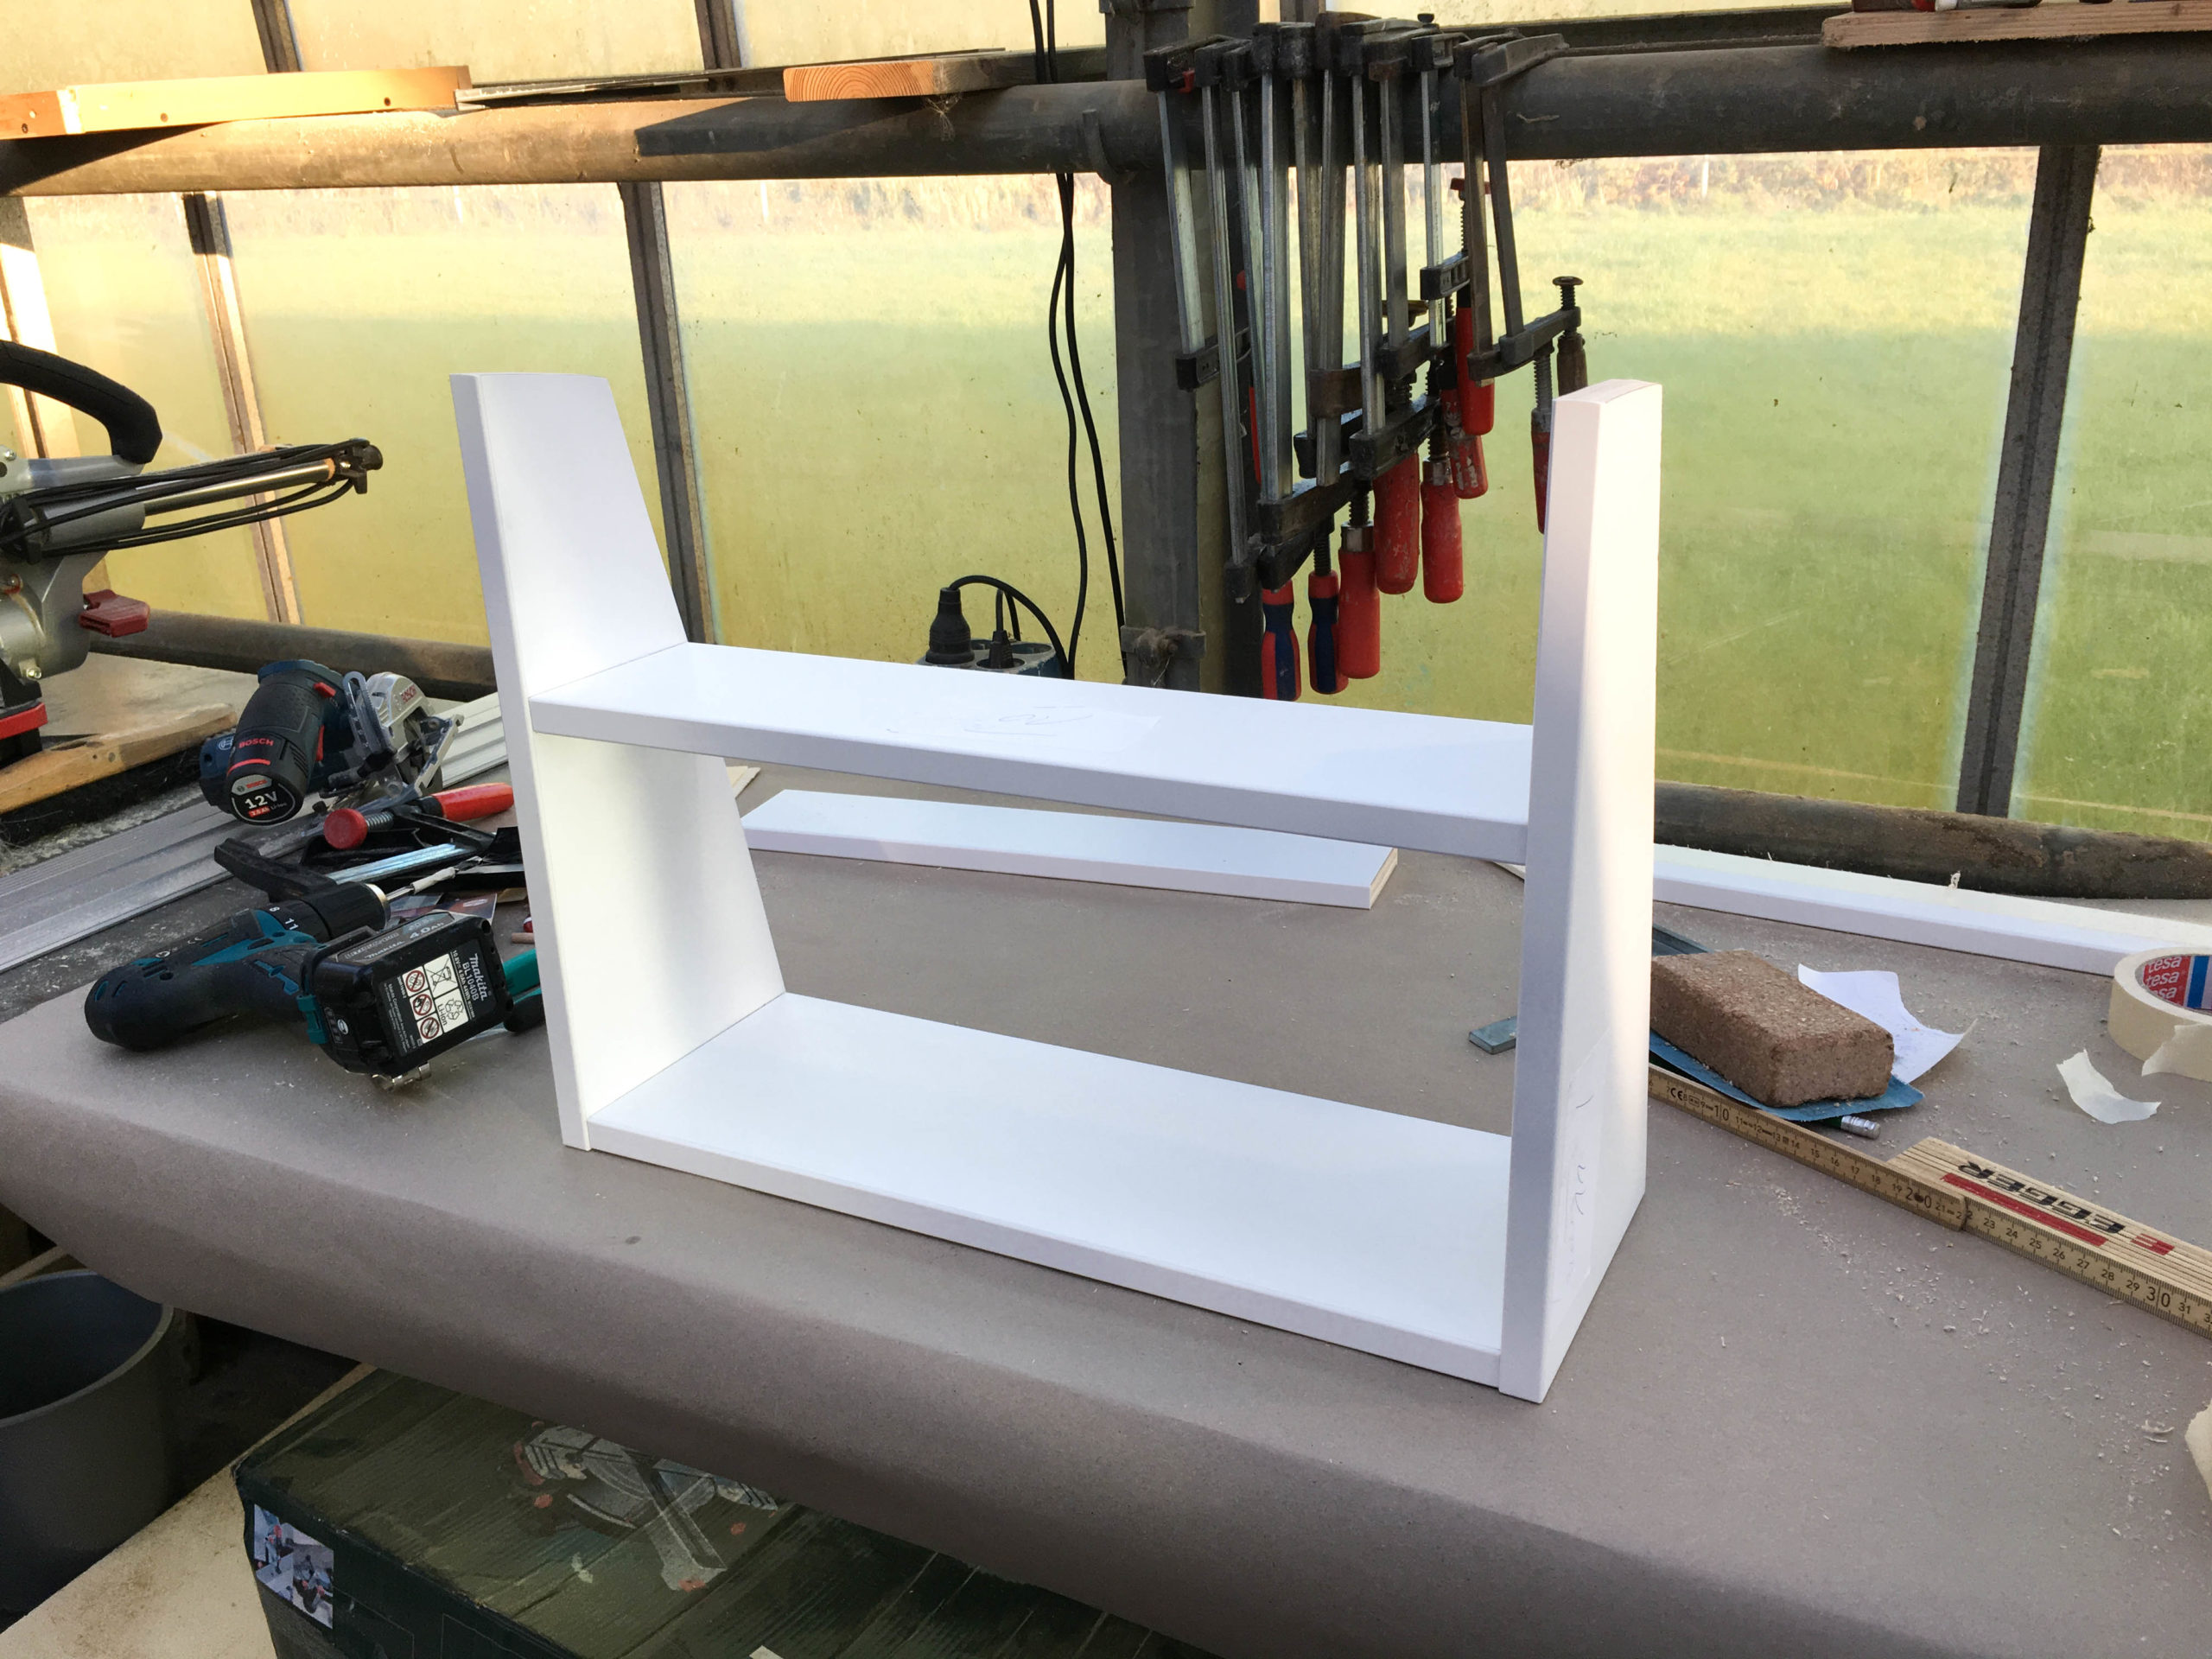
Cabinet body
The body of our kitchen block is made of white HPL coated Banova plywood, just like all of our other furniture, too.
The kitchen block measures 126,0 x 47,0 x 97,5 cm but the measurements were already predetermined by the fridge, the cooker and the sink.
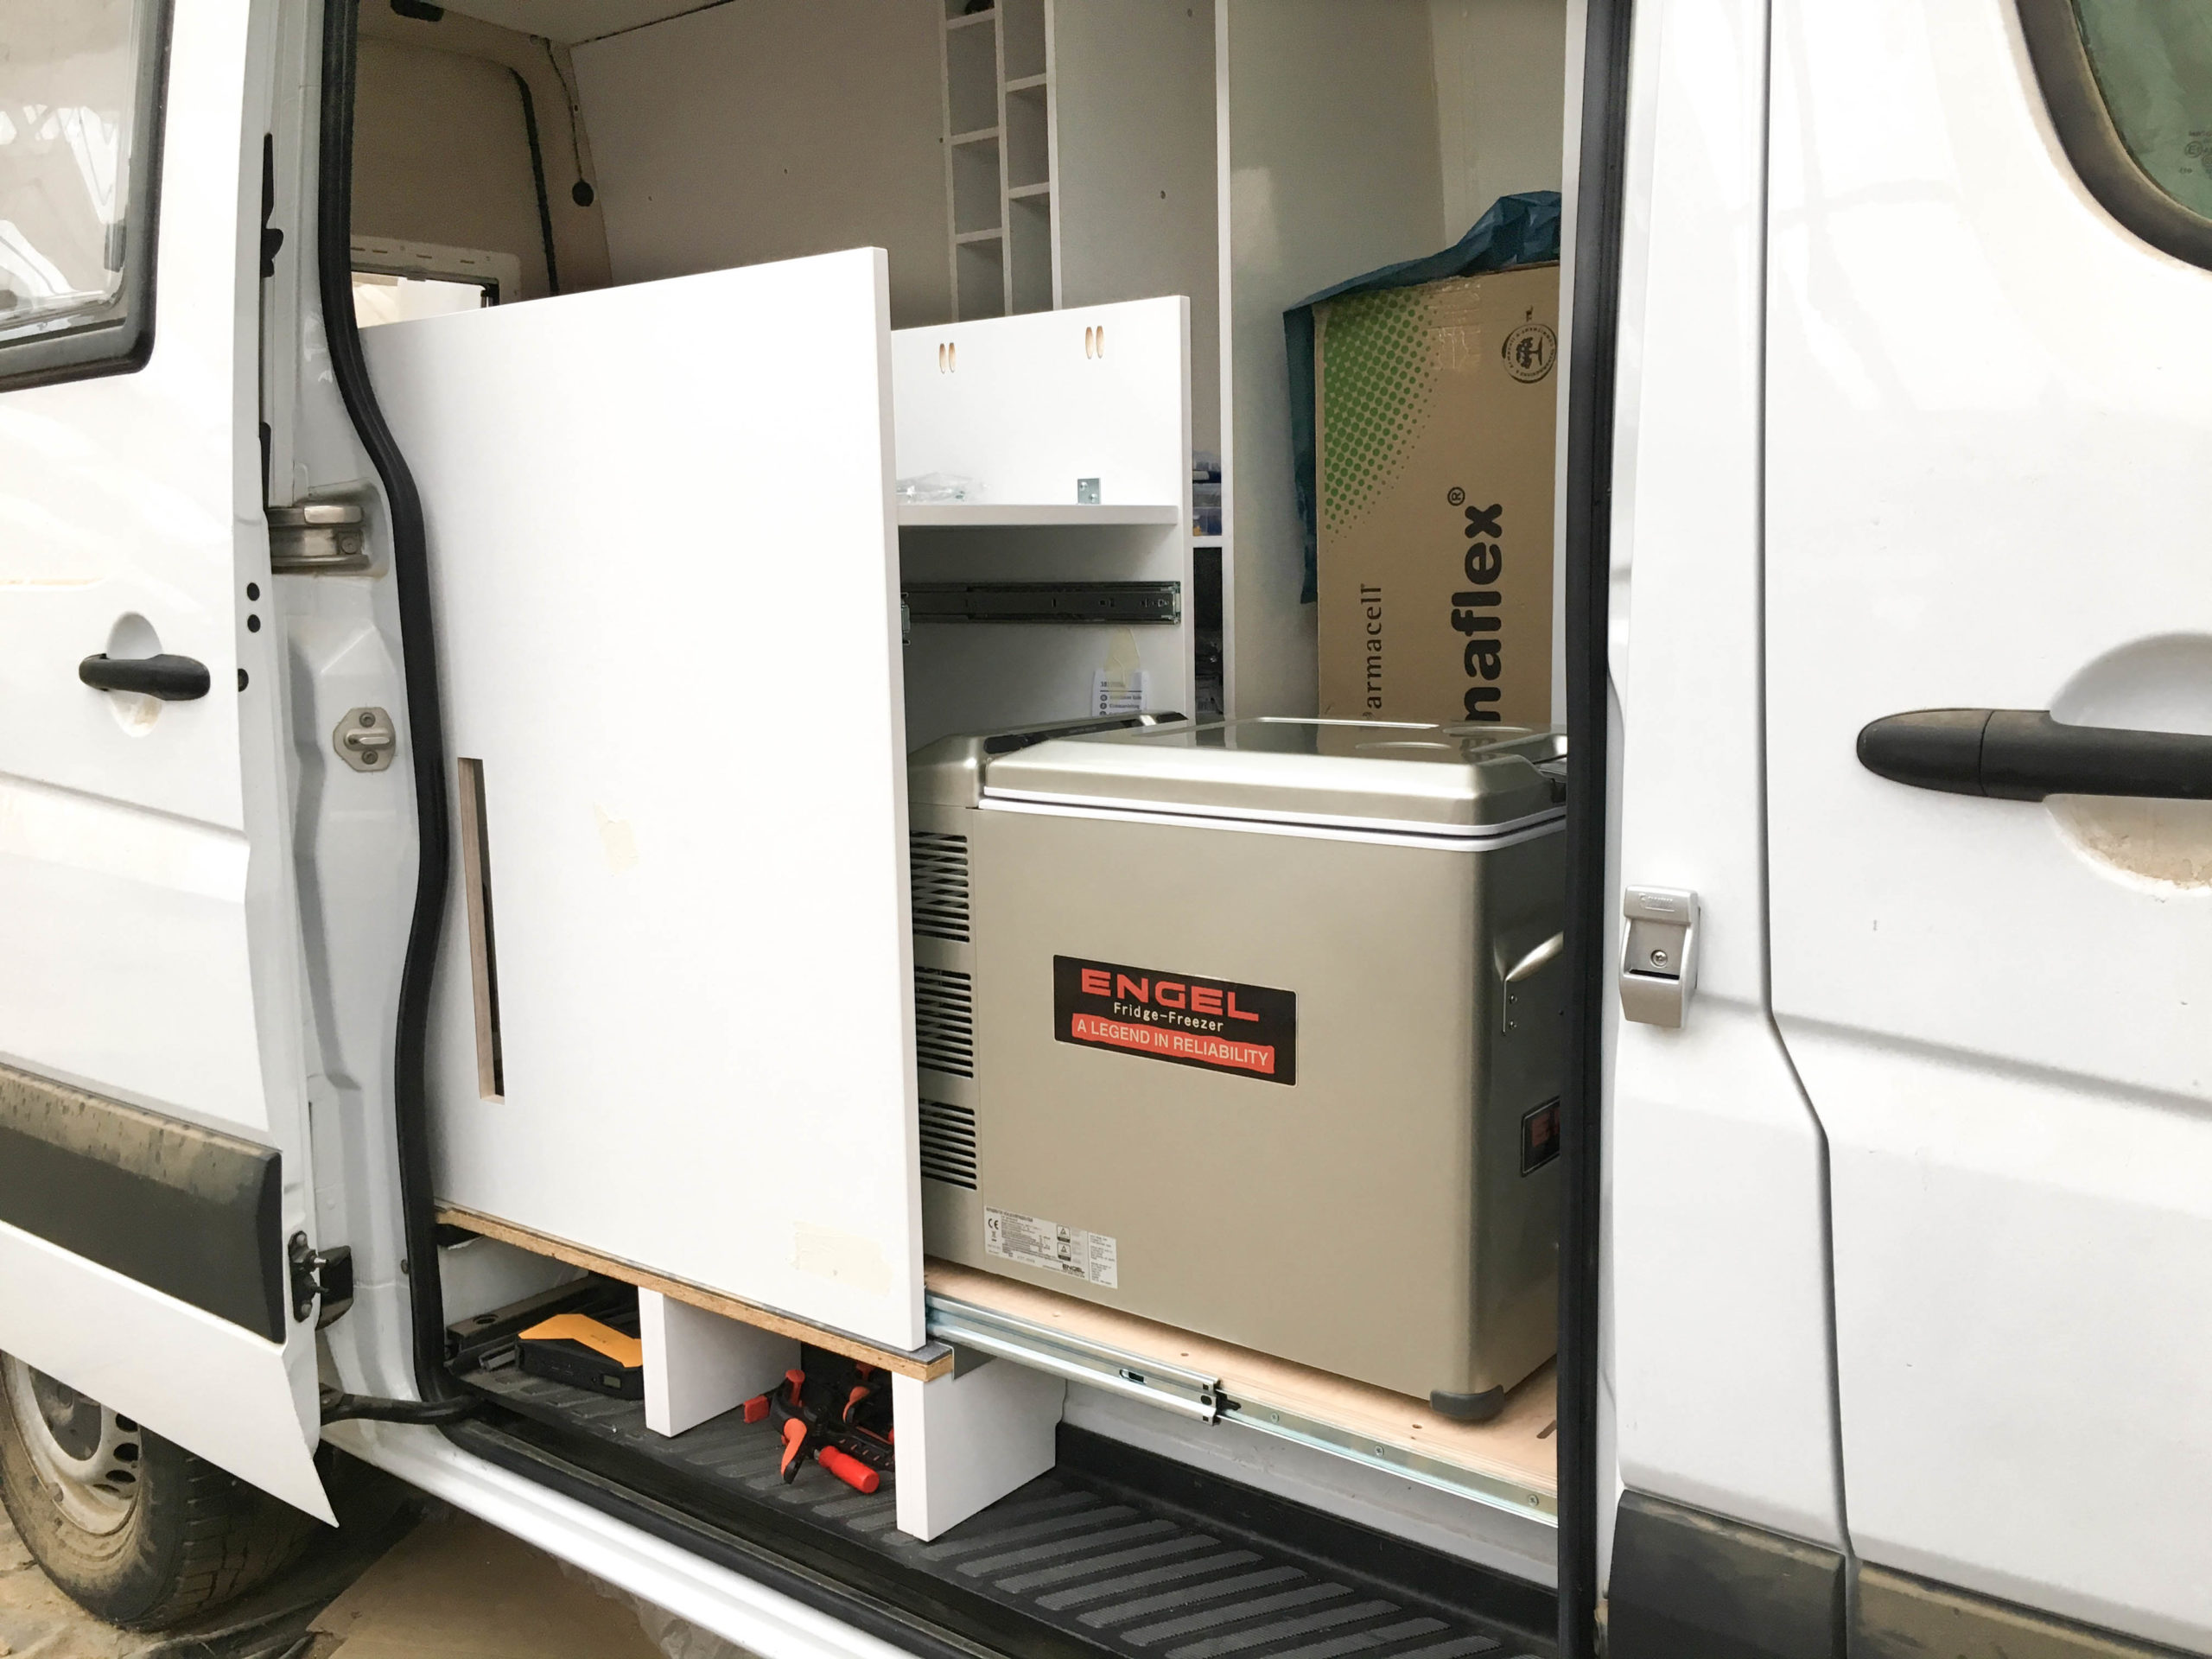
Instead of choosing a classic fridge, we went with a cooling box (but calling it fridge anyways) because it’s more energy-efficient. Cold air has a higher density than warm air so when you open it the heavy, cold air drops downwards (or stays down in the box) while the lighter, warm air rises upwards.
To reach into the fridge from the inside als well as from the outside we built a heavy-duty pullout drawer over the entrance step.
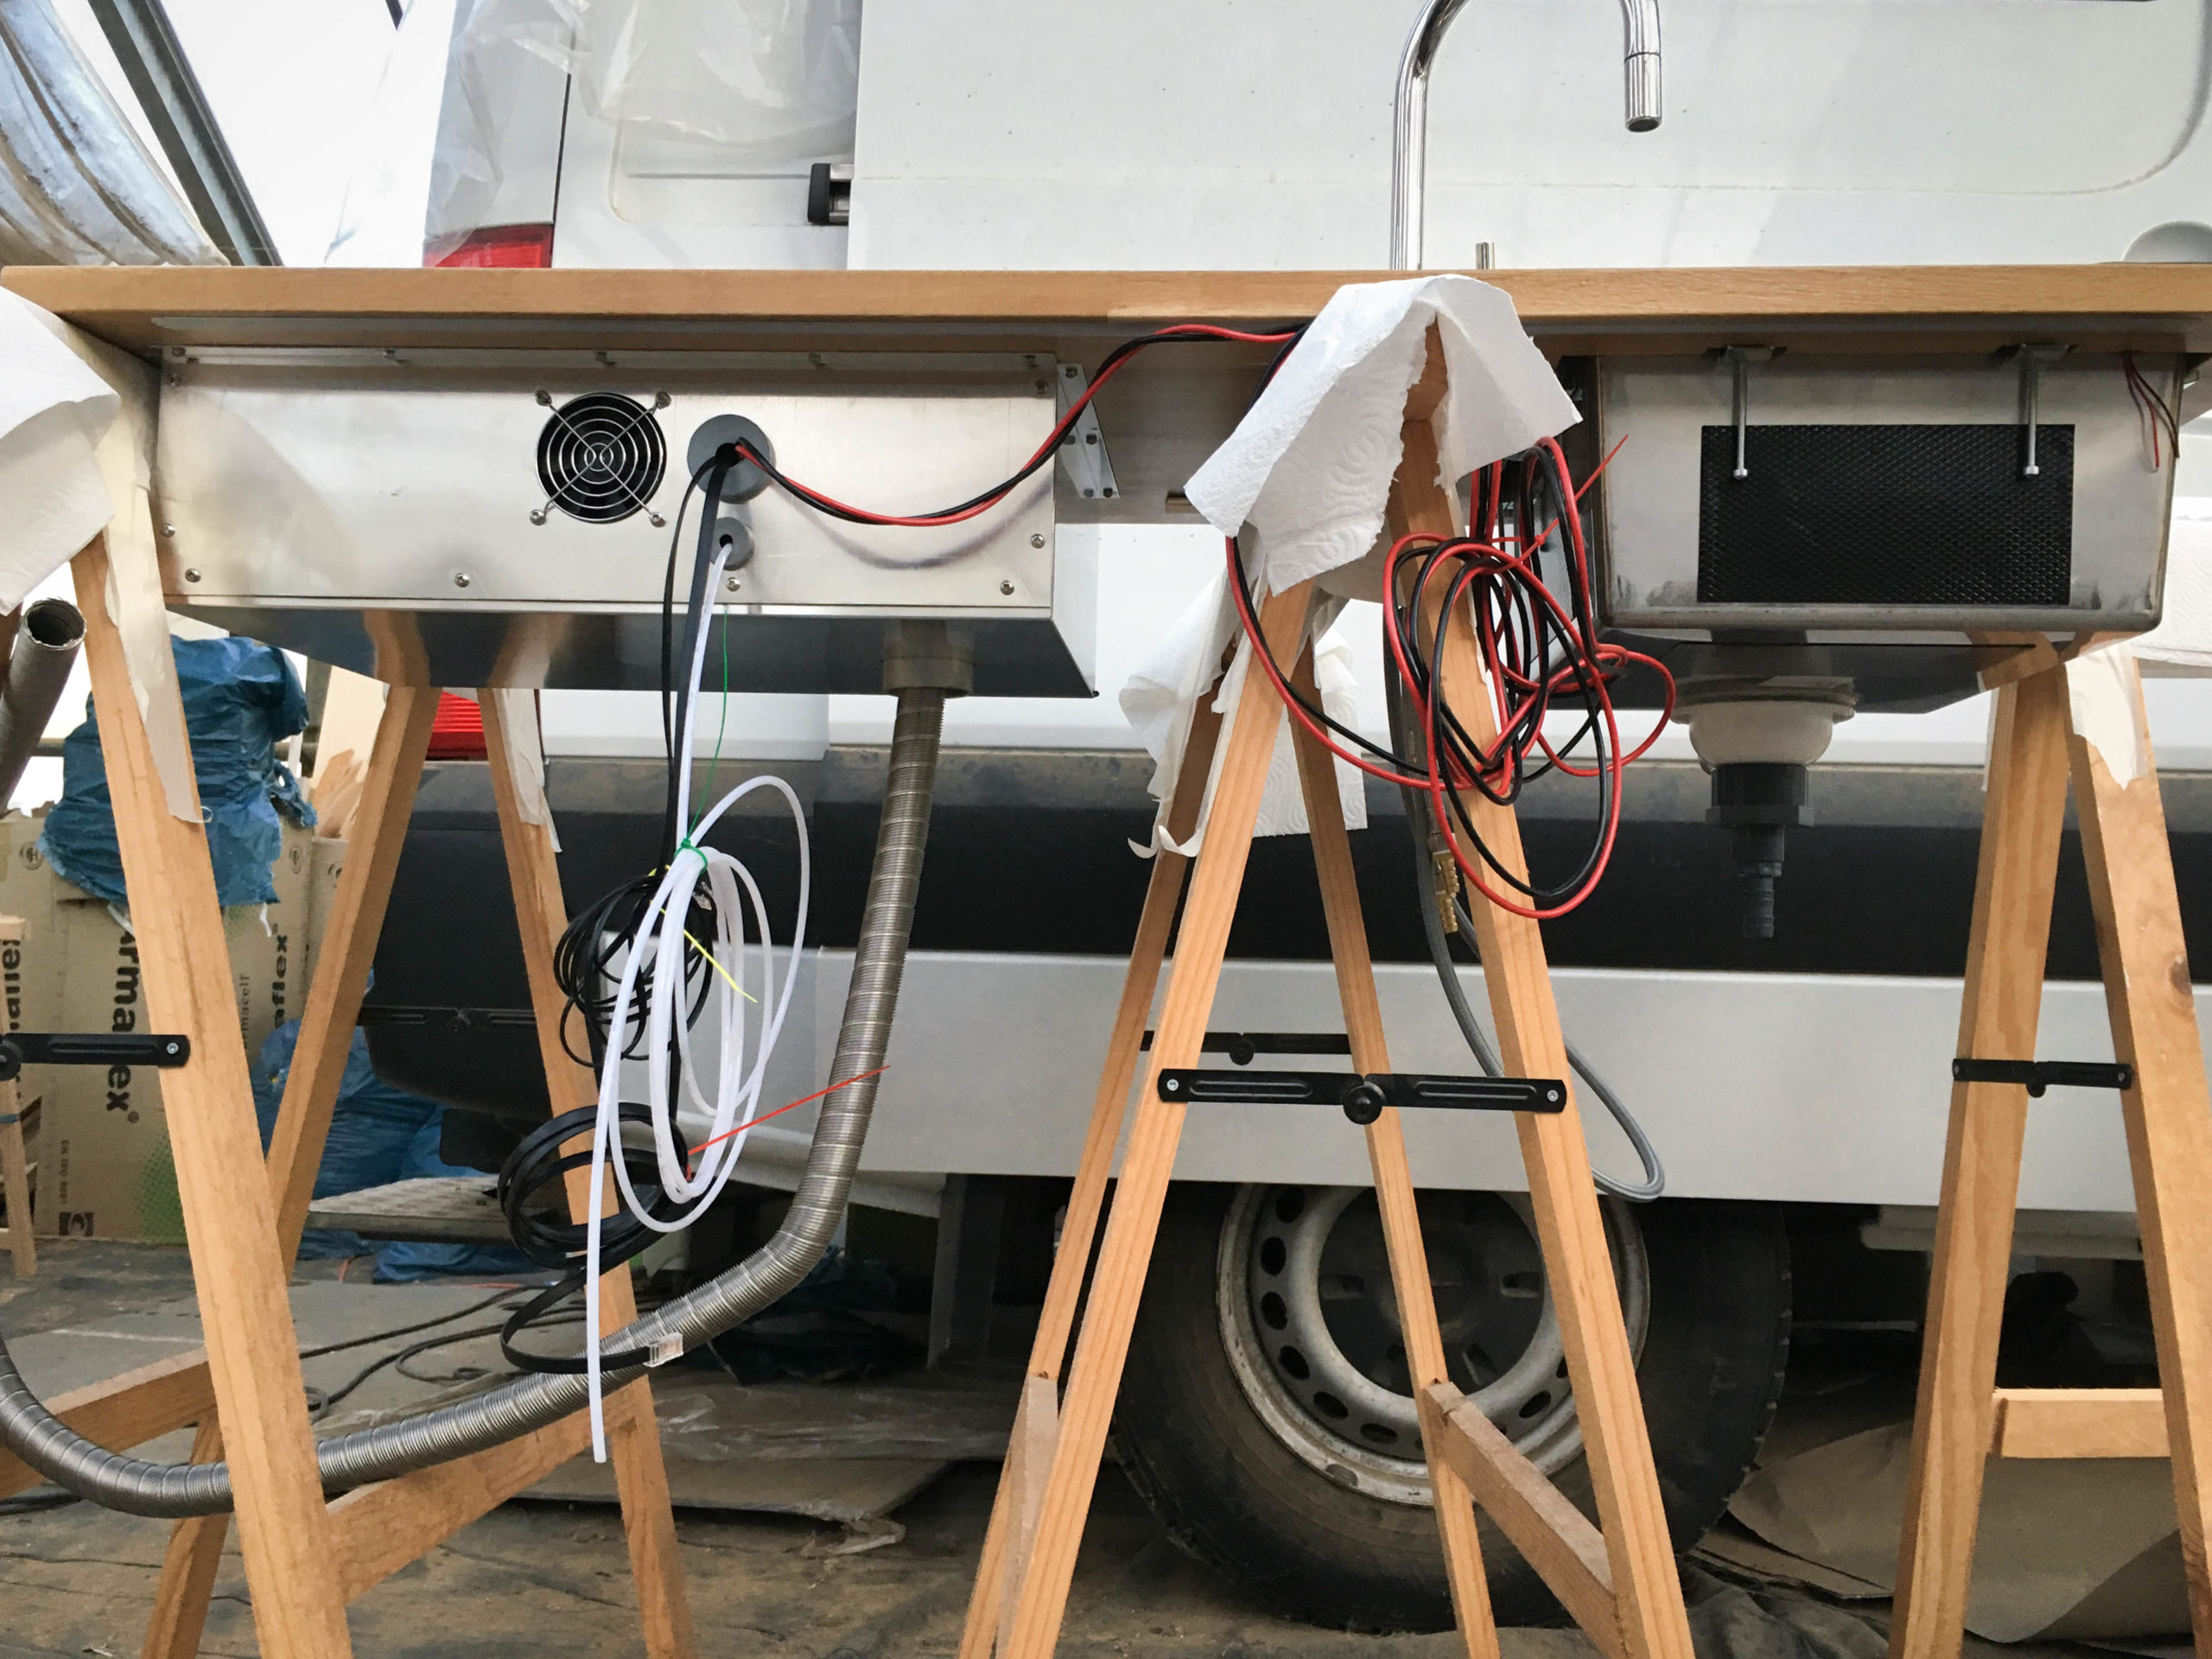
We fastened the kitchen block into the bars of the vehicle as well as into the floor with pocket holes made with the Kreg Jig as well as angles made of stainless steel.
Click here for more details and information about building our kitchen block!
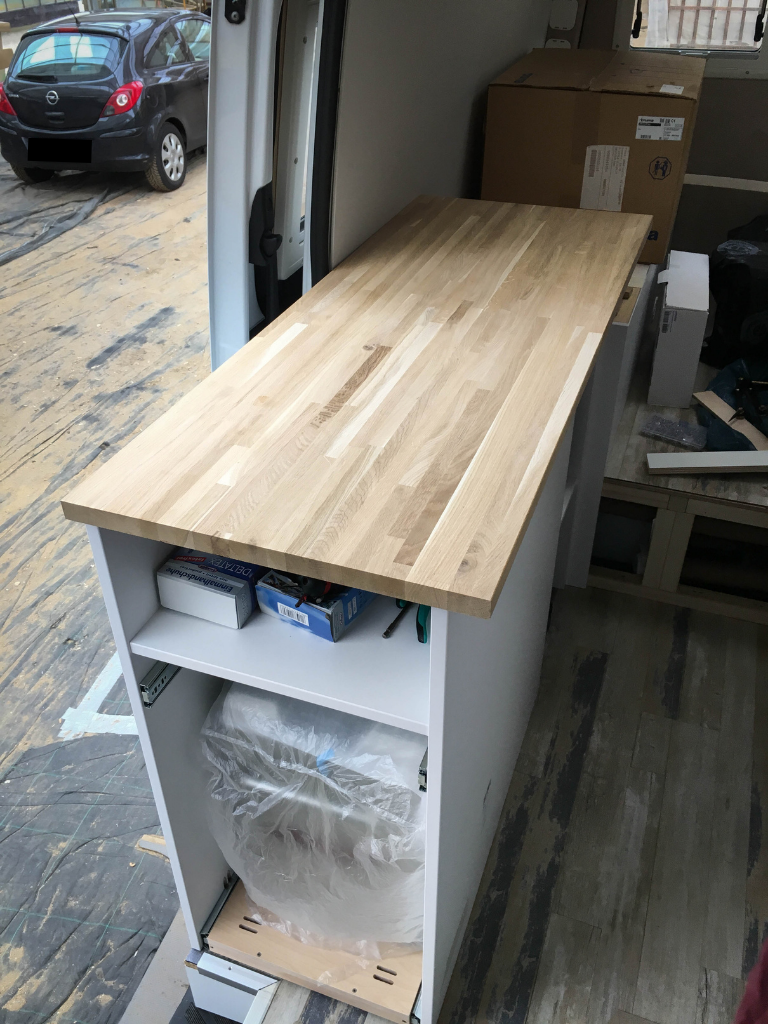
The countertop
The oakwood countertop measures 128,0 x 50,0 x 2,6 cm and we had it cut to size in the hardware store. It’s the same wood as the wood of the shelf of the cabinet.
Into the countertop we made cutouts and milling according to the installation manuals for the Dieselcooker, the sink, the extendable faucet and a LED lightstrip for nice indirect lighting. Then we sanded, primed and painted it with a satin-finish.
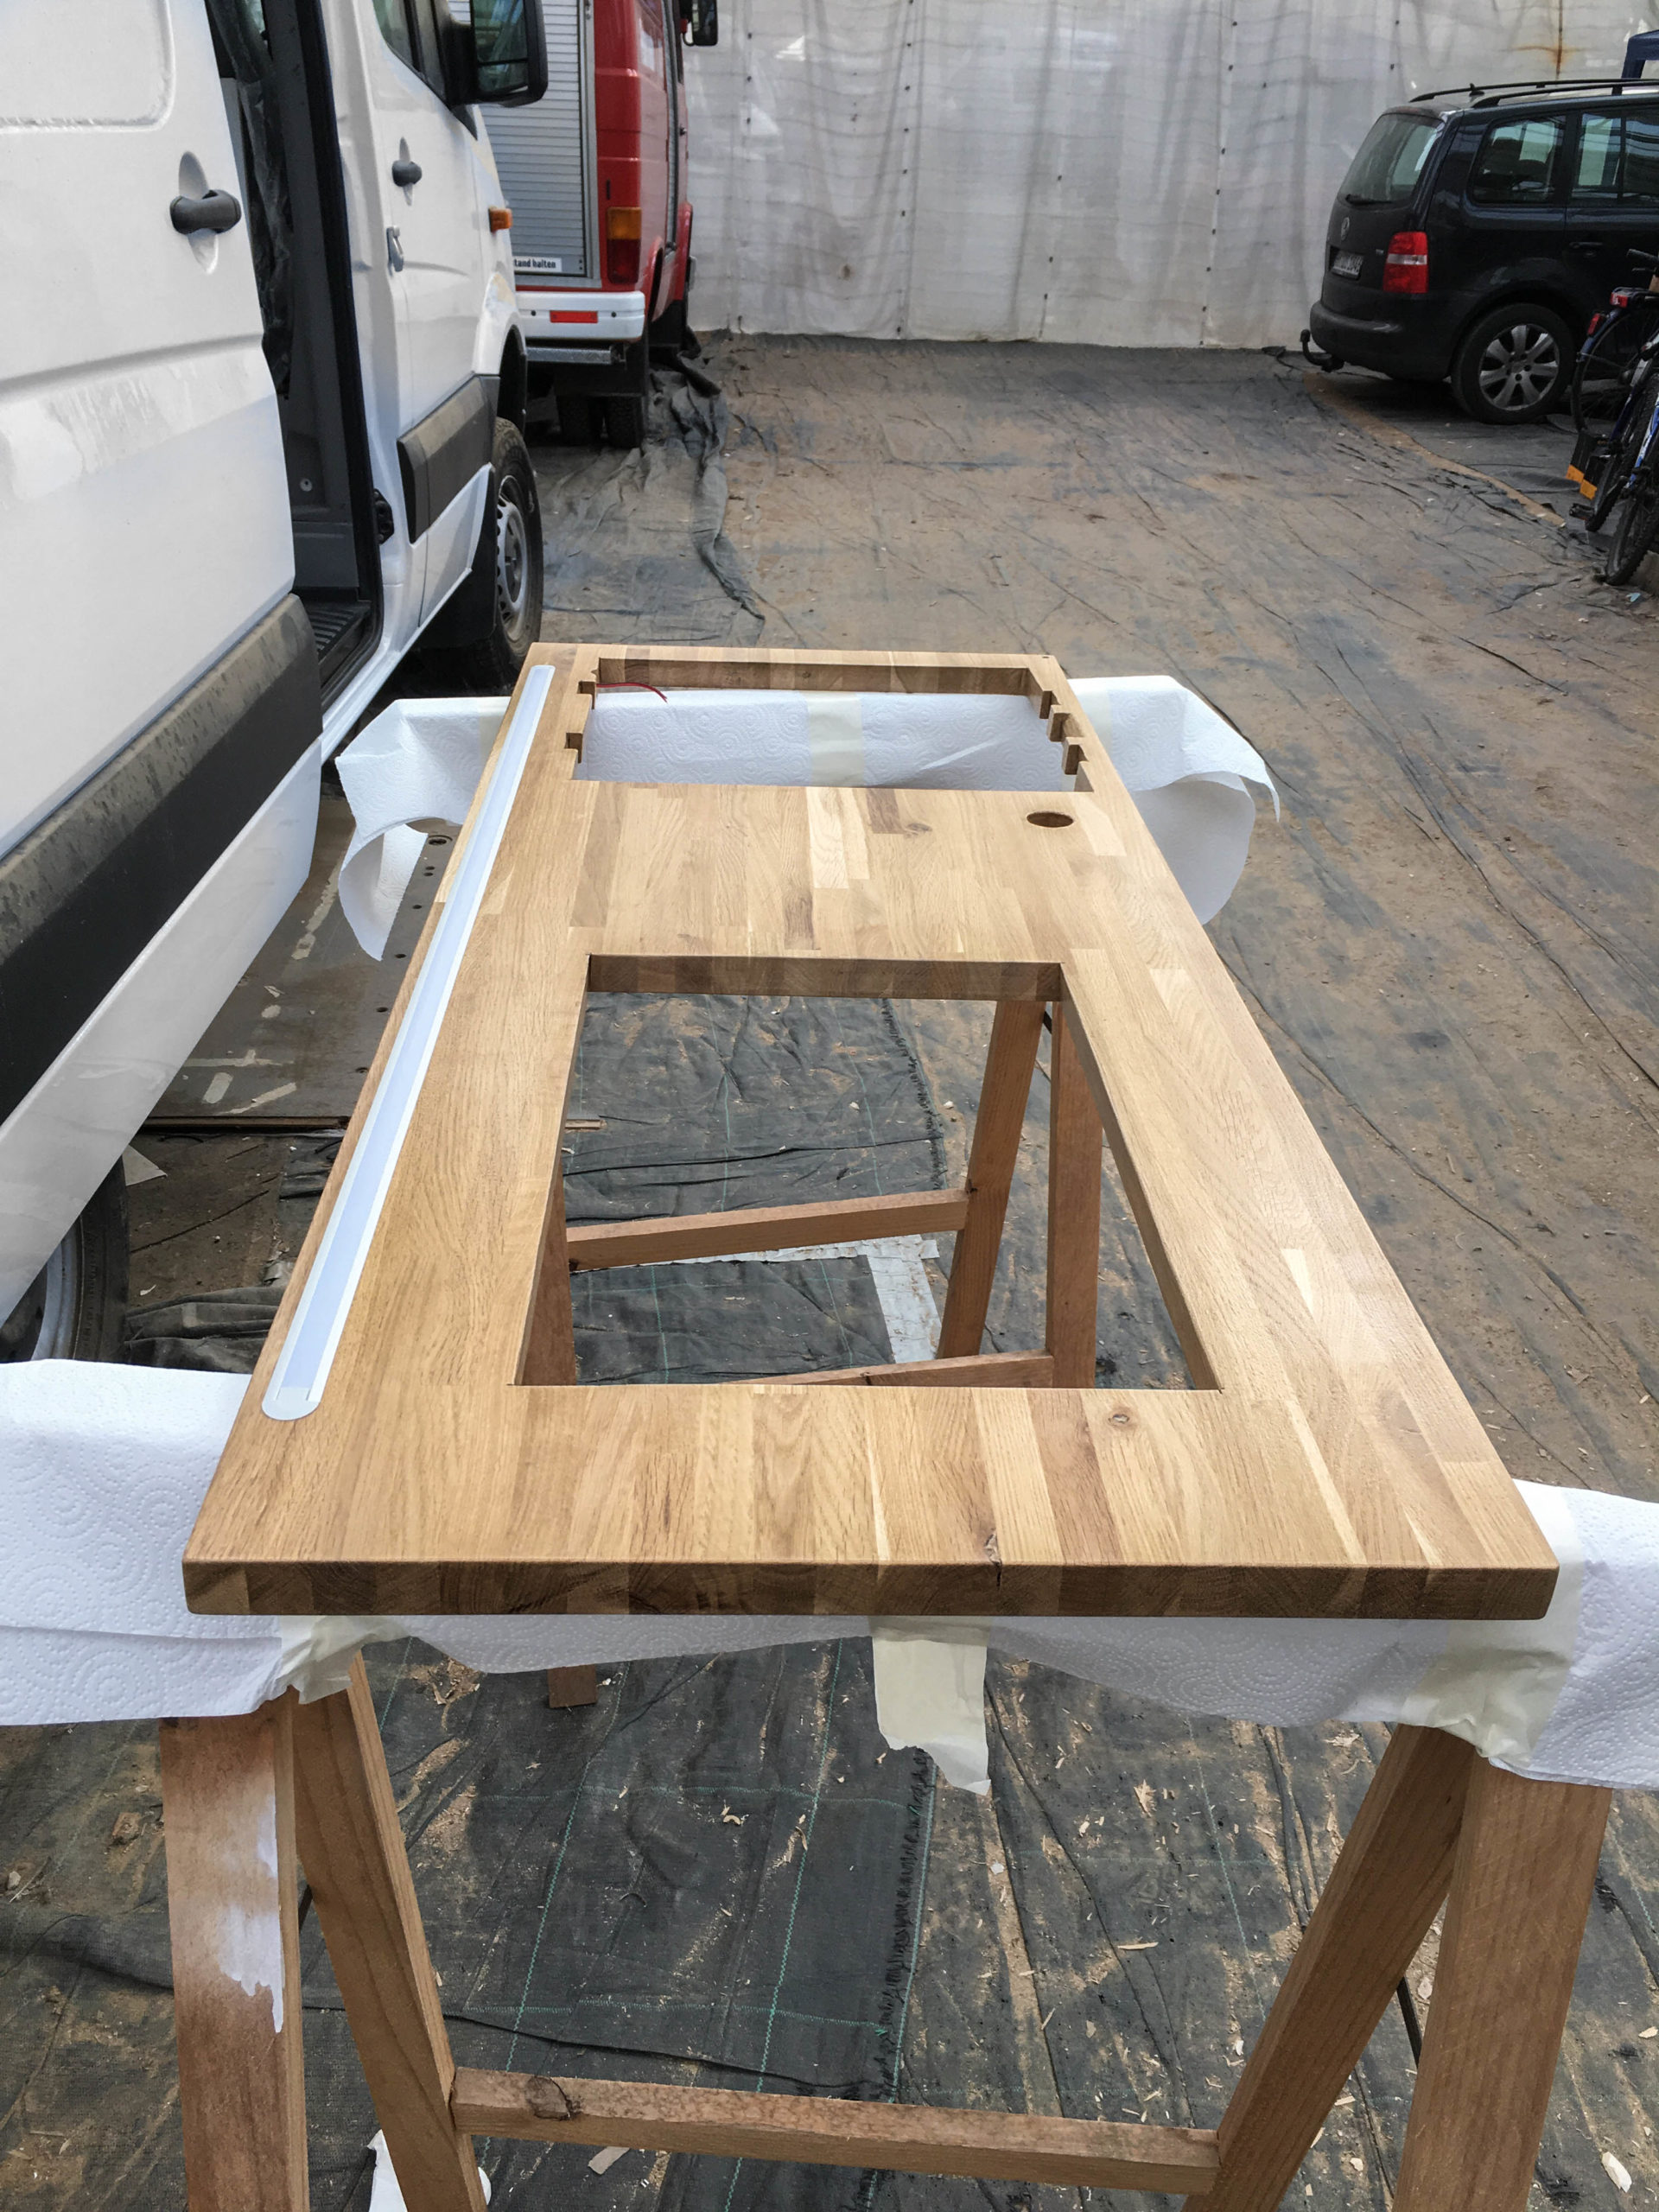
The countertop was then fastened to the cabinet body again with pocket holes with the Kreg Jig as well as with stainless steel angles.
Click here for more details and information about the countertop!
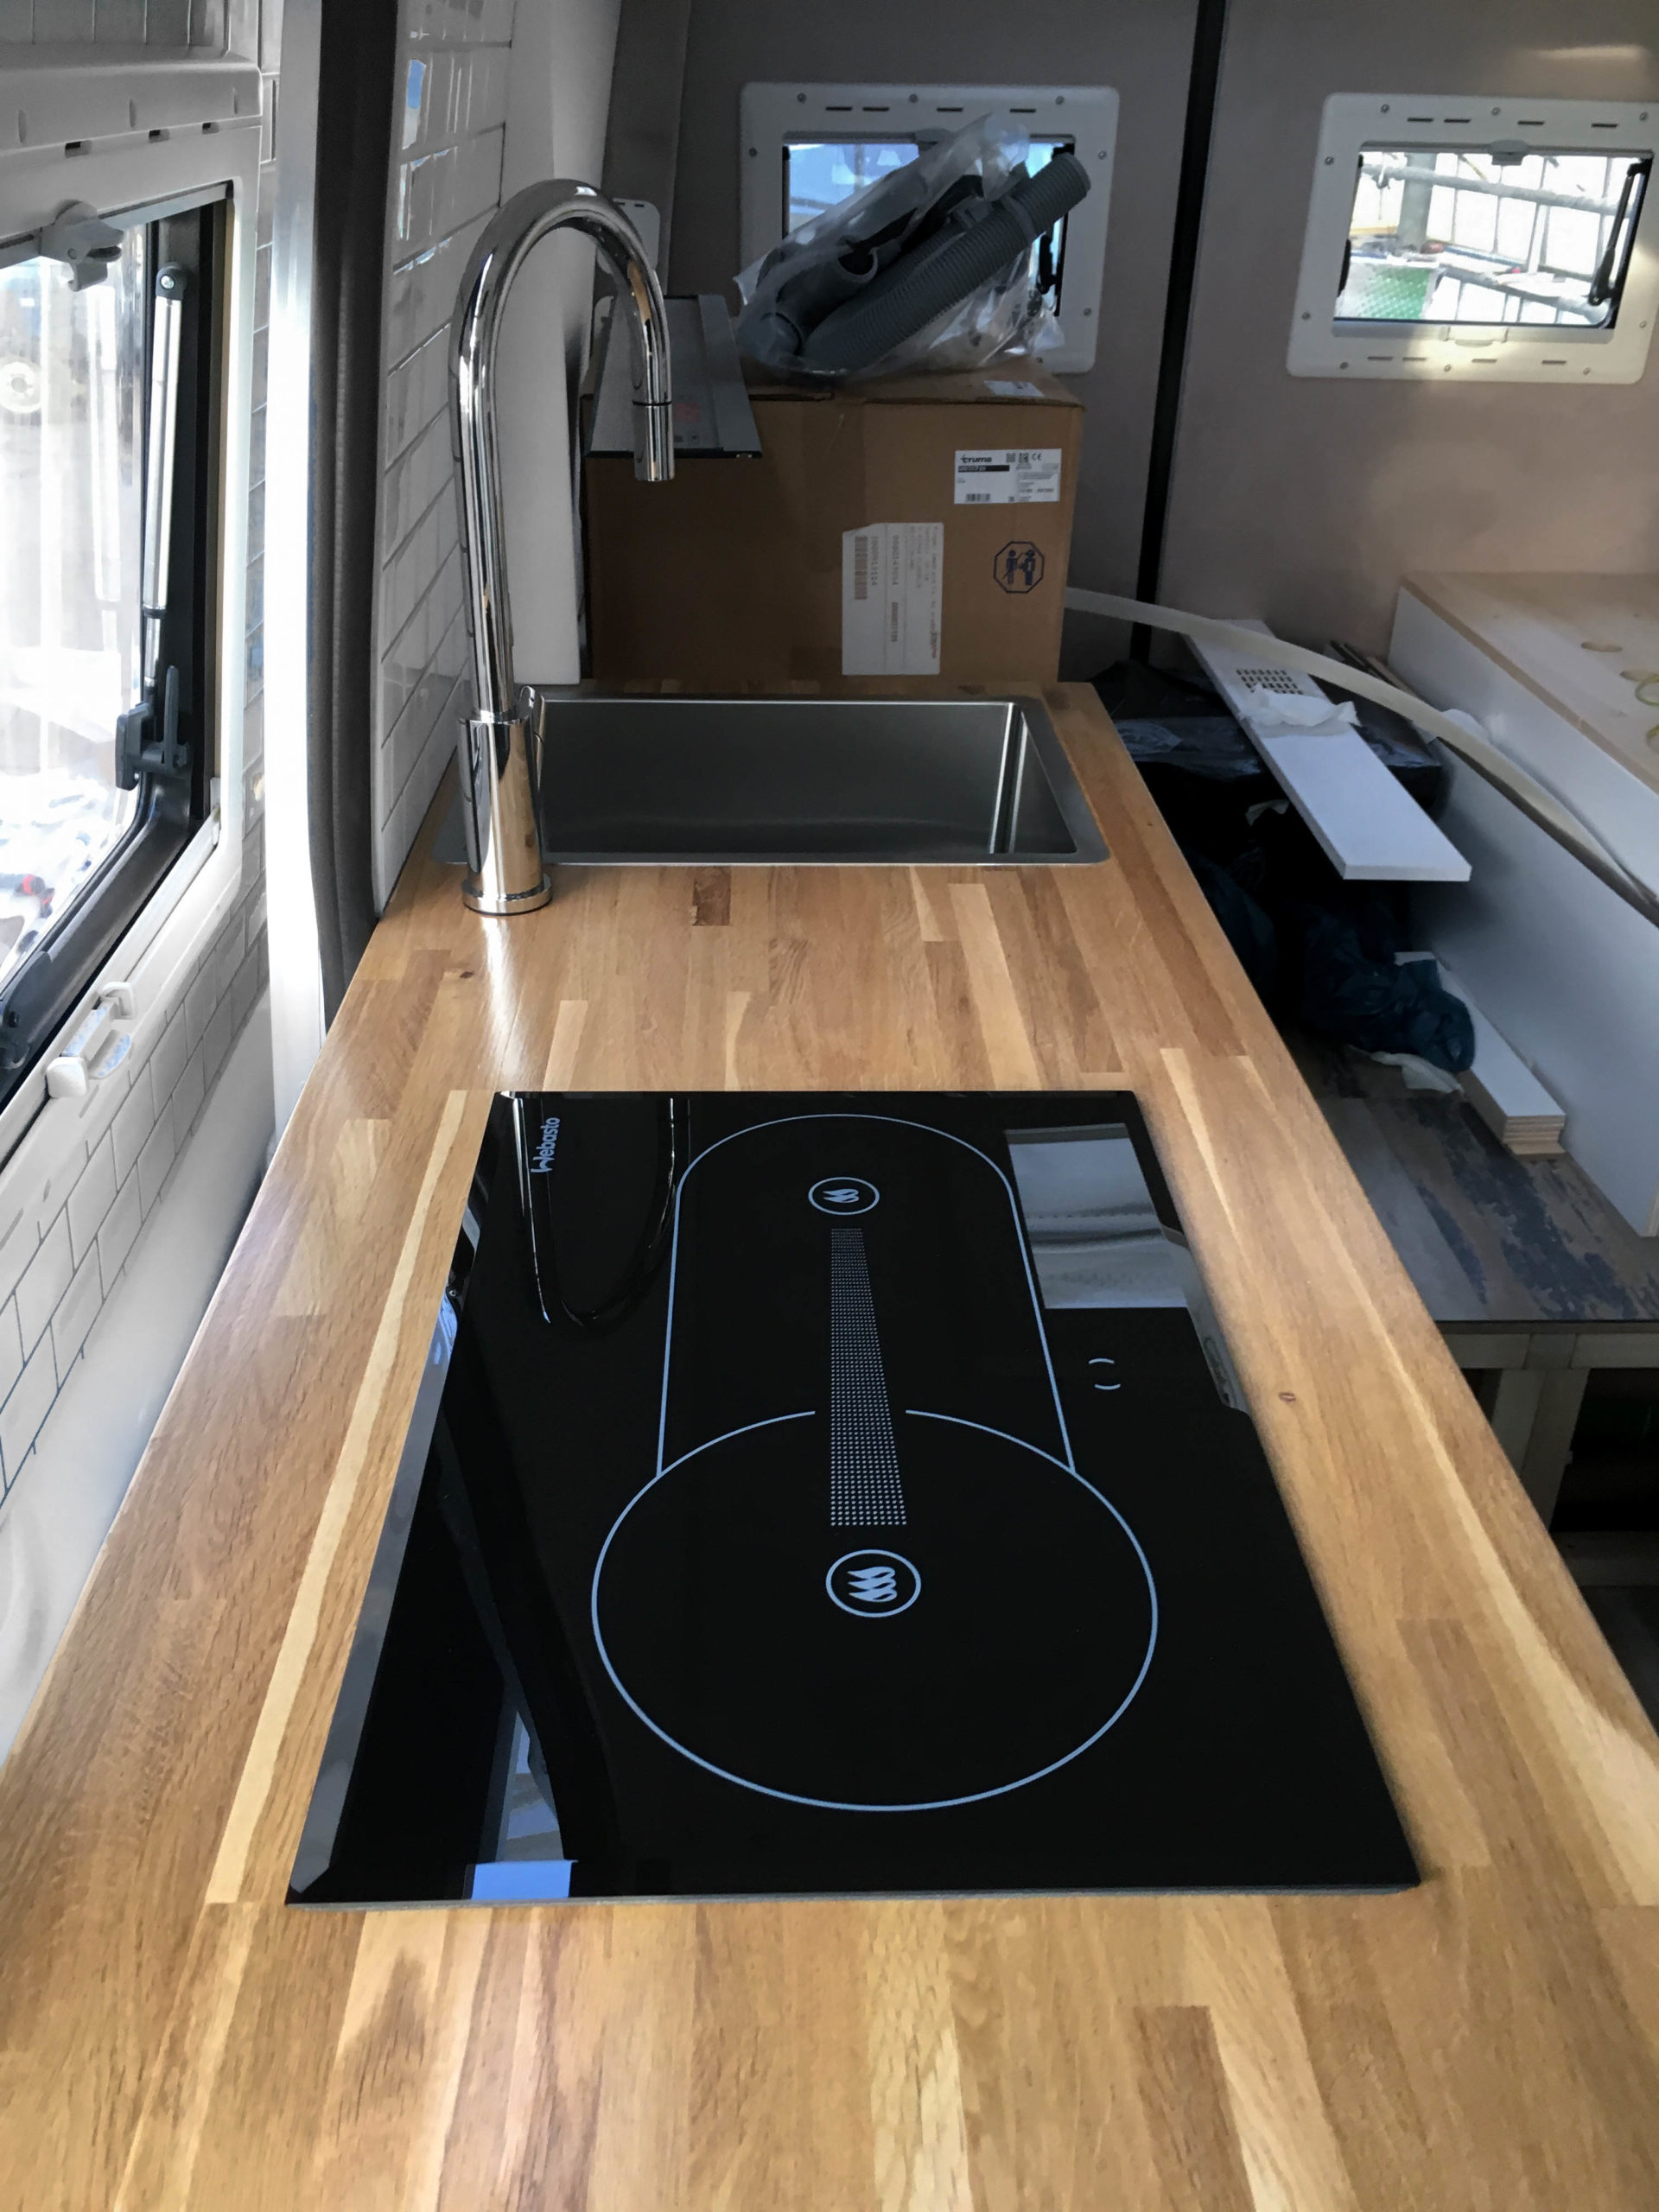
Installation of the devices
We installed the cooker, sink and faucet into the countertop before finally building the countertop into the camper kitchen – hence outside.
Please note that the Dieselcooker should only be installed by trained and qualified personnel!
For the sink and the extendable faucet we used products that are not specifically made for campervans. Click here for more information and details as well as some specialties about the installation.
Here you can read everything about water/plumbing!
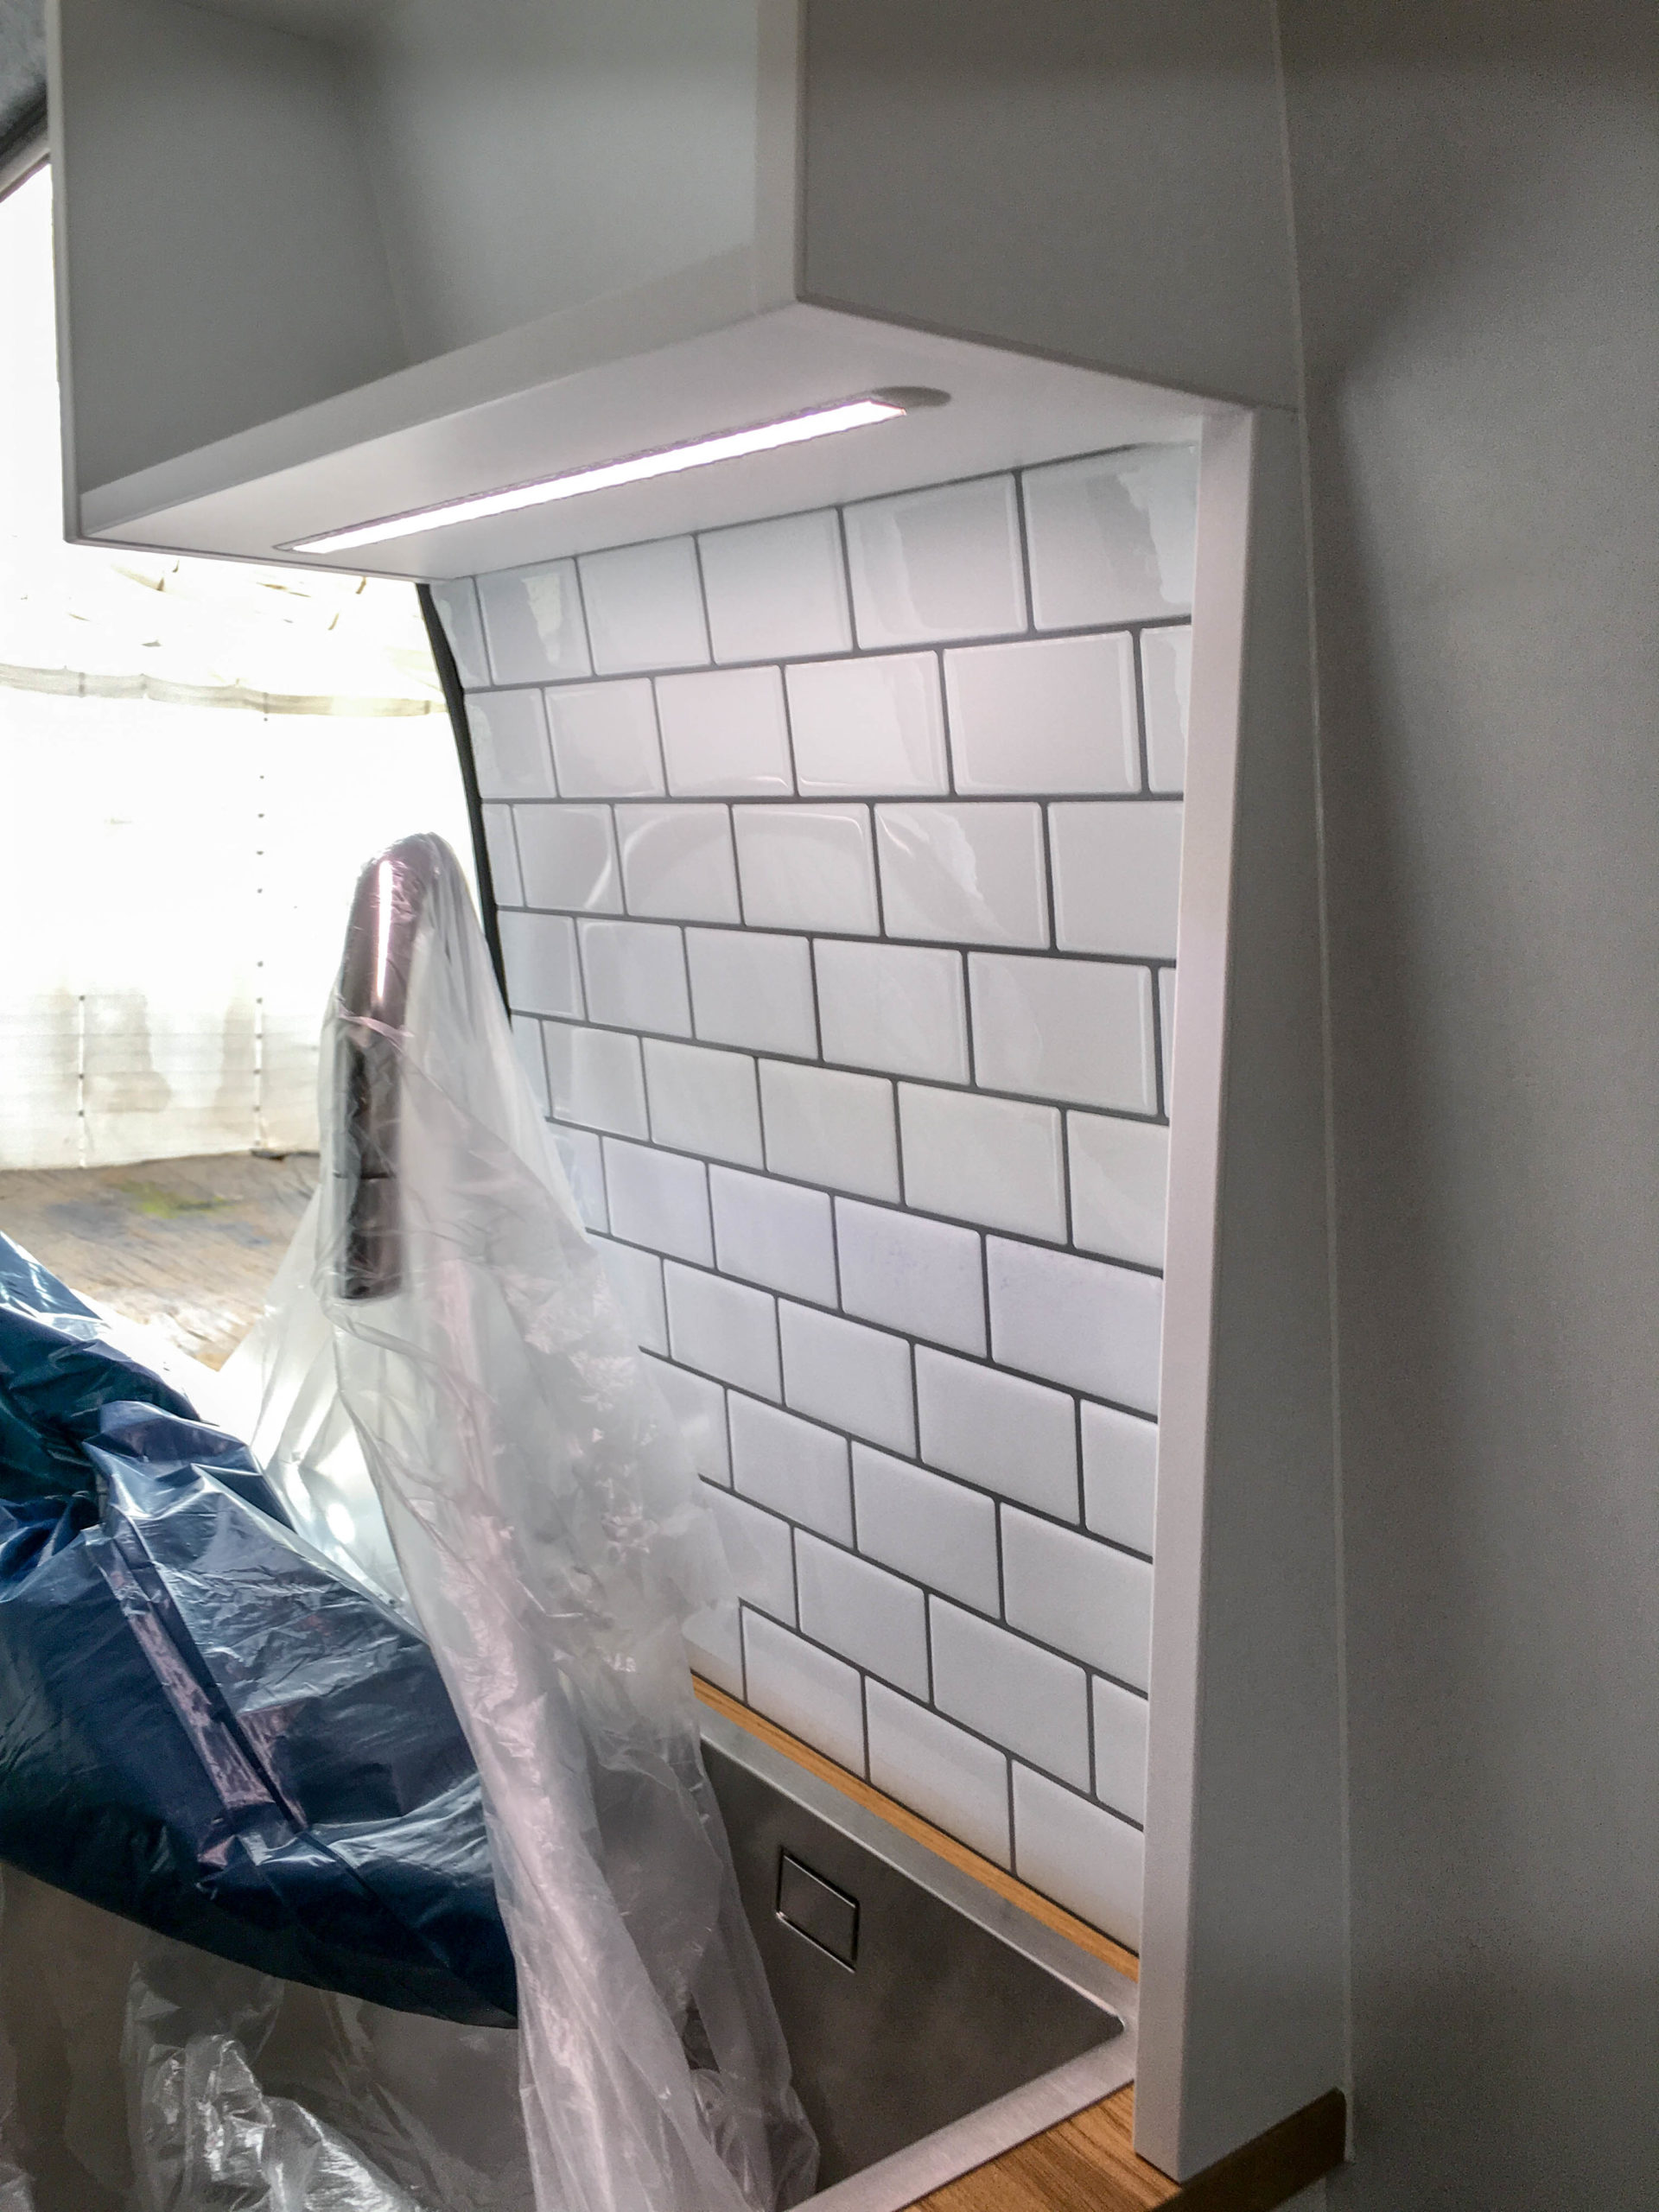
The backsplash
As for the splashguard behind the kitchen, we used self-adhesive 3D-tiles from TicTacTiles. These tiles are great for a campervan build because they are very lightweight.
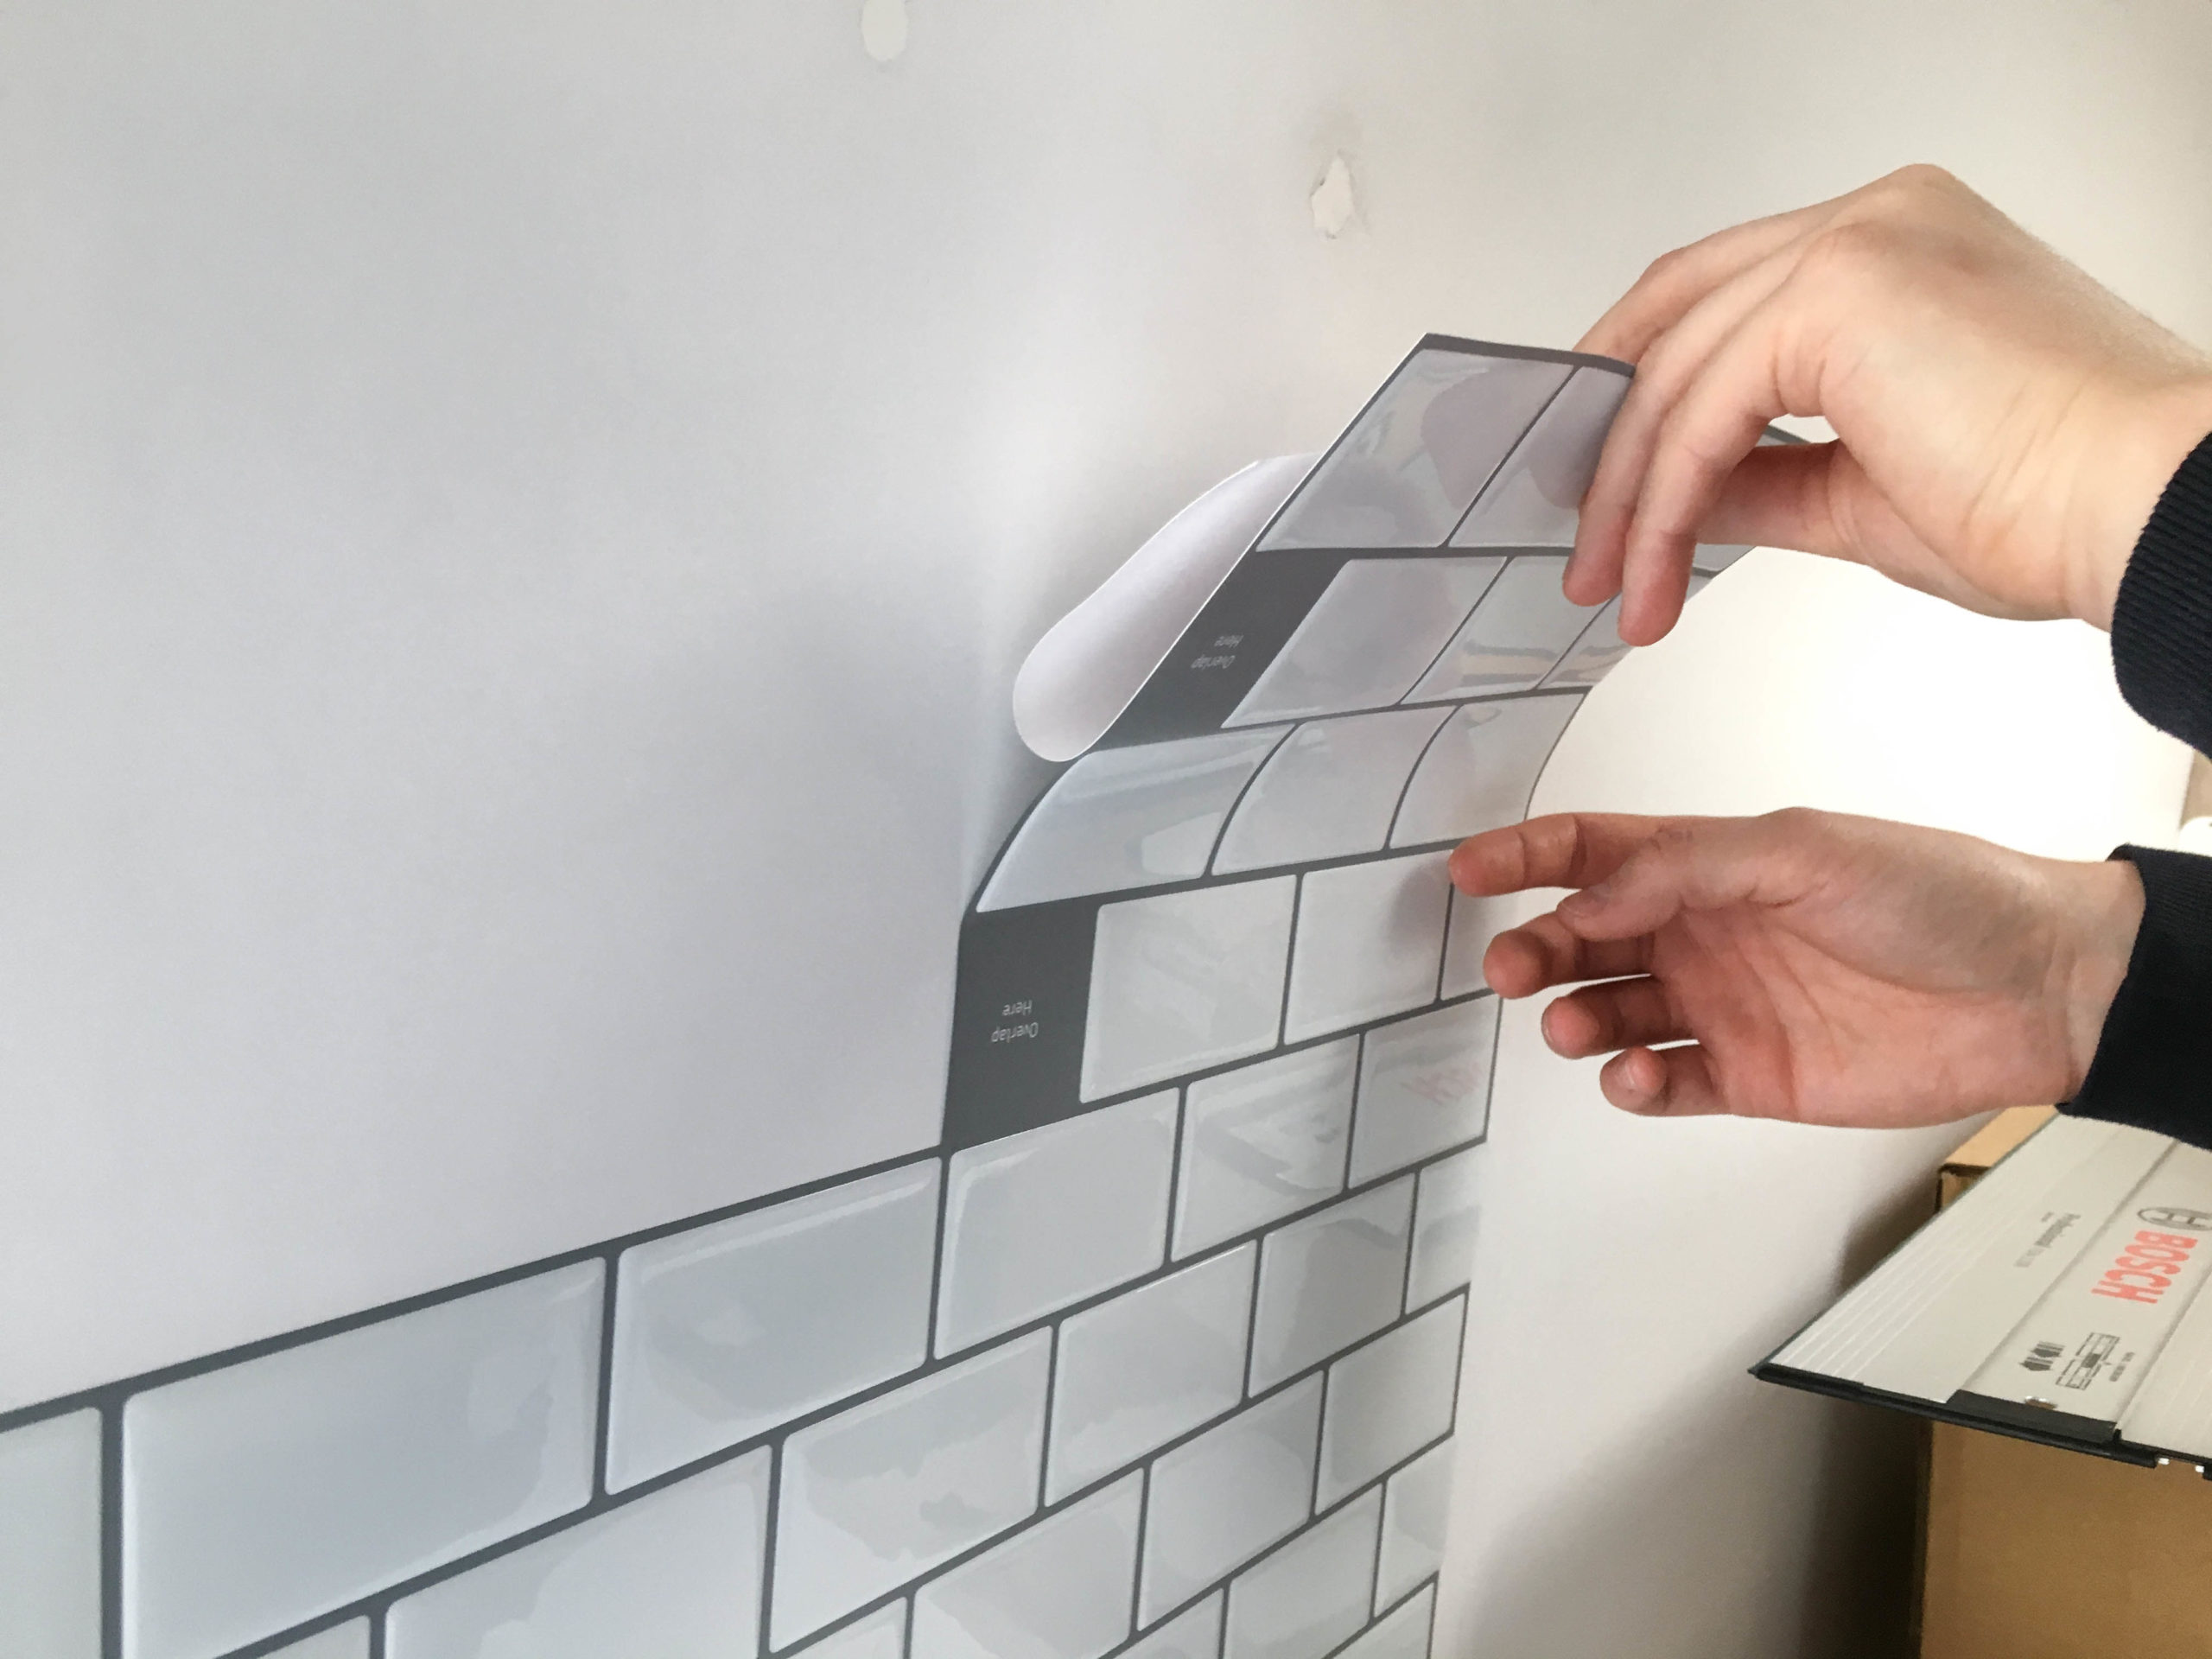
We already used the „Subway Mono White“ peel-and-stick tiles for the paneling of the sliding door in the kitchen area.

Click here for more details and information about our kitchen backsplash with TicTacTiles!
The upper cabinet
To use all possible space perfectly and to the maximum, we built a slim cabinet over the sink.
We built it in a similar way like the washbasin in our bathroom. First we made templates of poplar plywood by using the a transfer scribe before copying them onto the HPL coated Banova plywood for the cabinet.
For a tight mounting to the wall we installed rivet nuts in the bars behind the wall paneling and then screwed the cabinet to the wall with angles.
A great detail in the upper cabinet is the LED lightstrip for nice lighting in the kitchen.
Click here soon for everything about electrical!
Click here for more details and information about building our upper cabinet!
Bonus
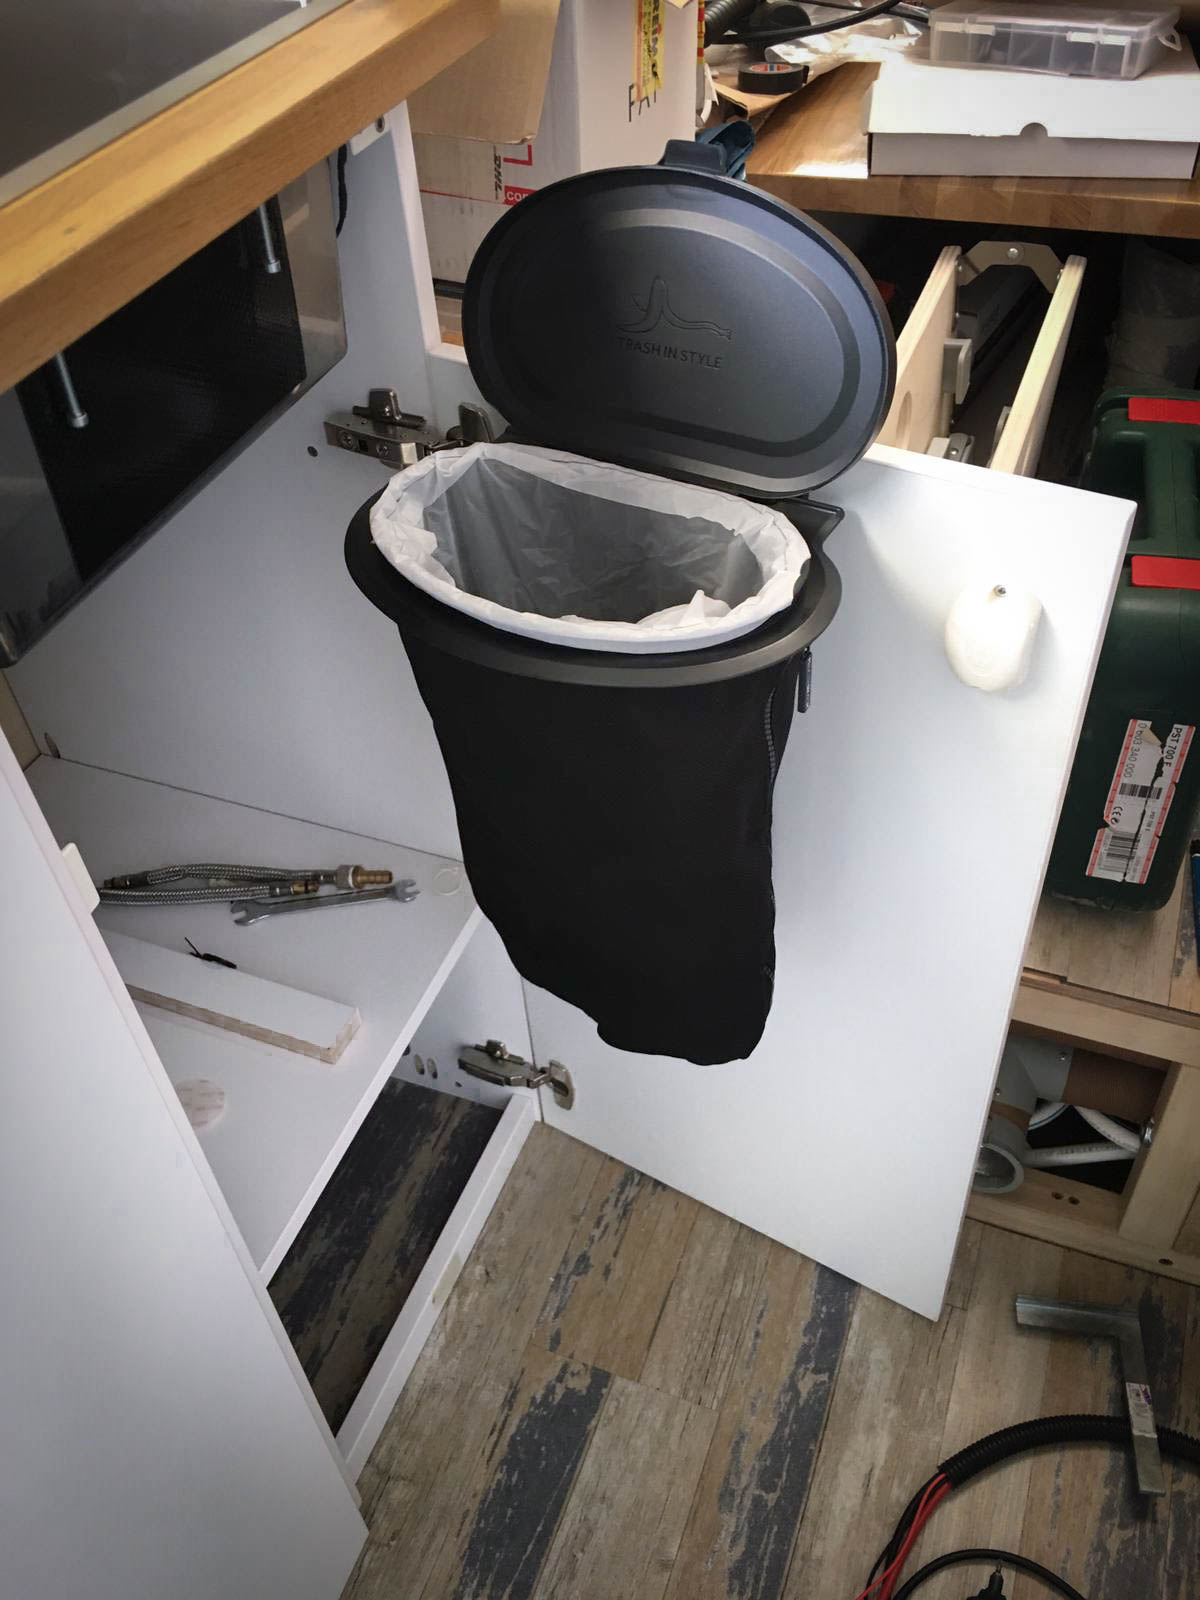
But how do you recognize if a DIY campervan conversion was planned well? A place for the trash! 😉 In our case at the door under the sink.
The Flextrash is a washable trashcan made of fabric. With different clips it can be fastened to the wall, a table, the metal support of a car seat or with suction cups to tiles or to the outside of the vehicle.
Our DIY Camper Kitchen!
For an overview of all detailed posts about the build of our kitchen in a DIY Campervan – click here!