
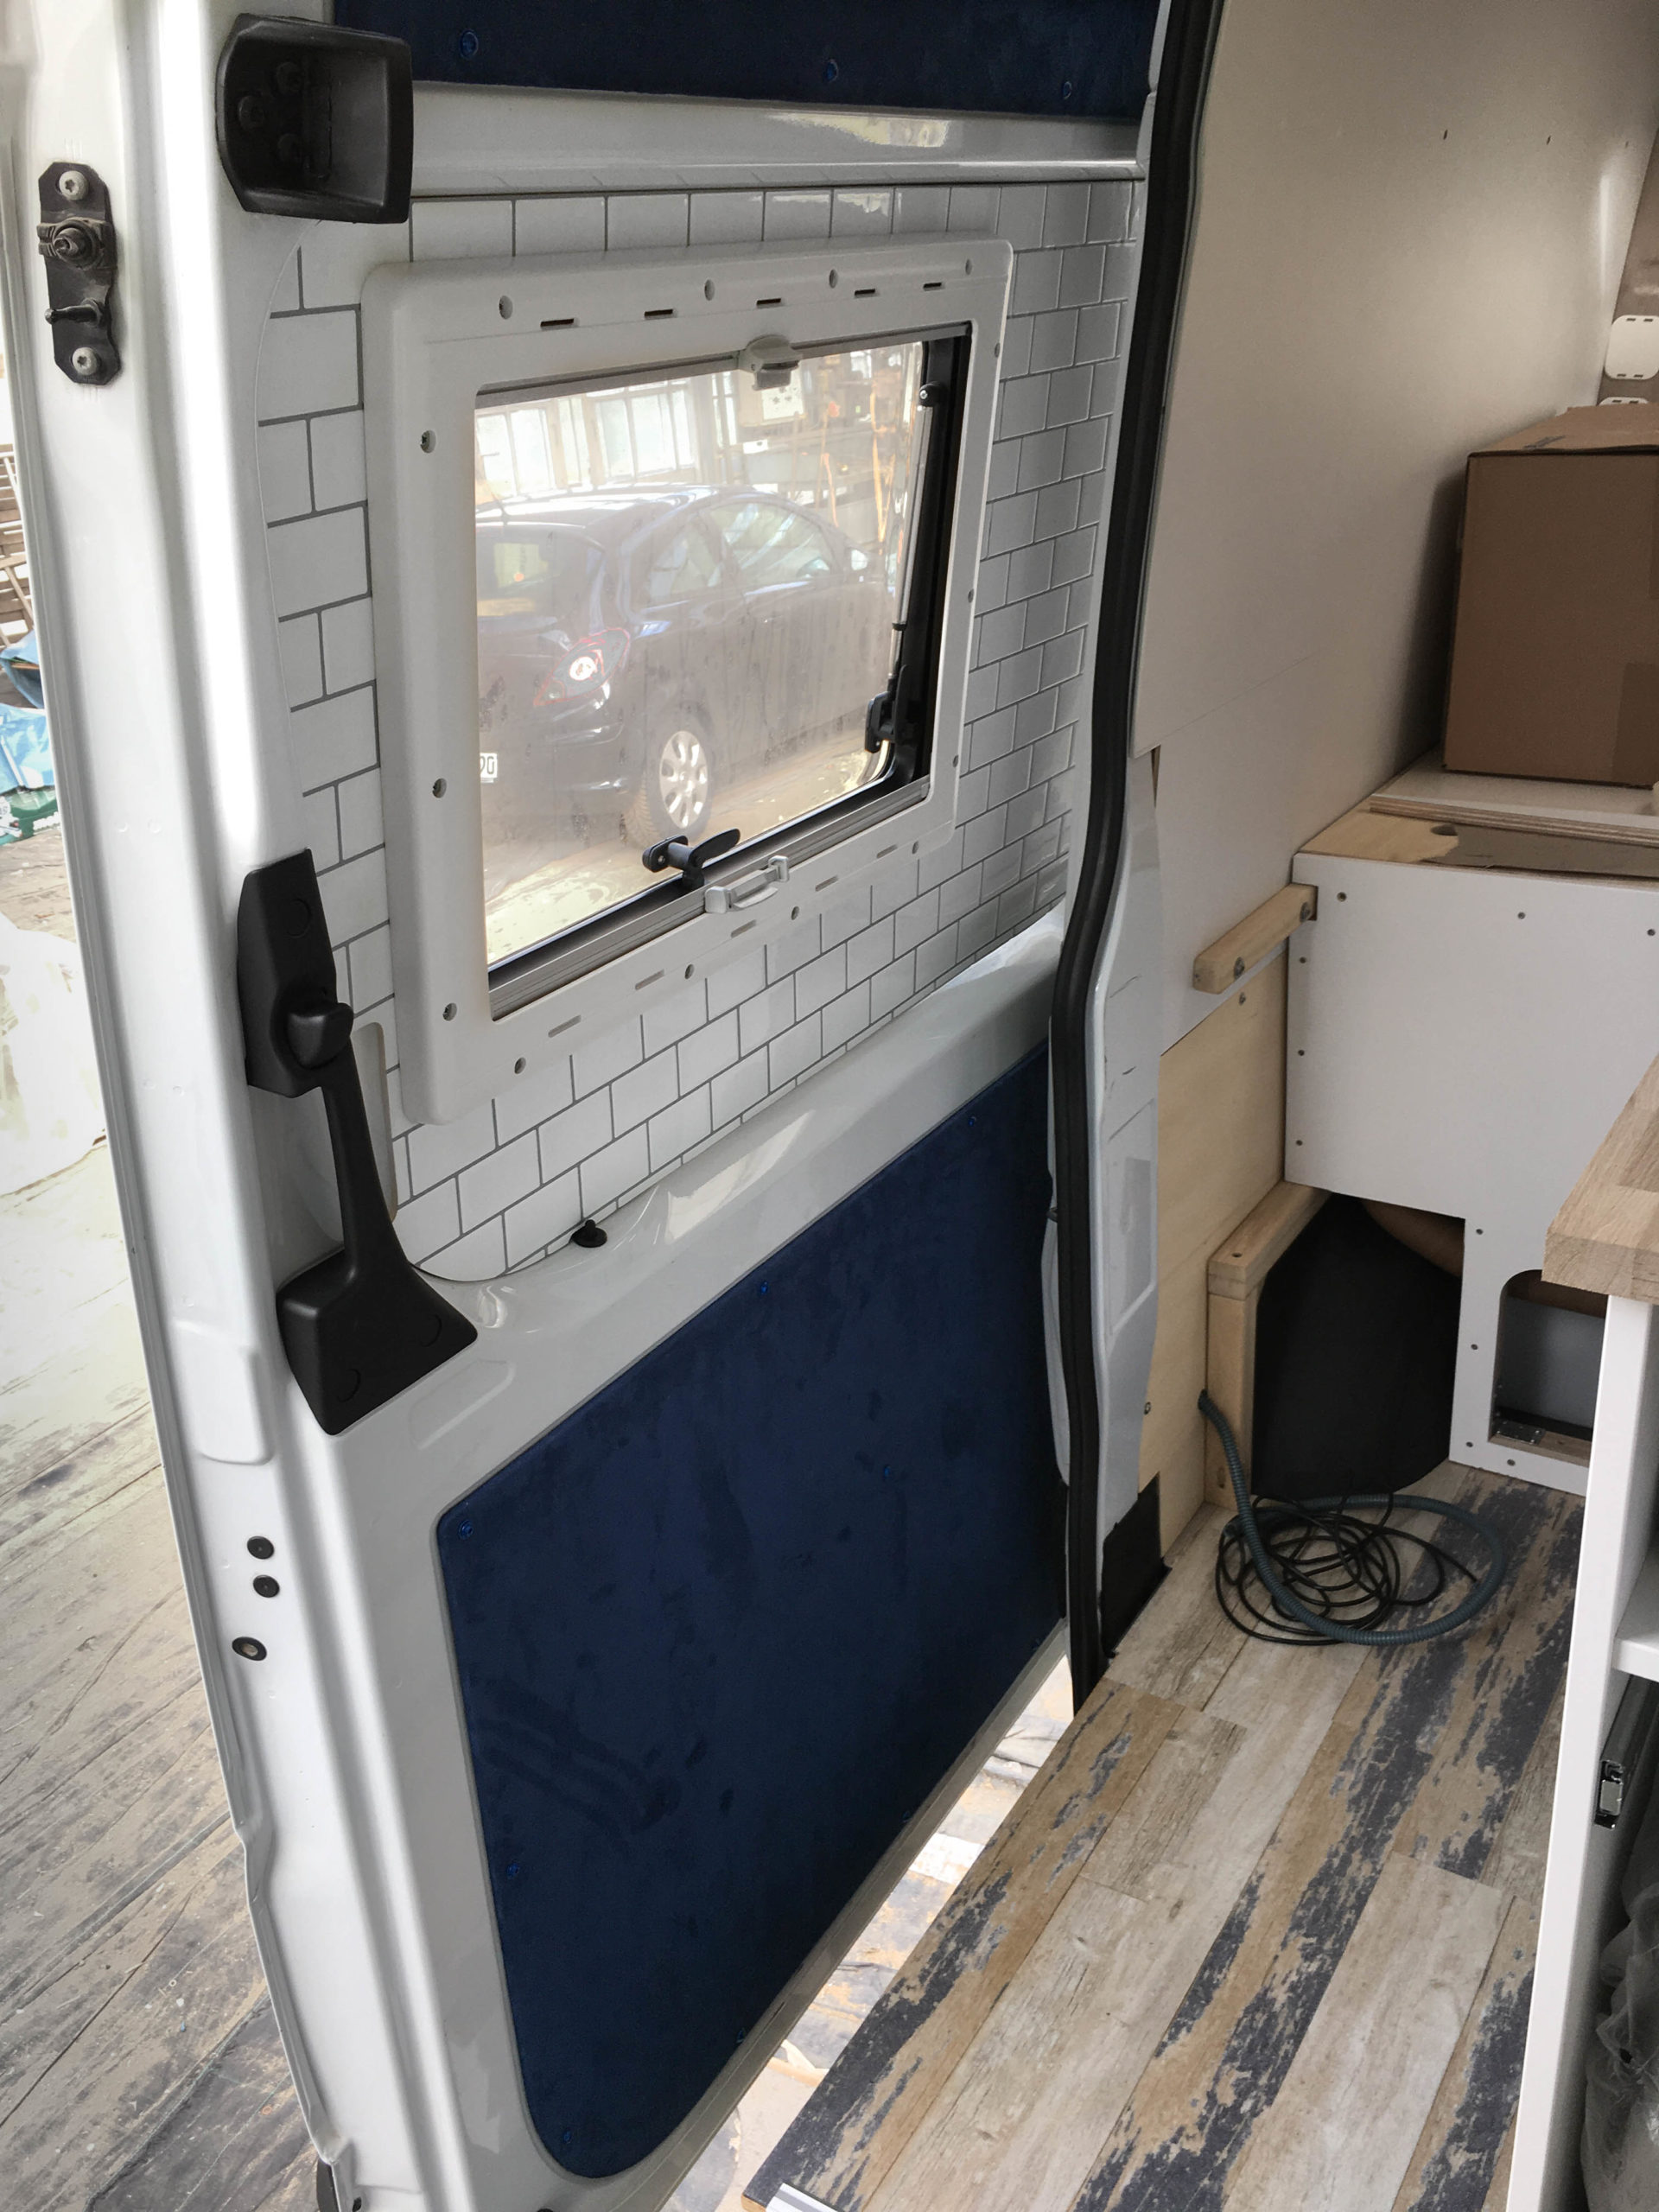
The most underrated „wall“ in a campervan is probably the sliding door. To finalize the interior paneling we outfit our sliding door with poplar plywood and fabric covers as well as Tic Tac Tiles!
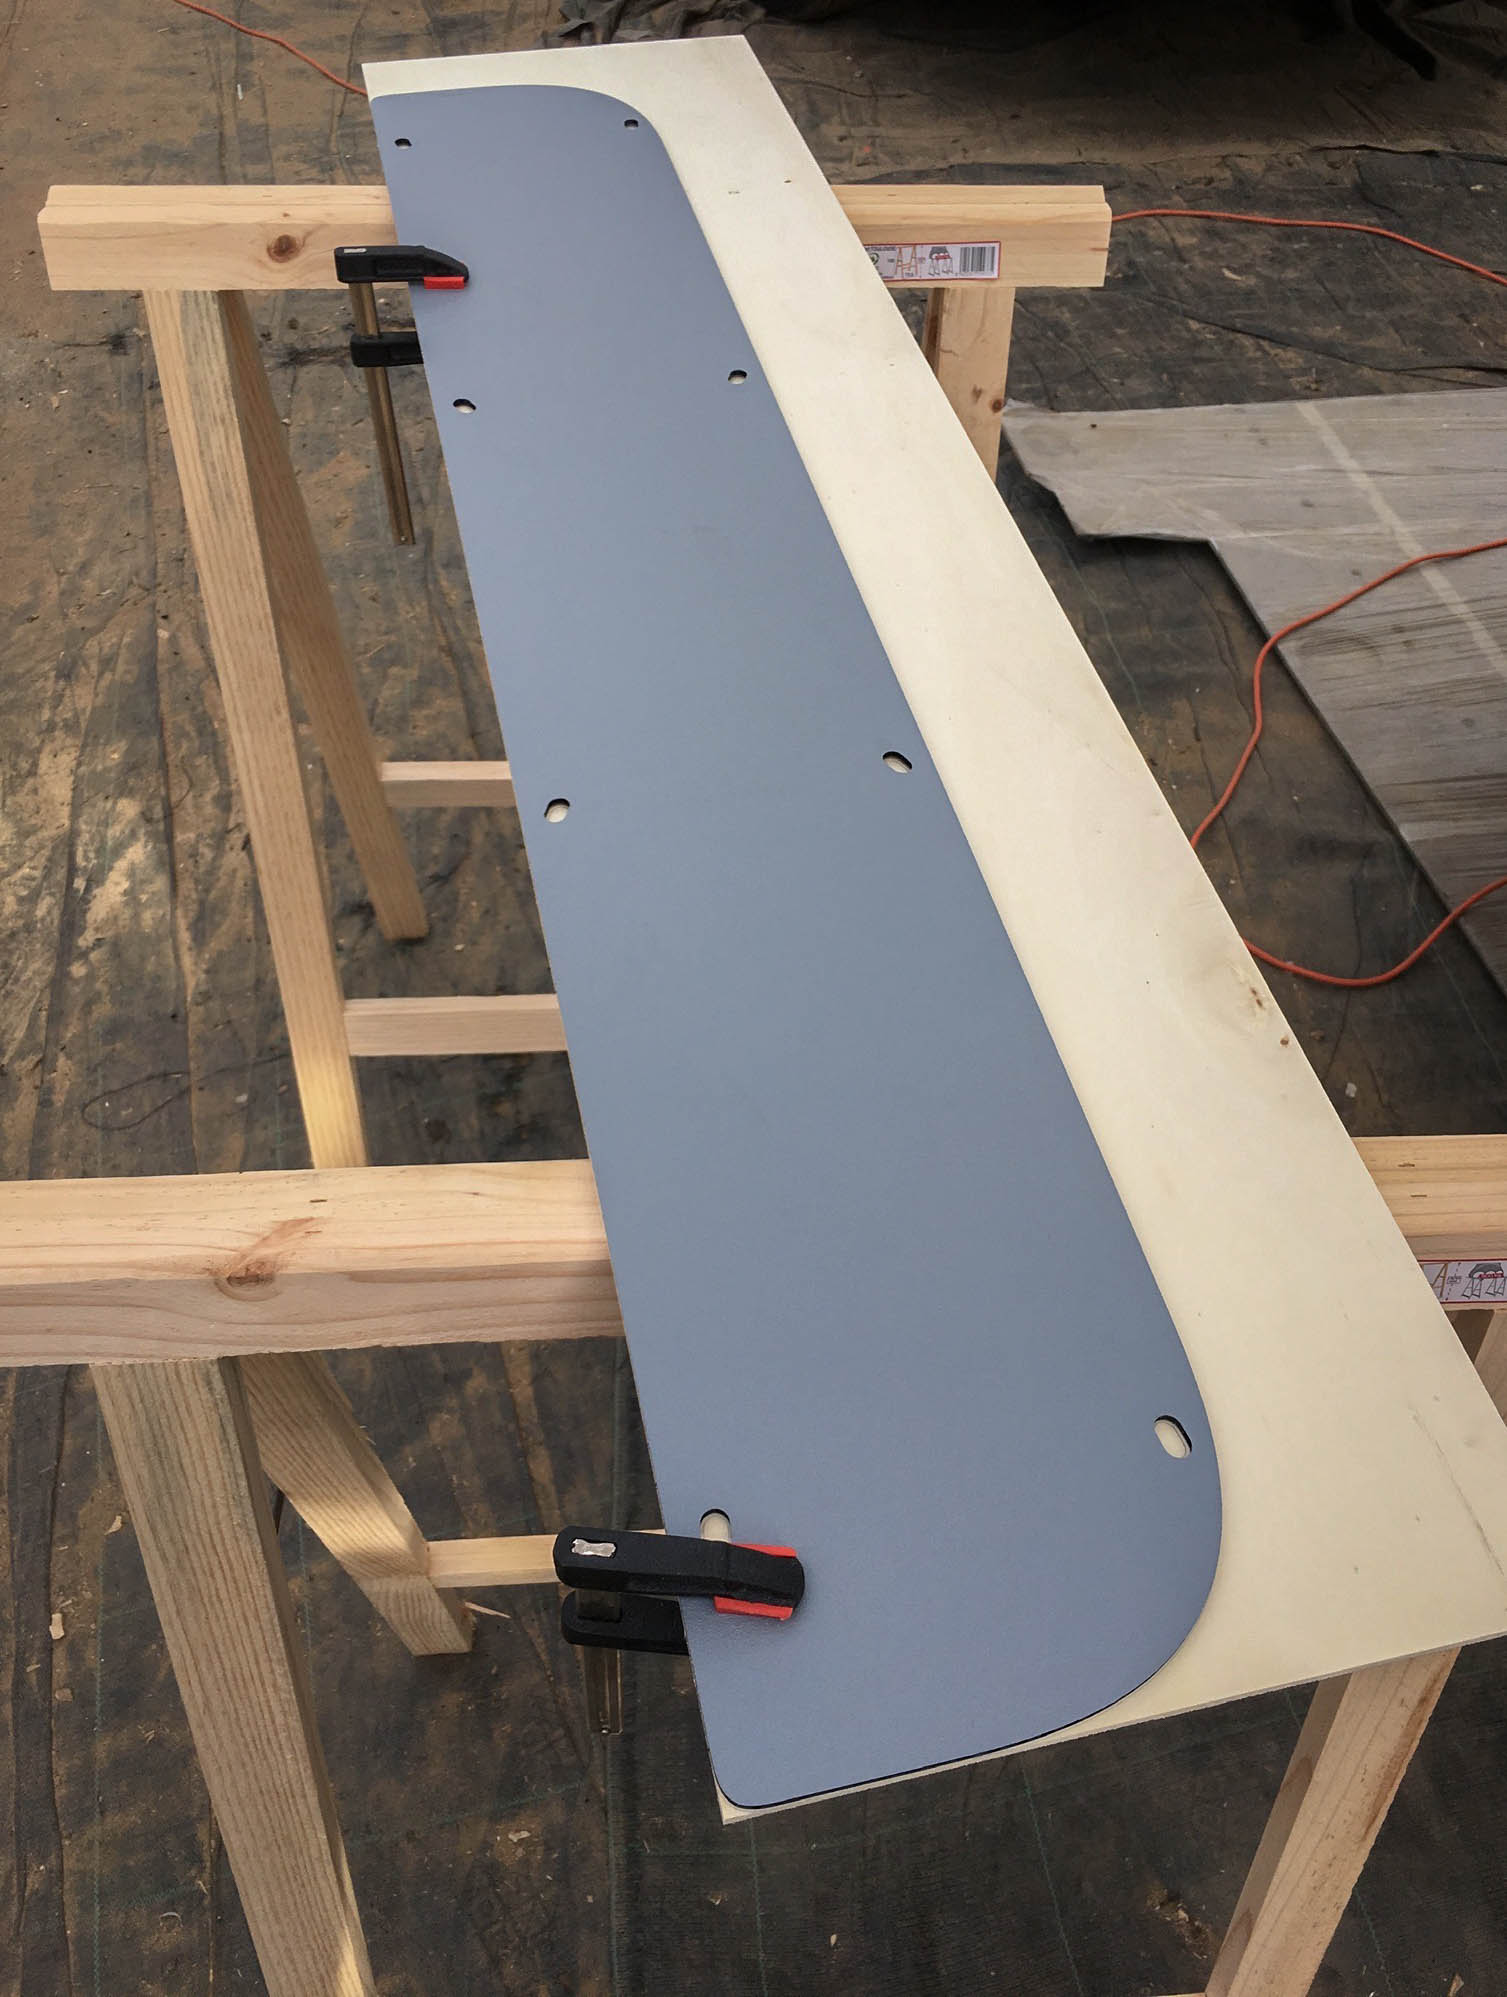
We already paneled the ceiling, walls and back doors with a vanbuild classic – 6 mm poplar plywood. We are again using this wood for the sliding door.
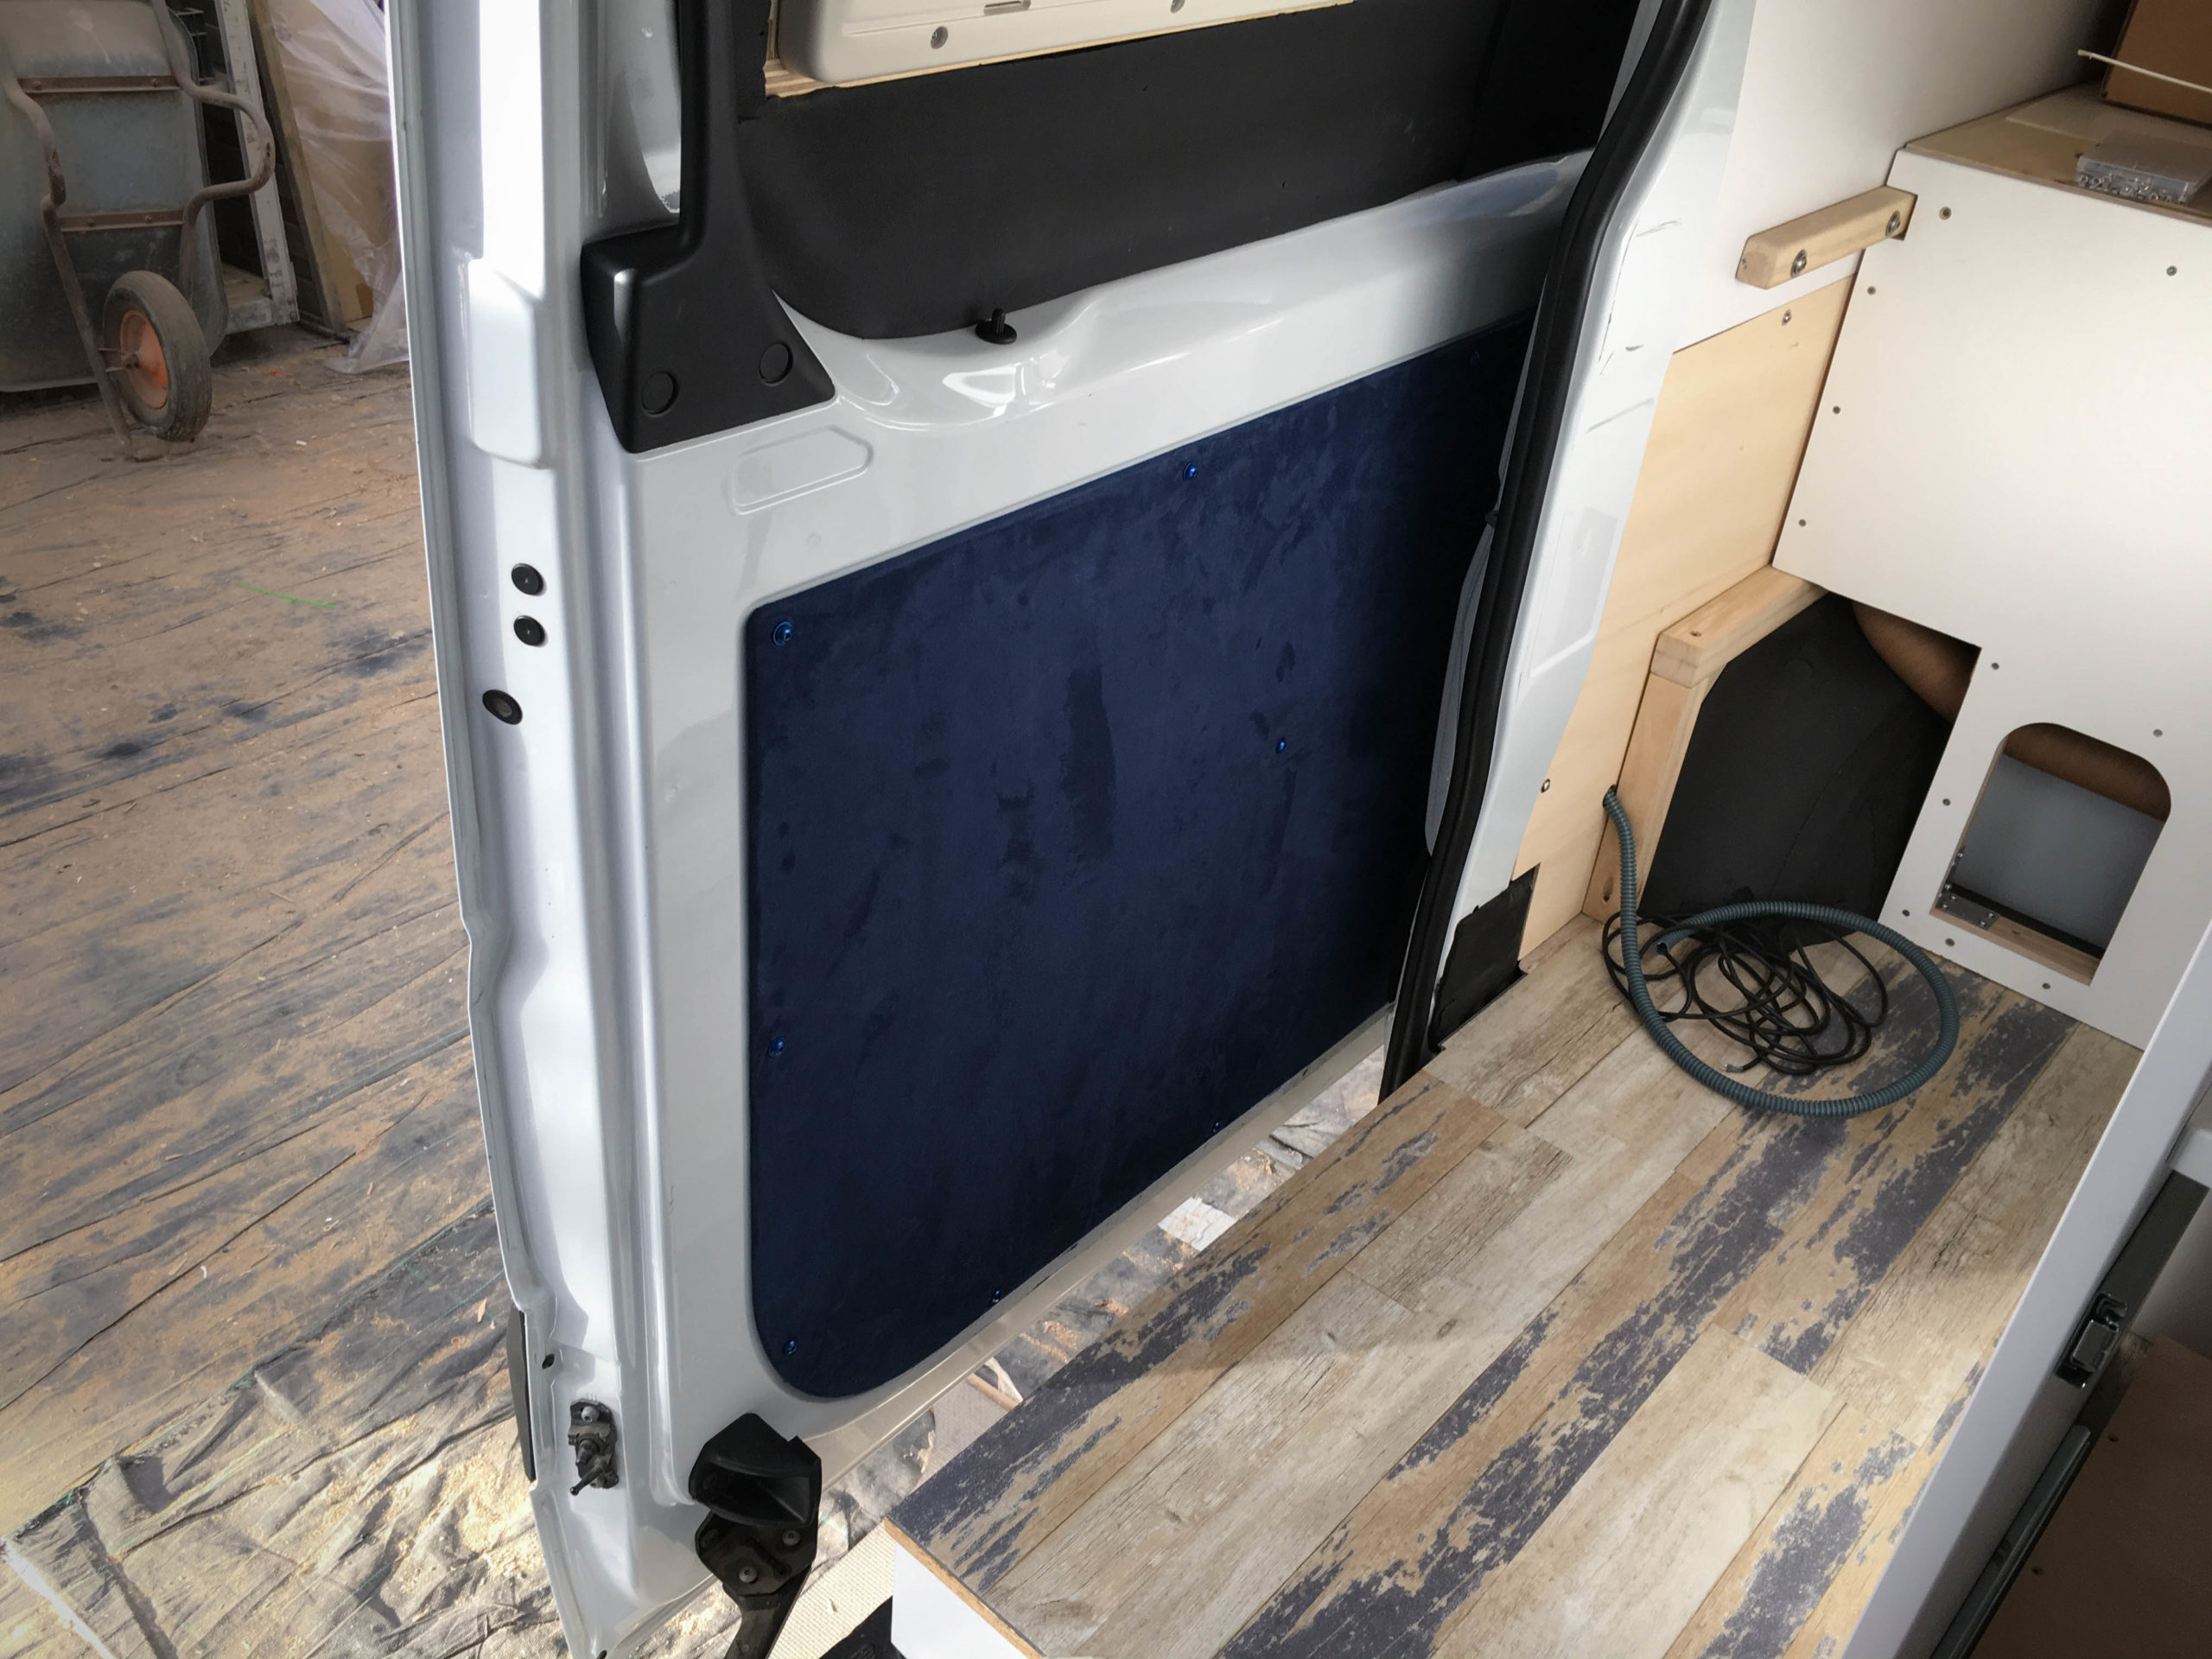
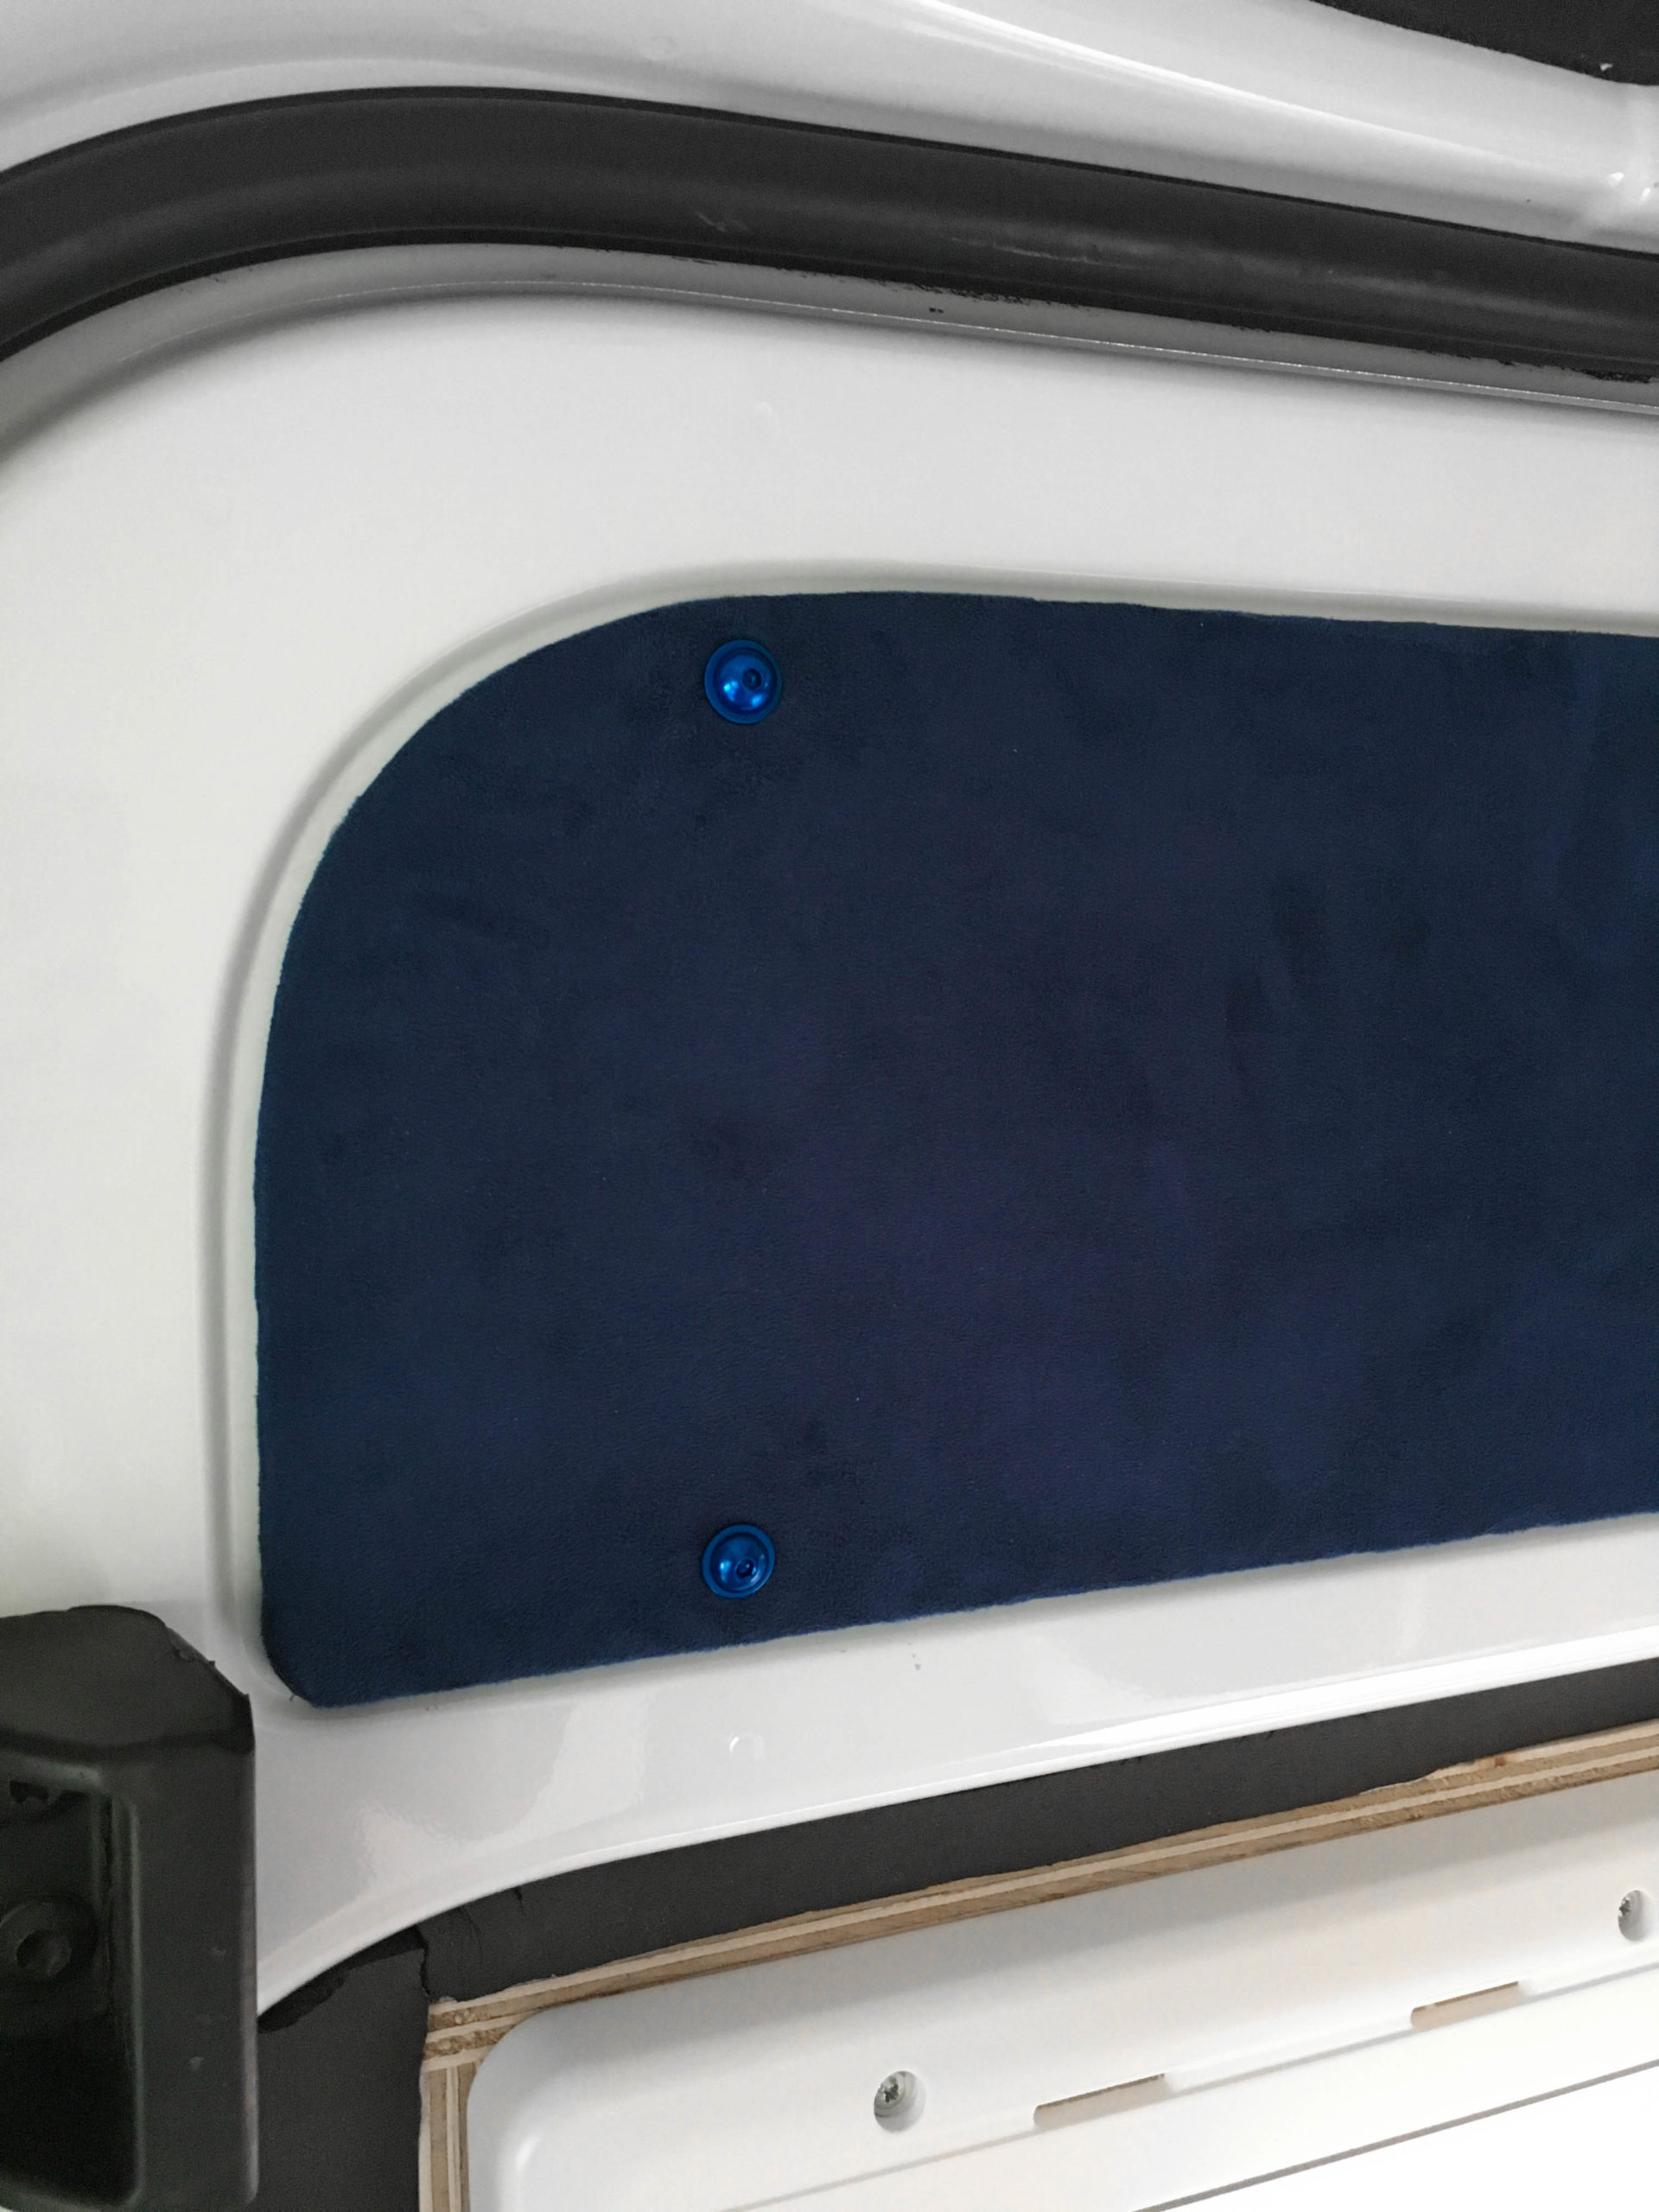
For the ceiling and the walls we used HPL coated wood or we treated it with oil before putting it into the van. This time (just as we already did with the back doors) we are using a fabric made of microfibre in a suede look. Because it’s the entrance area, it should be resistant to dirt. And we want to stick to the color concept, which we started with the flooring, so we went for a dark blue.
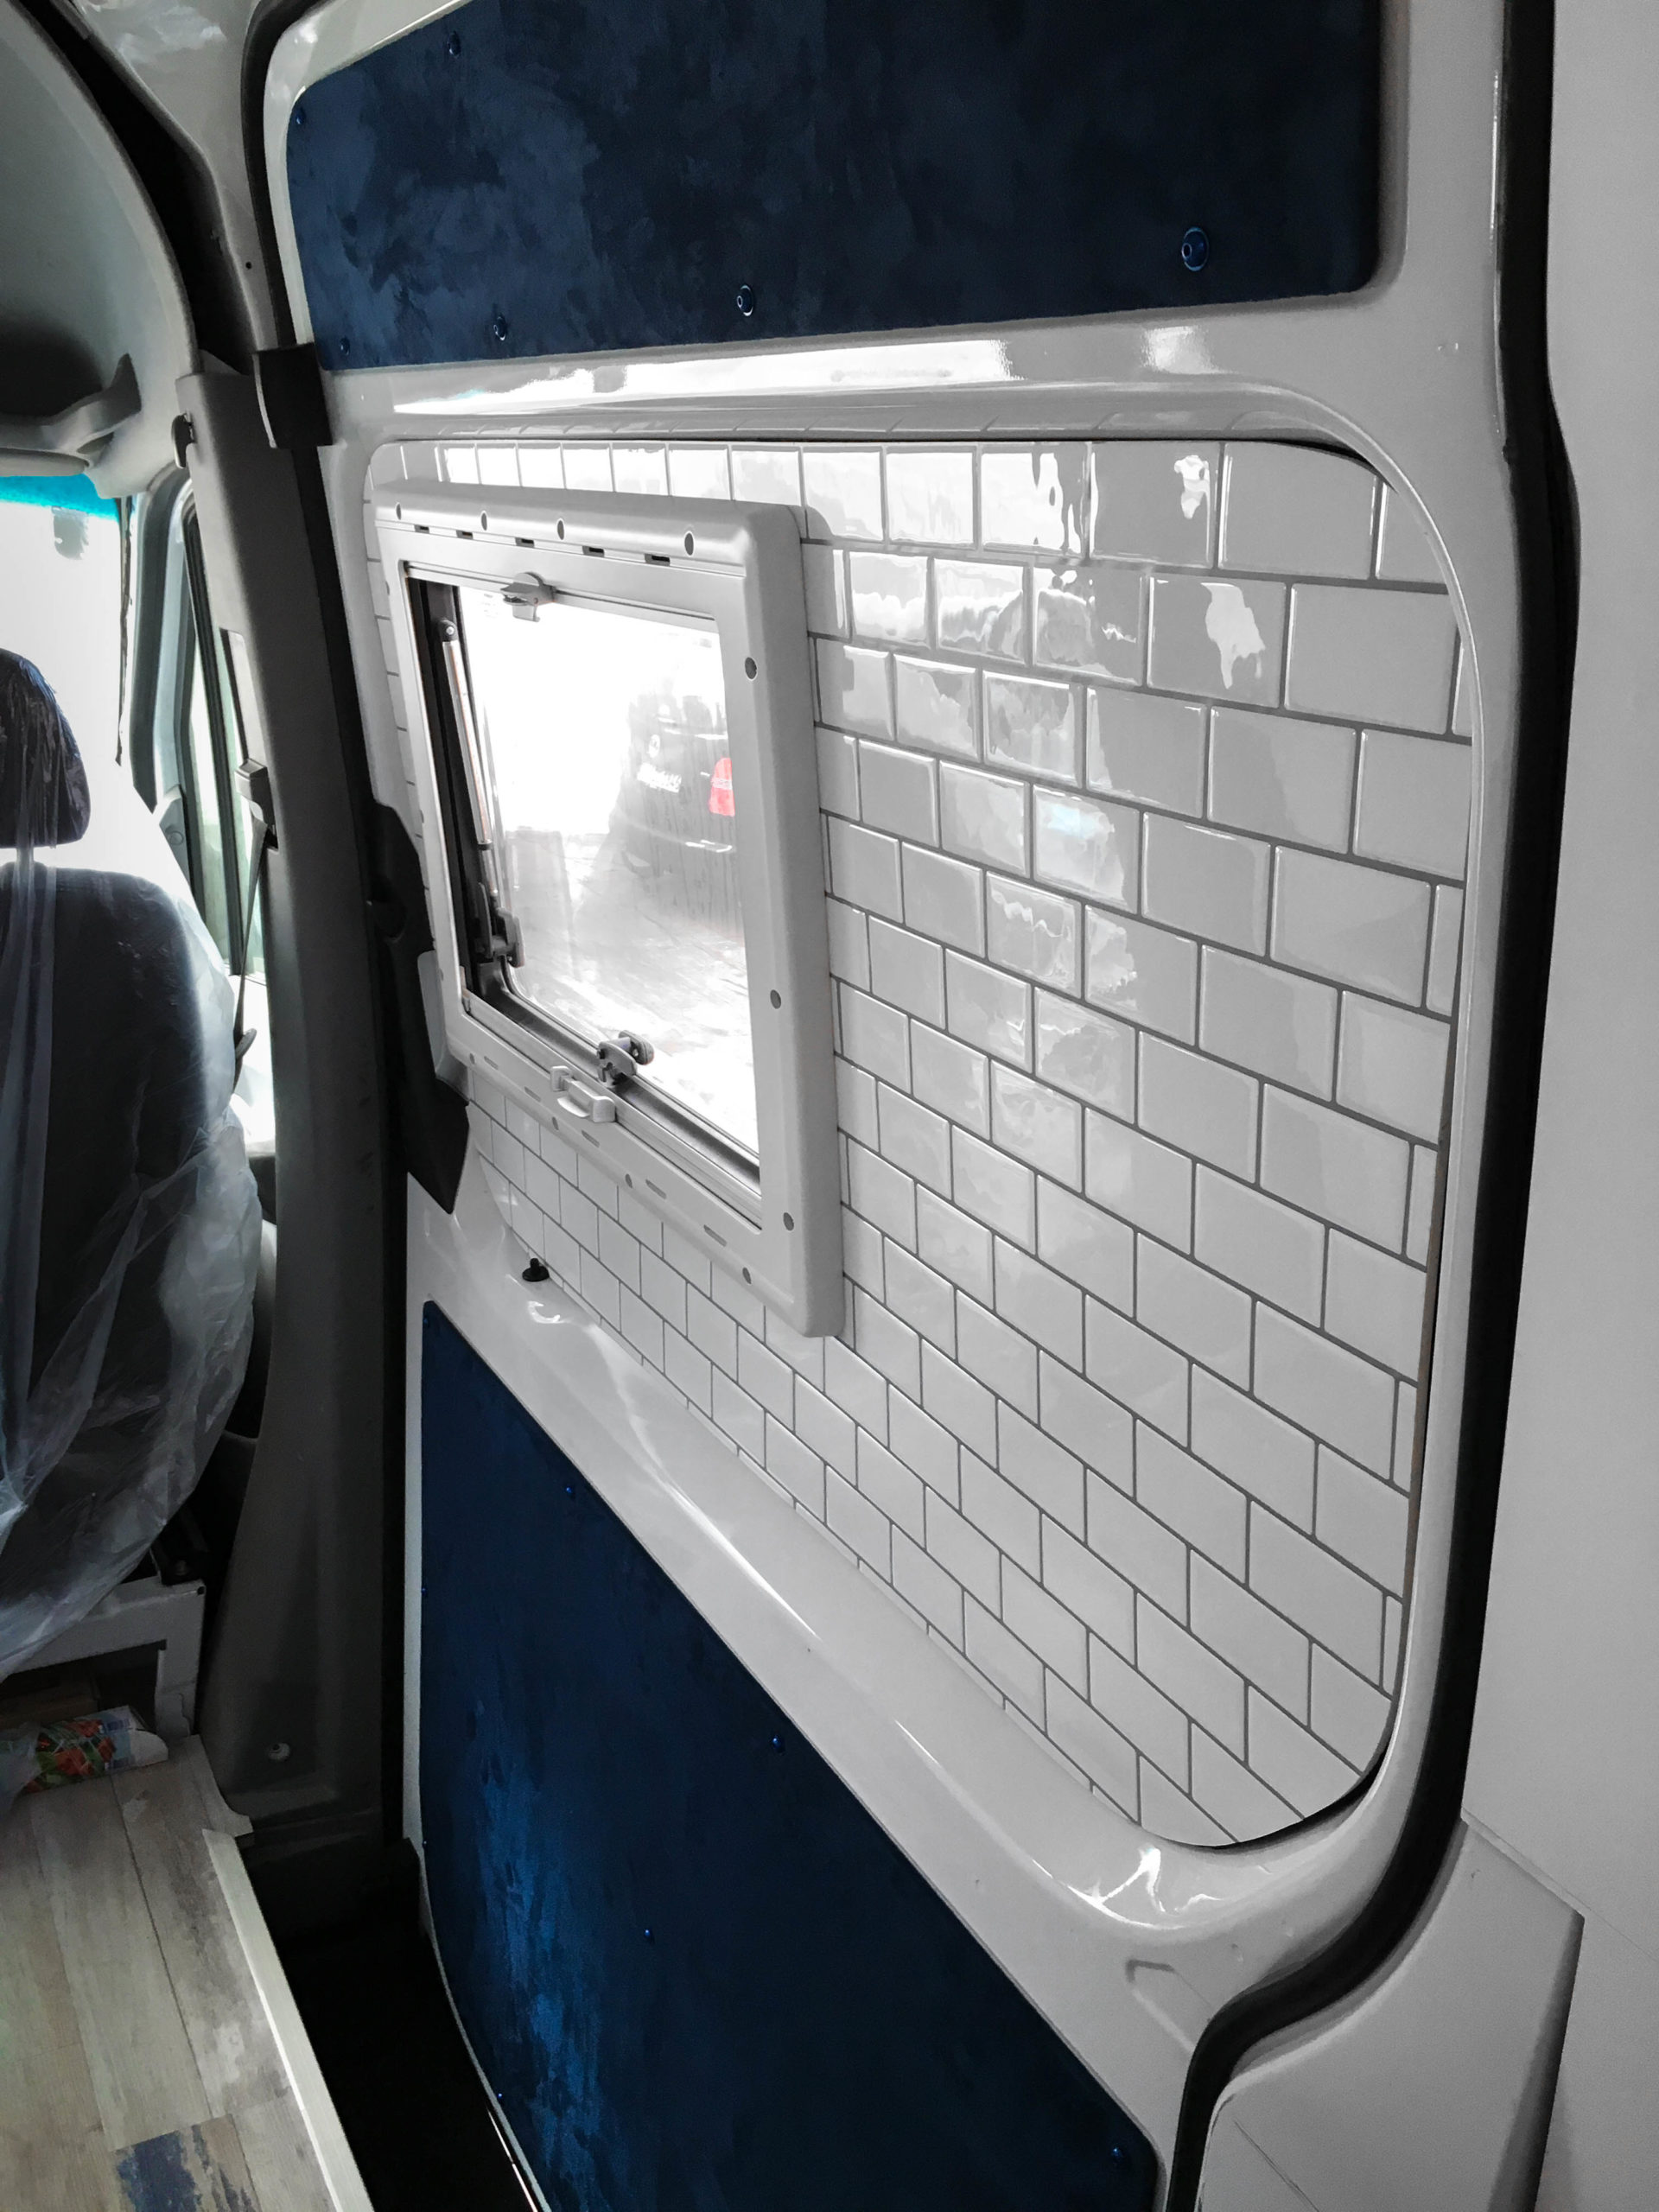
Our kitchen and cooktop will be in the entrance area of the camper. When the sliding door is closed, the middle part of the door will be the backsplash of the kitchen. Fabric is not an appropriate splash guard. We don’t like PVC. Tiles are way too heavy. The solution to this problem comes from the land of opportunities – self adhesive 3D wall tiles named Tic Tac Tiles.
It was pure chance that we discovered these wall tiles with a realistic tile effect and 3D texture. We found them to be perfect for our DIY vanbuild: lightweight, easy to apply (except for the curve of the door) and we really like the look of a classic subway tile!
Here you can read more about our interior paneling!
The door has three panels: one at the top, one in the middle, and a bottom one. As templates, we used the old panels which we copied to regular 6 mm poplar plywood plates, which are available at the hardware store.
The top and bottom panels were sprayed with spray glue, then we quickly put the fabric on top and fastened everything tight with stainless staples on the backside.
To mount the plates to the door, we installed rivet nuts to screw the top and bottom plates into the door.
We used color-matching blue screws and shims. The internet is you friend when it comes to „special wishes“ 😉
Into the middle plate, we had to make the cutout for the window first. Then we also sprayed the plate with spray glue (the glue on the back of the Tic Tac Tiles is not made for wood, that’s why we added spray glue). Then we applied the peel and stick Tic Tac Tiles in „Subway Mono White“ and cut off the protruding edges.
The middle plate is held by the frame of the window and by its form which fits the door.
By finishing the sliding door we also finished all of our interior paneling!
