
To be as self-sufficient as possible with the Camper, we spare ourselves the gas cooker and opt for the energy sources electricity (sun) and Diesel – that’s why we use a Diesel based camping cooker from Webasto!
Because of our planned destination we want to be as self-sufficient as possible and therefore want to have as few energy sources as possible. We will generate electricity from our solar panels, and we need Diesel to drive anyways.
The classic camping cooker usually is a gas cooker. But (just like with heating) we don’t want to depend on yet another resource with different mounting systems everywhere. Also gas bottles are quite heavy and take up valuable storage room.
So it was either an electric cooker or Dieselcooker for us. For an electric cooker we would have needed more ampere hours which our battery just can’t do (only a question of price, though). So we went for the Dieselcooker 😉
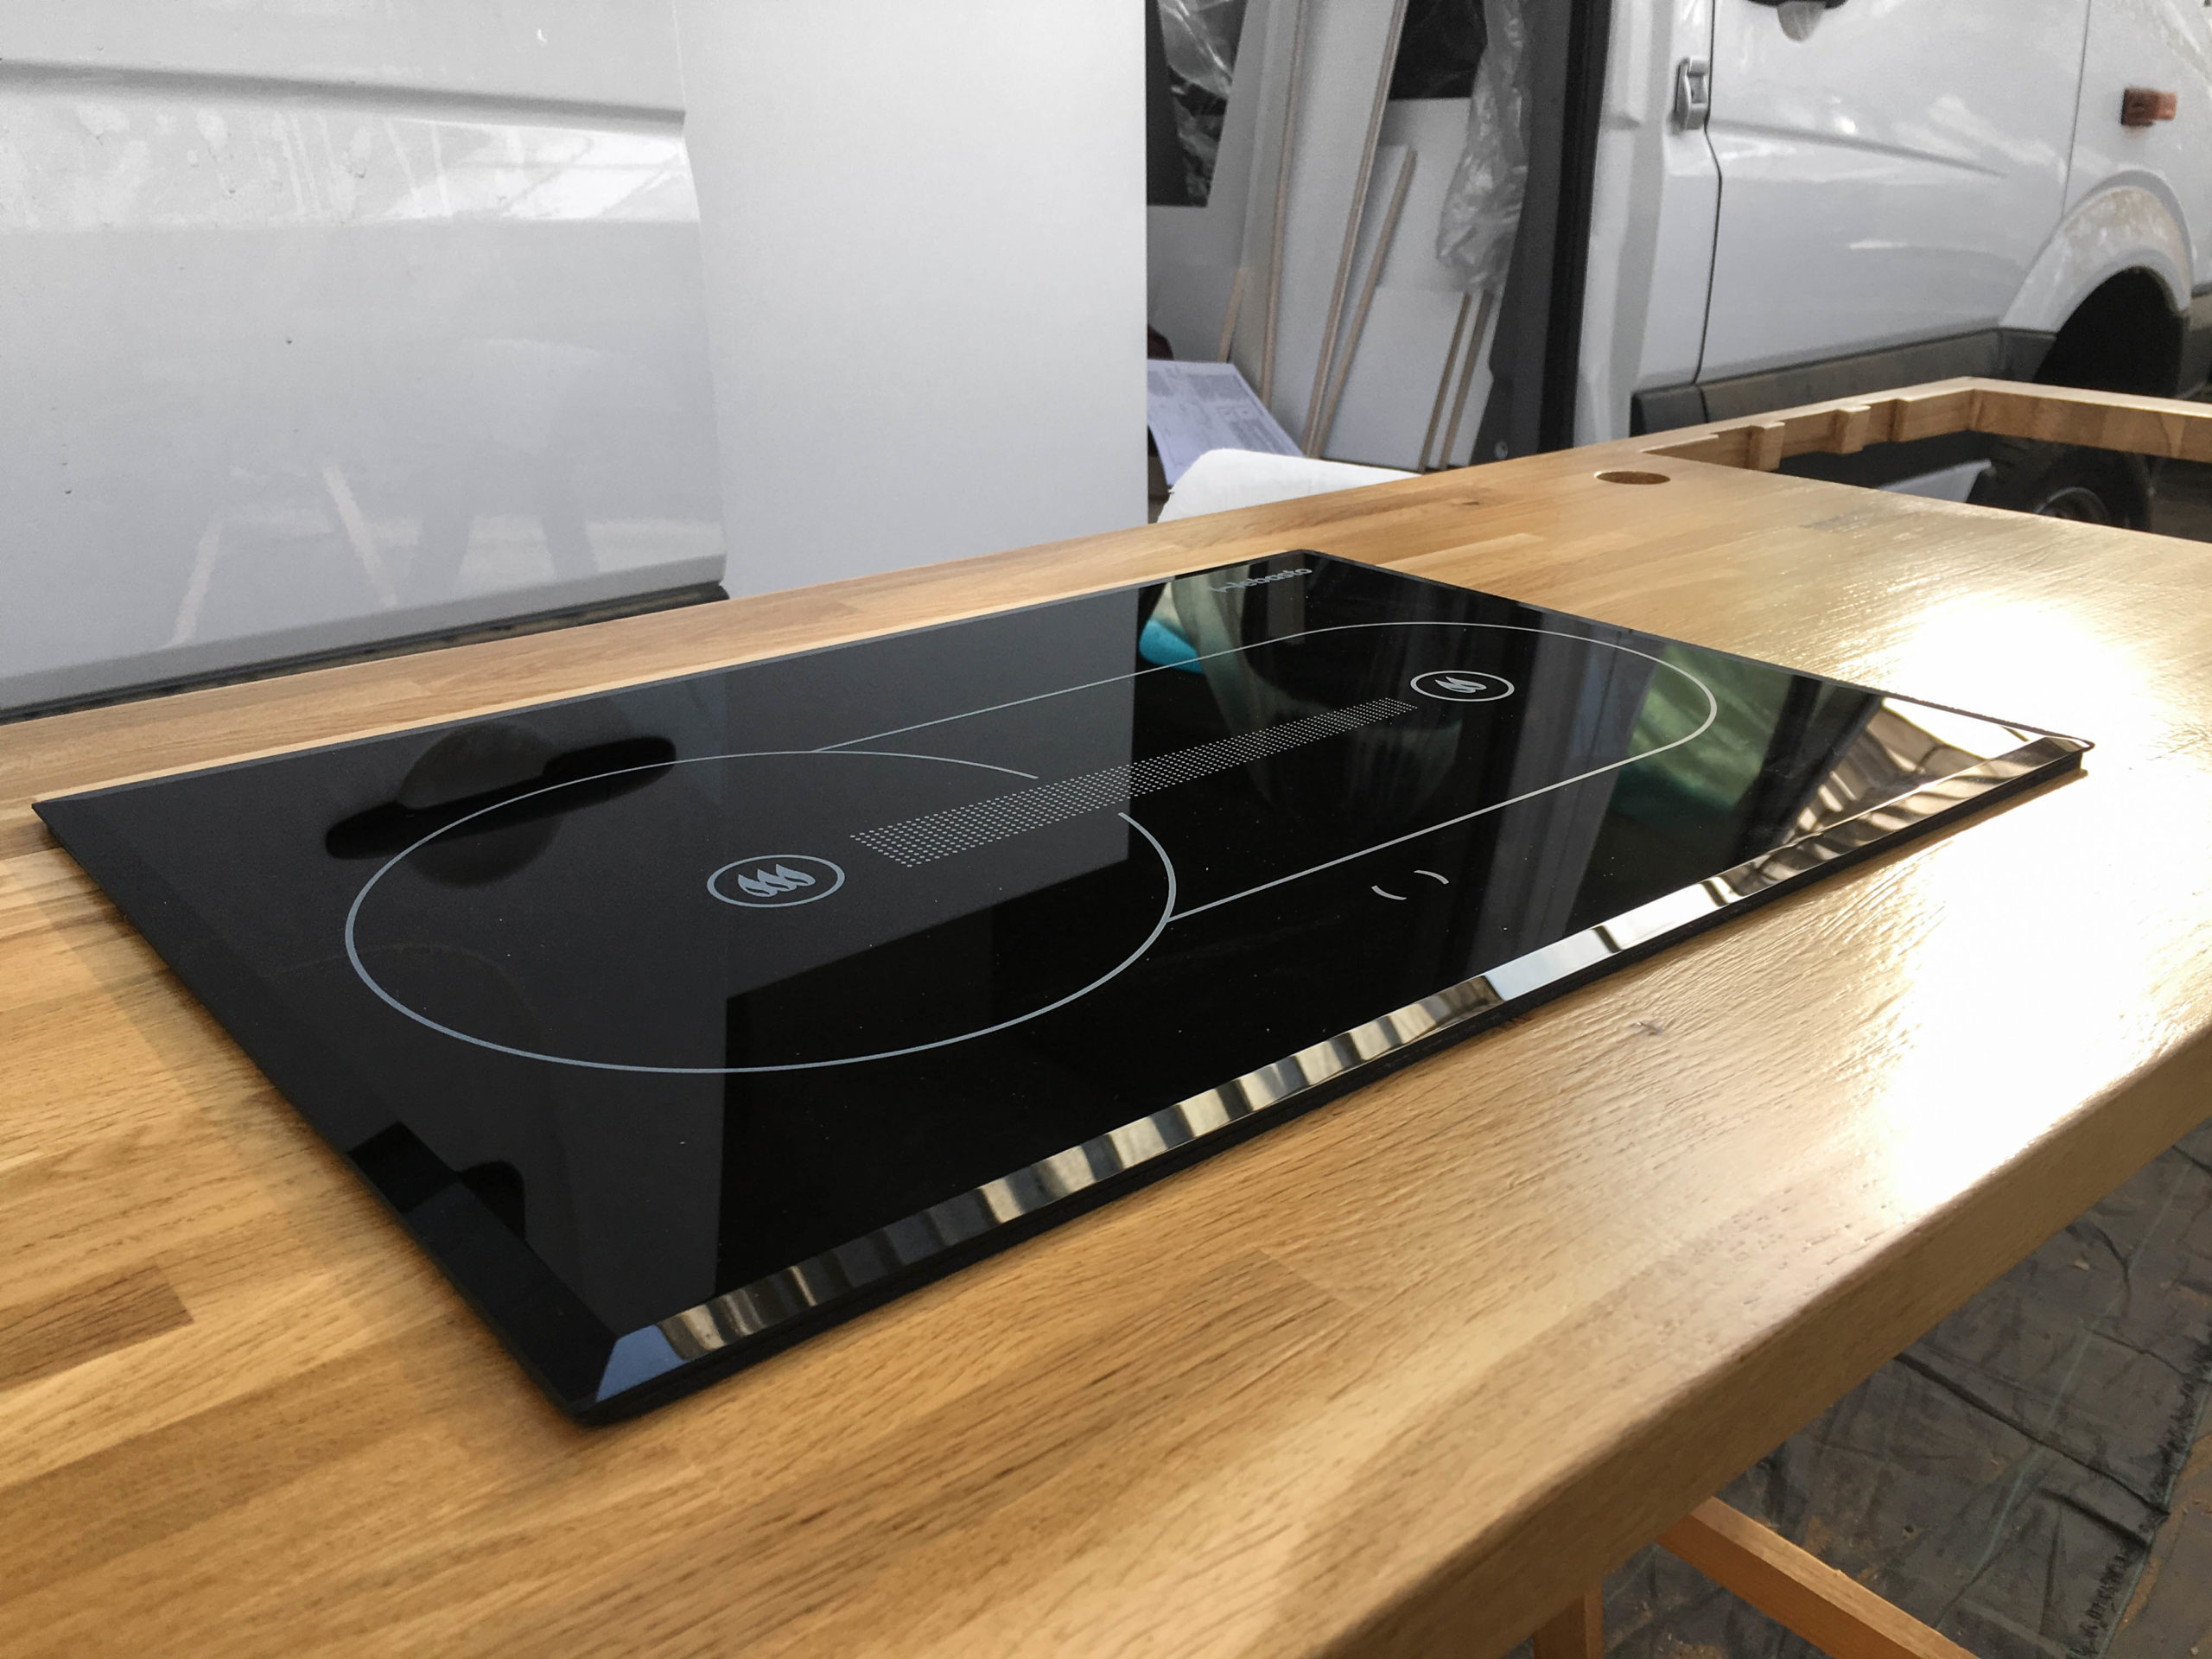
The Dieselcooker X100 from Webasto is a one burner cooker and has a diesel burner as a heat source. The combustion chamber, which is incorporated in the cooker, heats up the ceramic cooking plate. The cooktop has room for two pots or pans; one area is for cooking while the second area is for warming. The Diesel, which is needed for heating, comes directly from the diesel tank. The CERAN cooking plate measures 466 x 316 x 50 mm, the protective housing measures 565 x 366 x 172 mm (2 cm exhaust air nozzle). The cooker consisting of cooktop and housing weighs 9,5 kg. The nominal voltage is 12 V.
Attention! The manufacturer of the Dieselcooker makes it clear, that the mounting, installation as well as any repairs of the cooker shall only be made by trained and qualified personnel who have the necessary technical knowledge as well as technical documentation, tools and equipment to guarantee a proper installation and repair work. We cannot guarantee the accuracy of our following descriptions! Please do not risk a fire in your camper or poisoning of carbon monoxide (which can cause severe injury or even death)!
The manufacturer states that the cooker can be installed into any vehicle. The cooker is placed from the top into a gap in the worktop of the kitchen, the housing including the integrated cooking fan, is attached from the bottom.
We can’t say for sure if it’s really possible to built the cooker into an already existing kitchen unit. But it worked really well with our „new“ DIY Camper Kitchen!
Fresh air supply
Because the cooker needs air for burning and cooling, there has to be enough air circulation in the vehicle at all times. Accordingly you should choose the installation location. For enough fresh air supply, there has to be an opening near the air vent, which is located in the front panel of the housing.
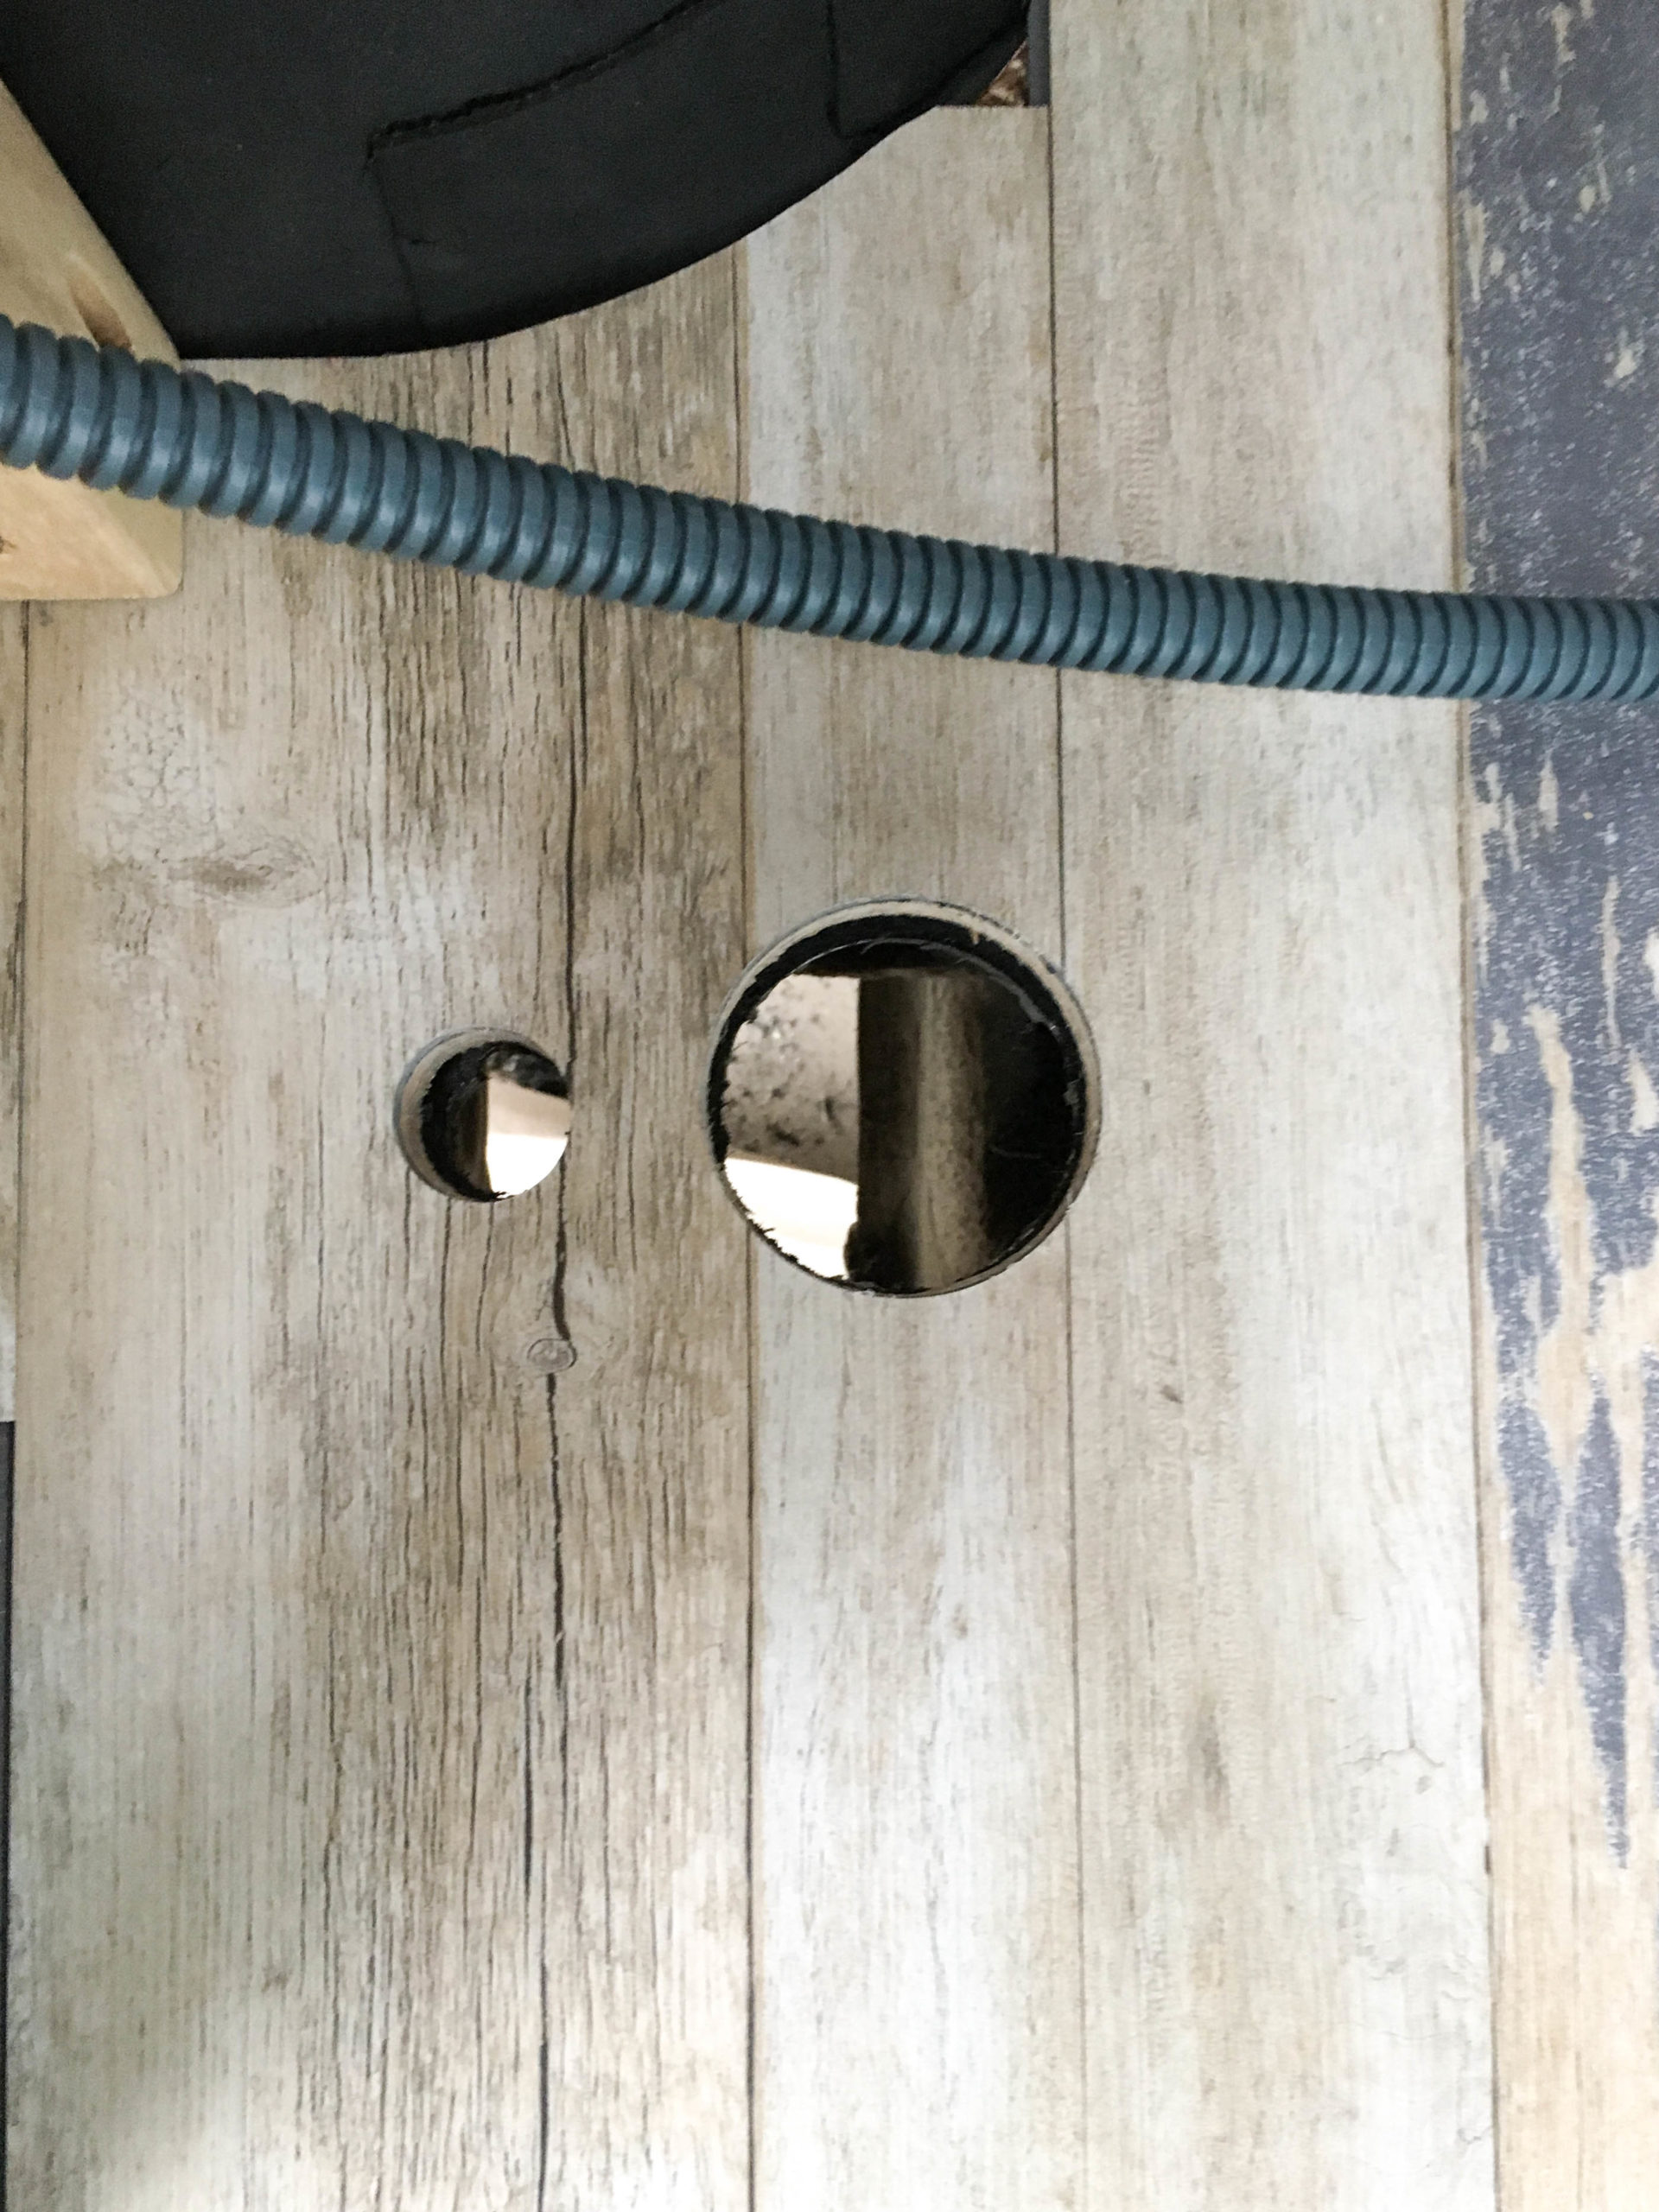
Installation opening
To determine the exact position of the cooker and the installation opening, we made templates according to the installation guide.
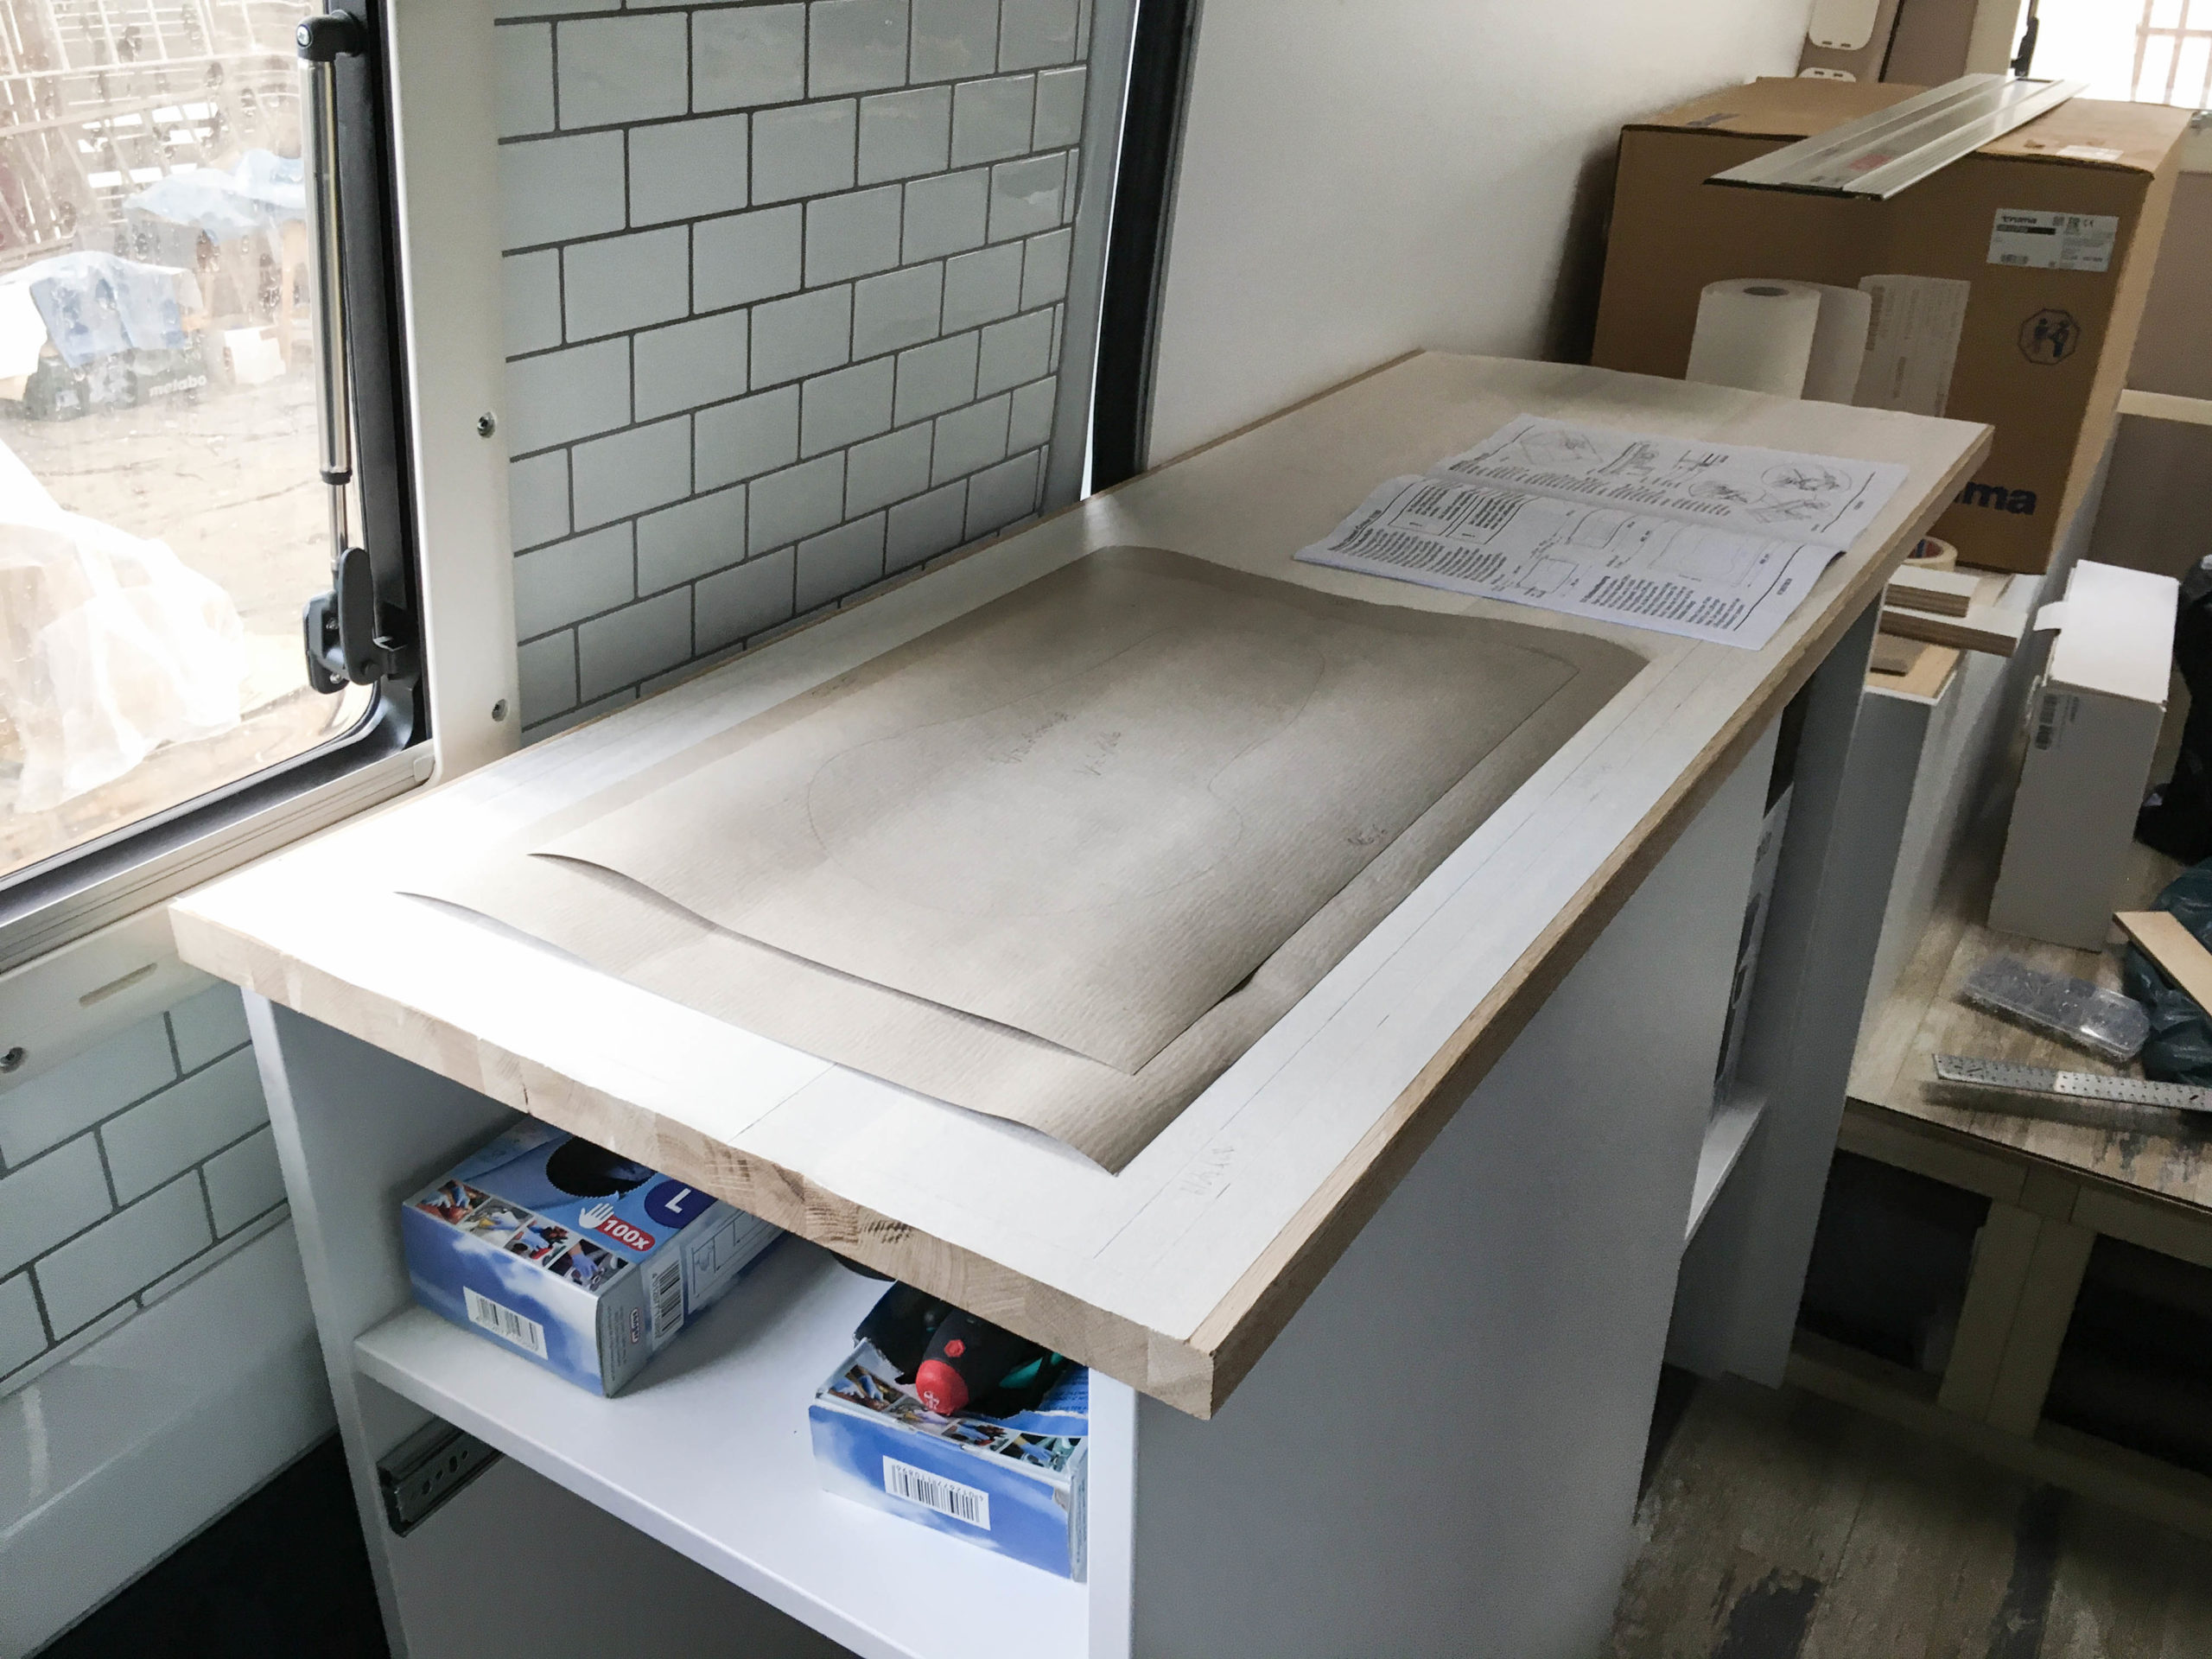
Only after we made sure it was located in the middle, we marked the cutout which we made with a jigsaw. To protect the worktop we used transfer paper on which we drew the measurements.
Fitting of the cooker
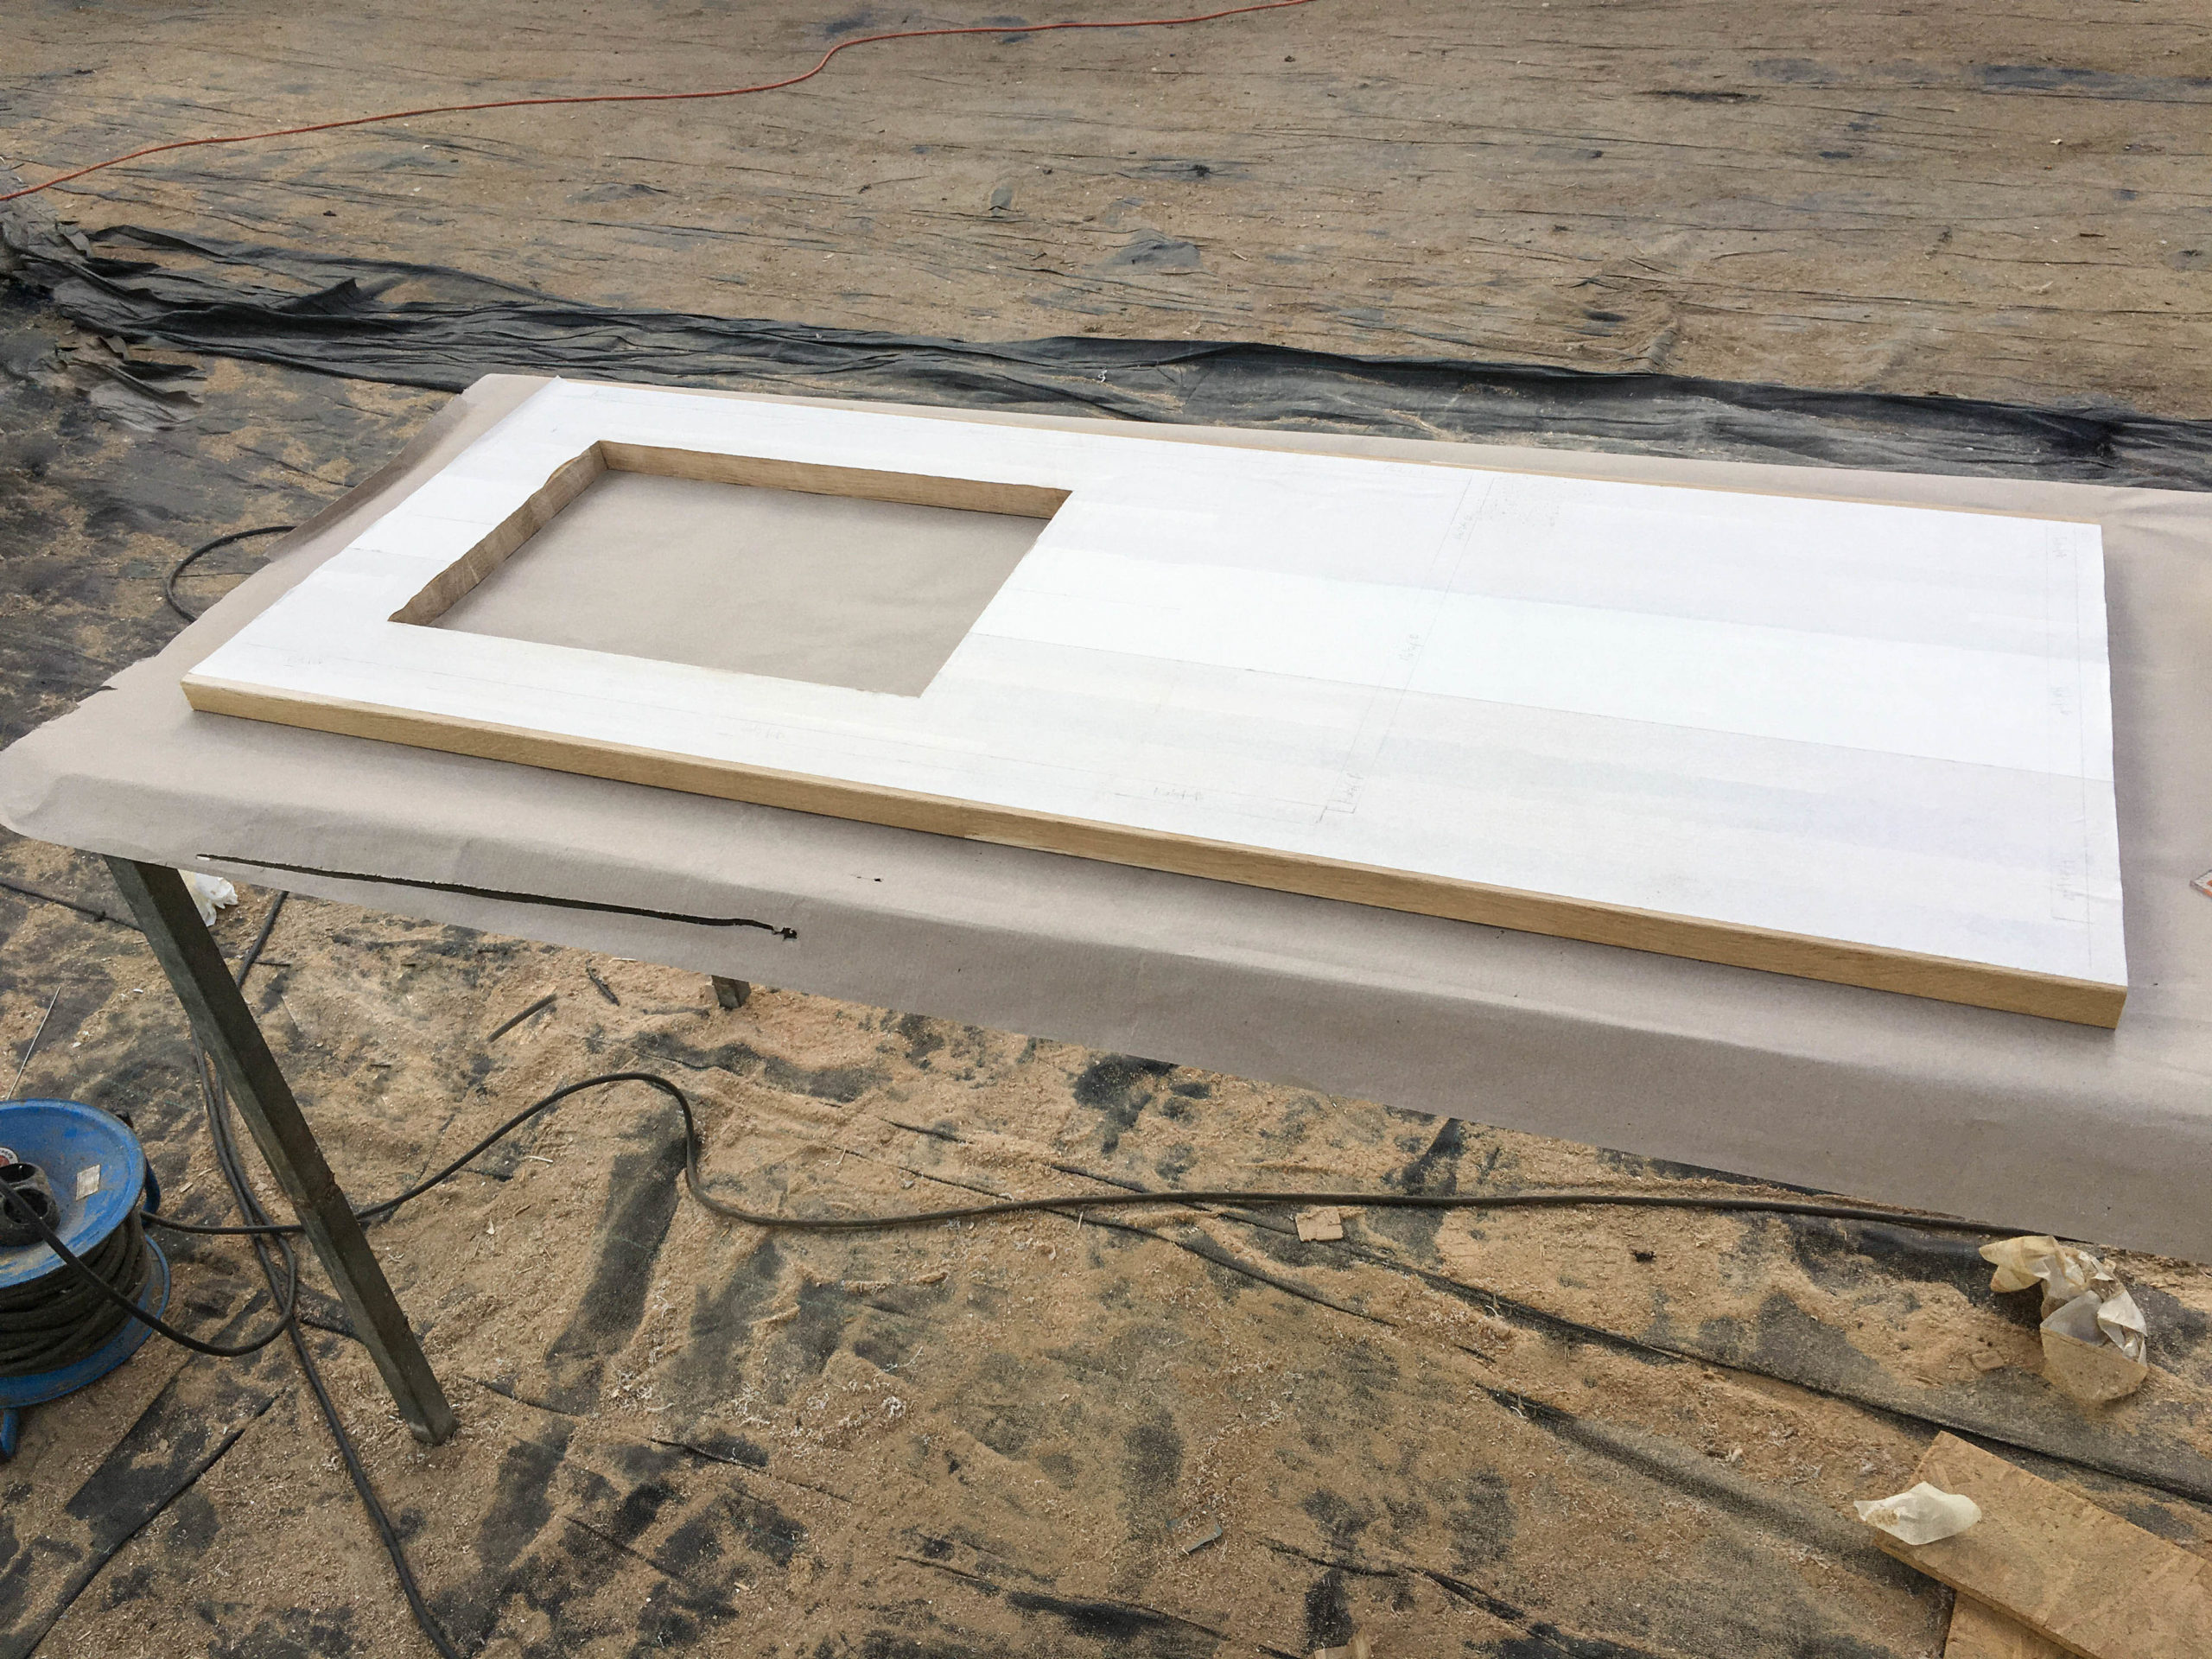
After sanding, priming and painting the worktop, we placed the cooker in the cutout and fastened it to the worktop with the screws and nuts on the sides of the cooker, according to the thickness of the worktop.
Then we had to connect the fuel pipe with the fuel pump and the power cable with the port on the back of the cooker.
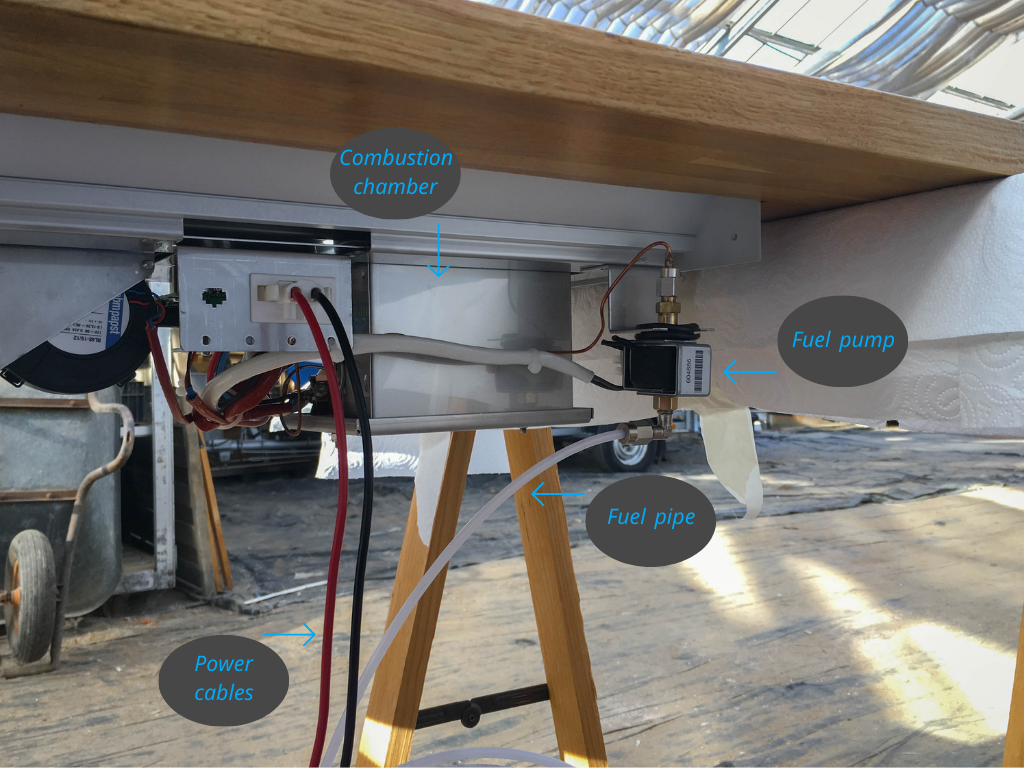
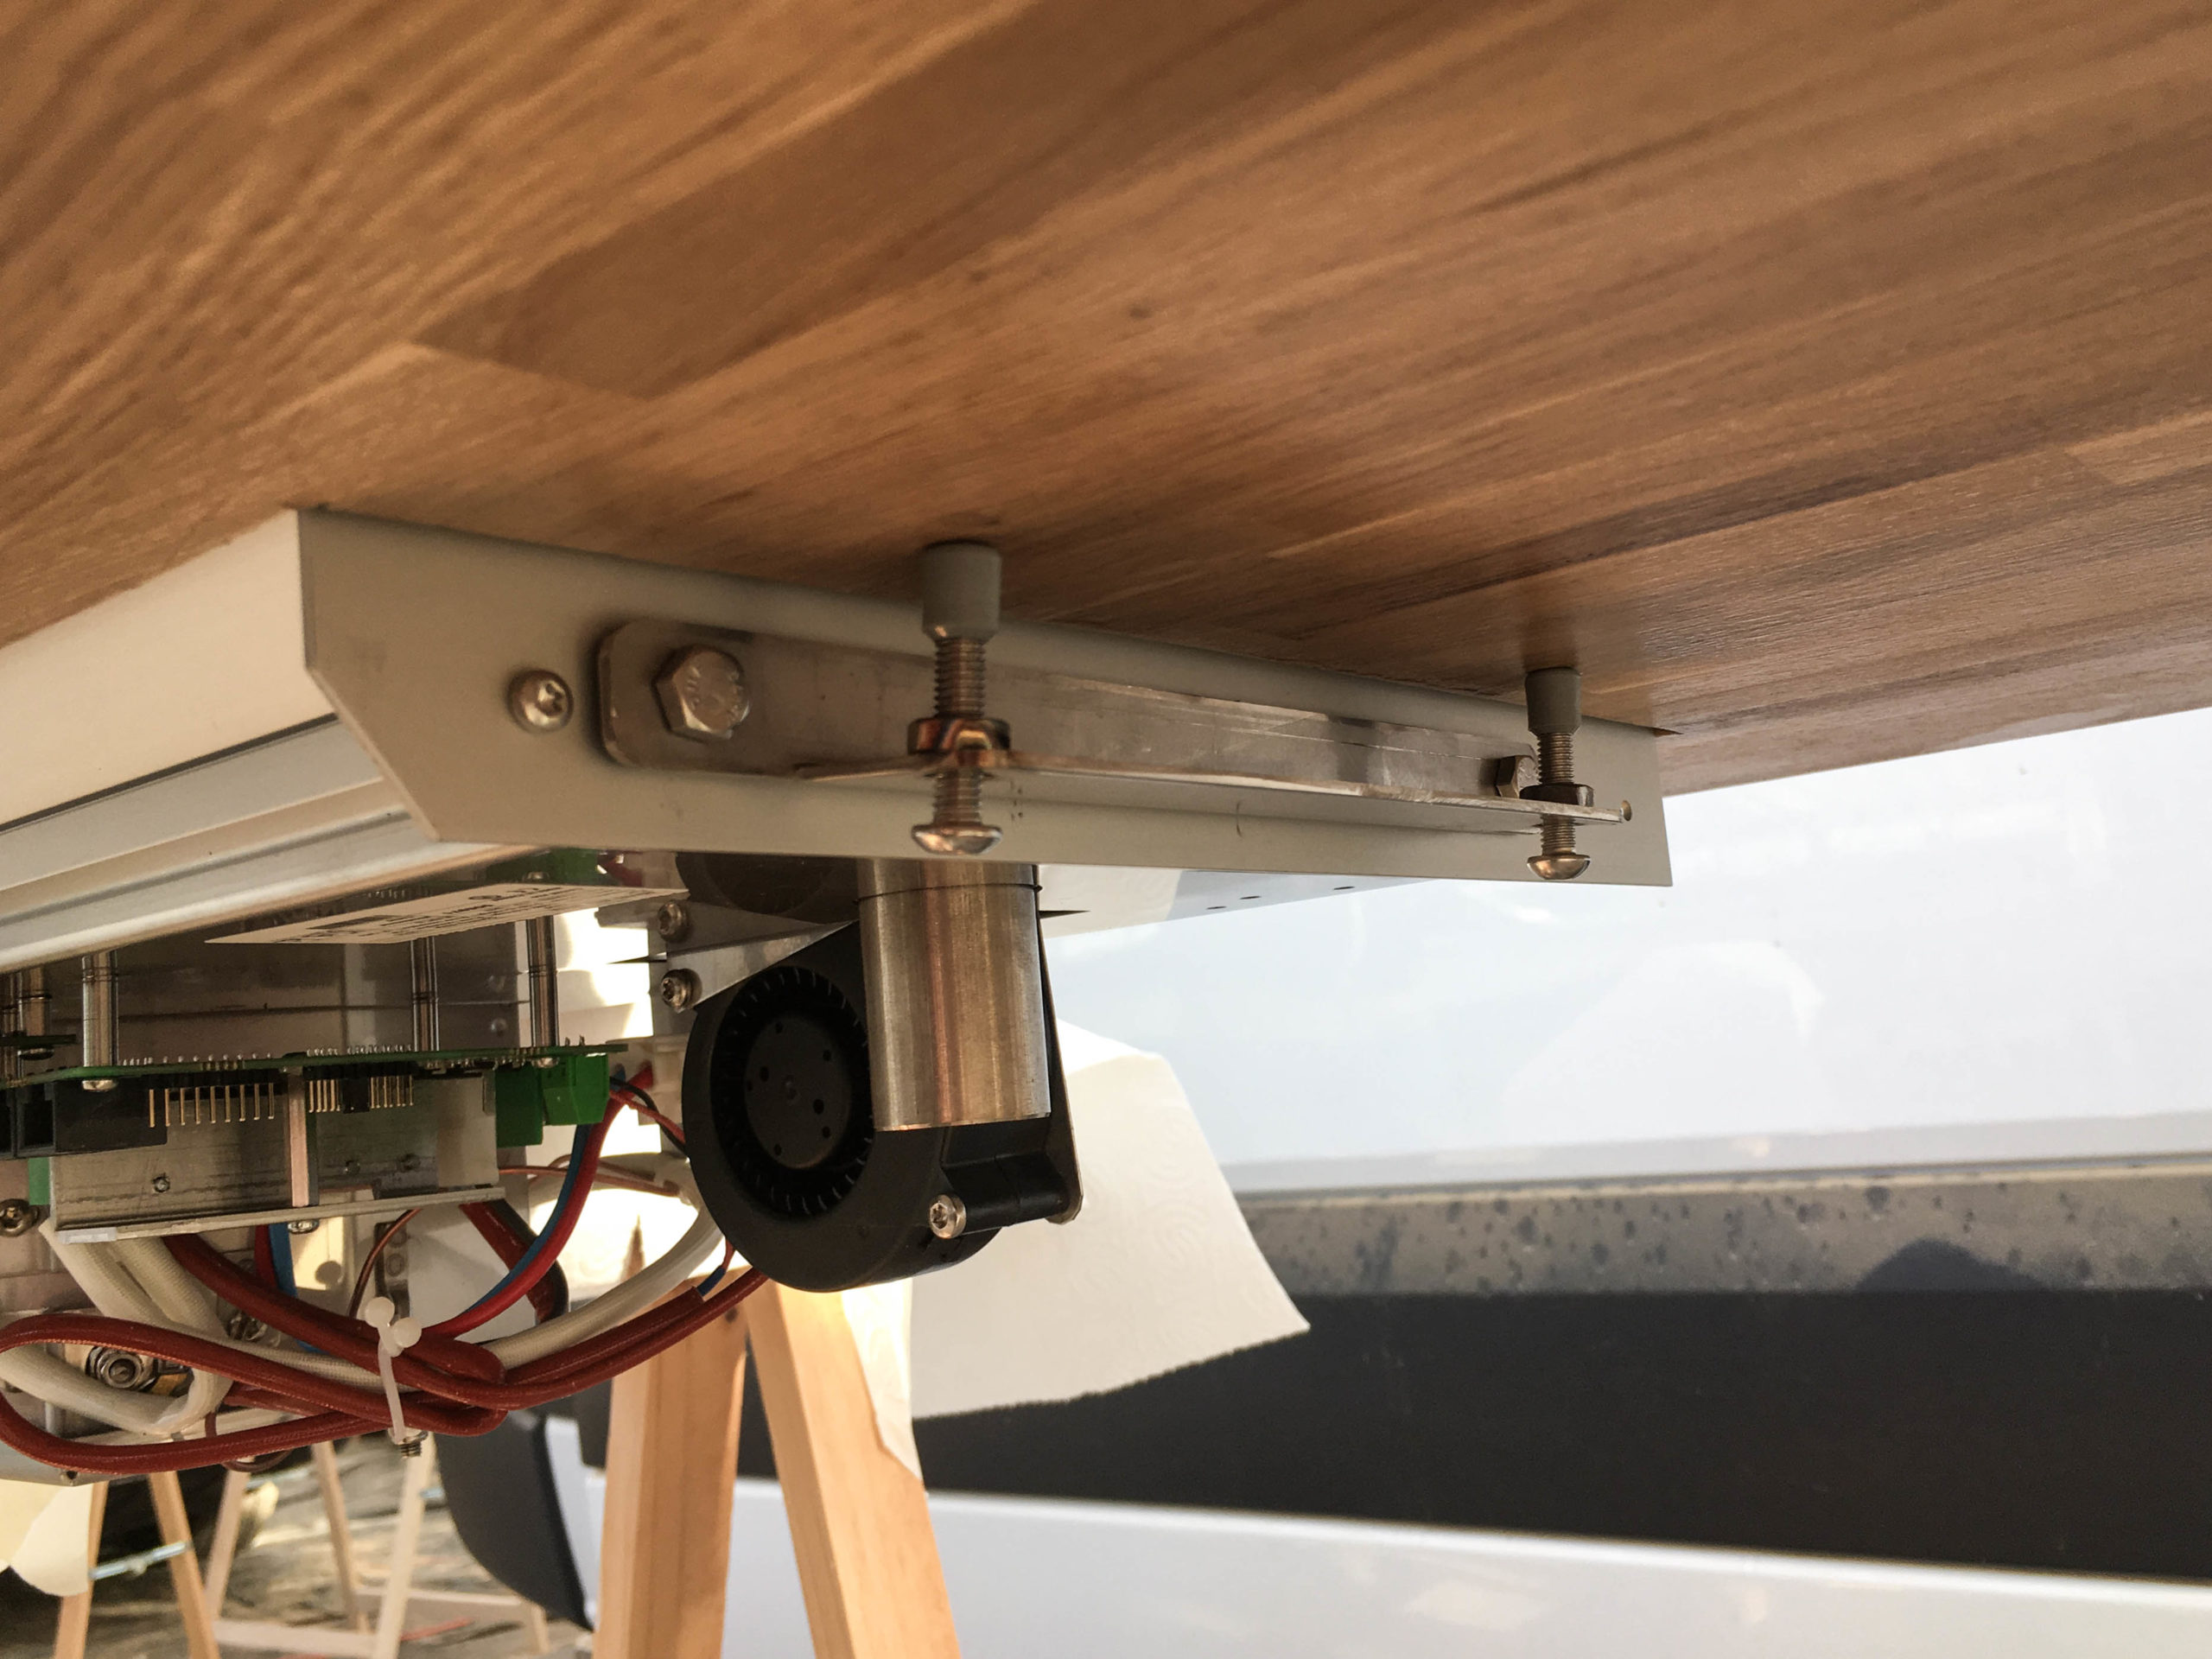
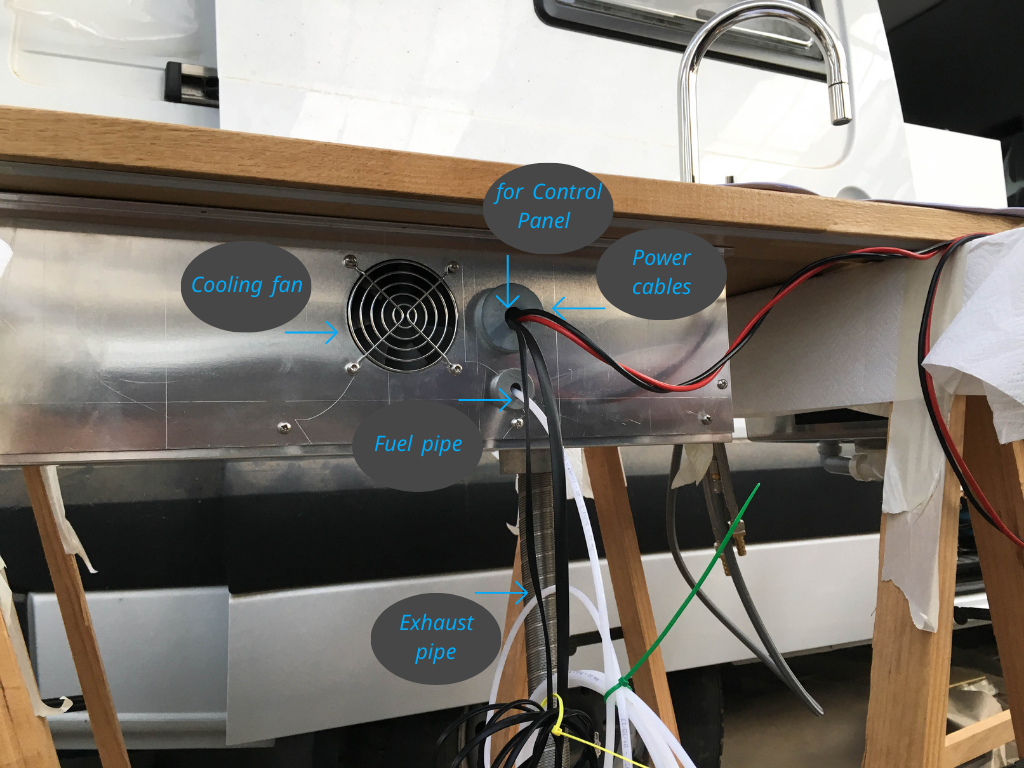
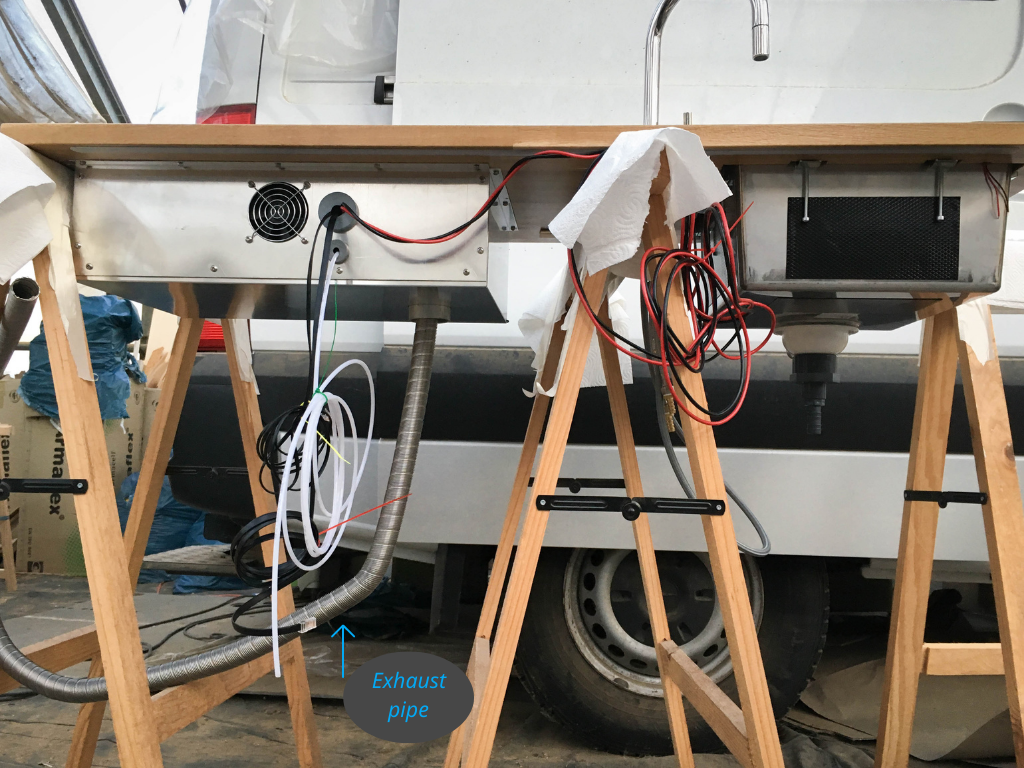
In the next step we mounted the ventilation housing underneath the worktop around the cooker. The fuel pipe and the power cable had to stay inside the housing.
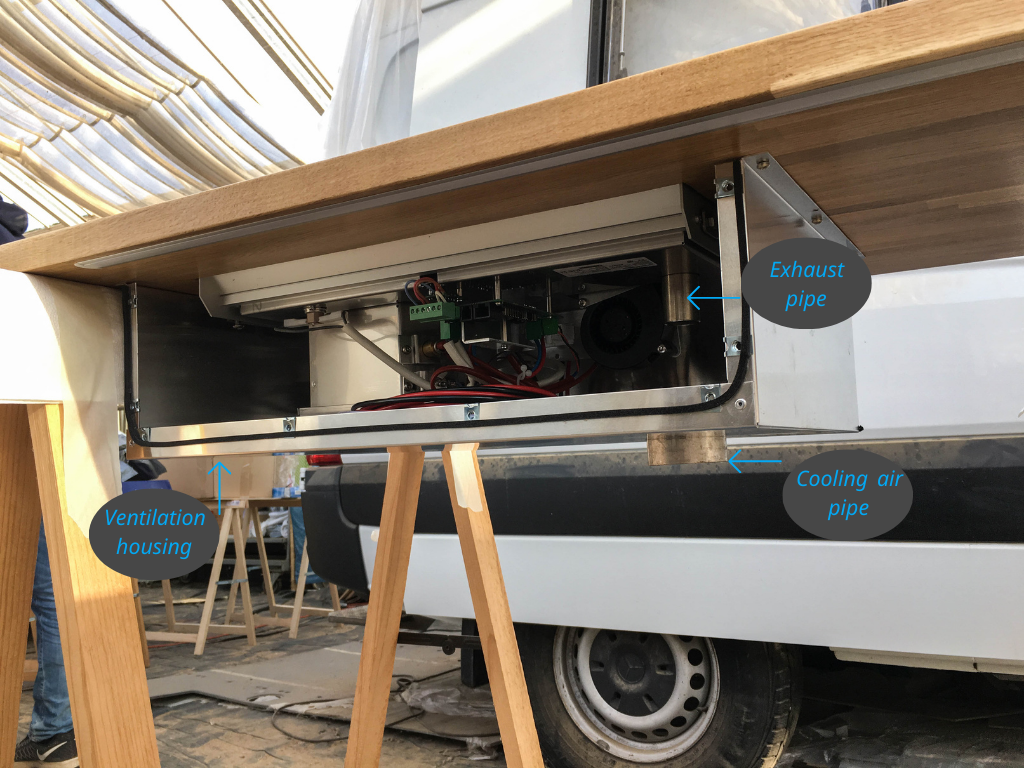
The exhaust pipe as well as the cooling air outlet have to be attached with hose clamps; we decided to only install the exhaust pipe in this step, we’ll get back to the cooling air pipe later. Then the cooling fan has to be connected to the board of the control system. Pay attention that the opening of the connectors match.
After mounting the fuel pipe, the cable of the cooling fan and the power cable to the other cables of the control system with clamps, we threaded the cables through the sealings. Then we attached the front panel to the ventilation housing. The cables and pipes should not touch any hot areas or surfaces like the combustion chamber or exhaust pipe neither on the inside nor on the outside.
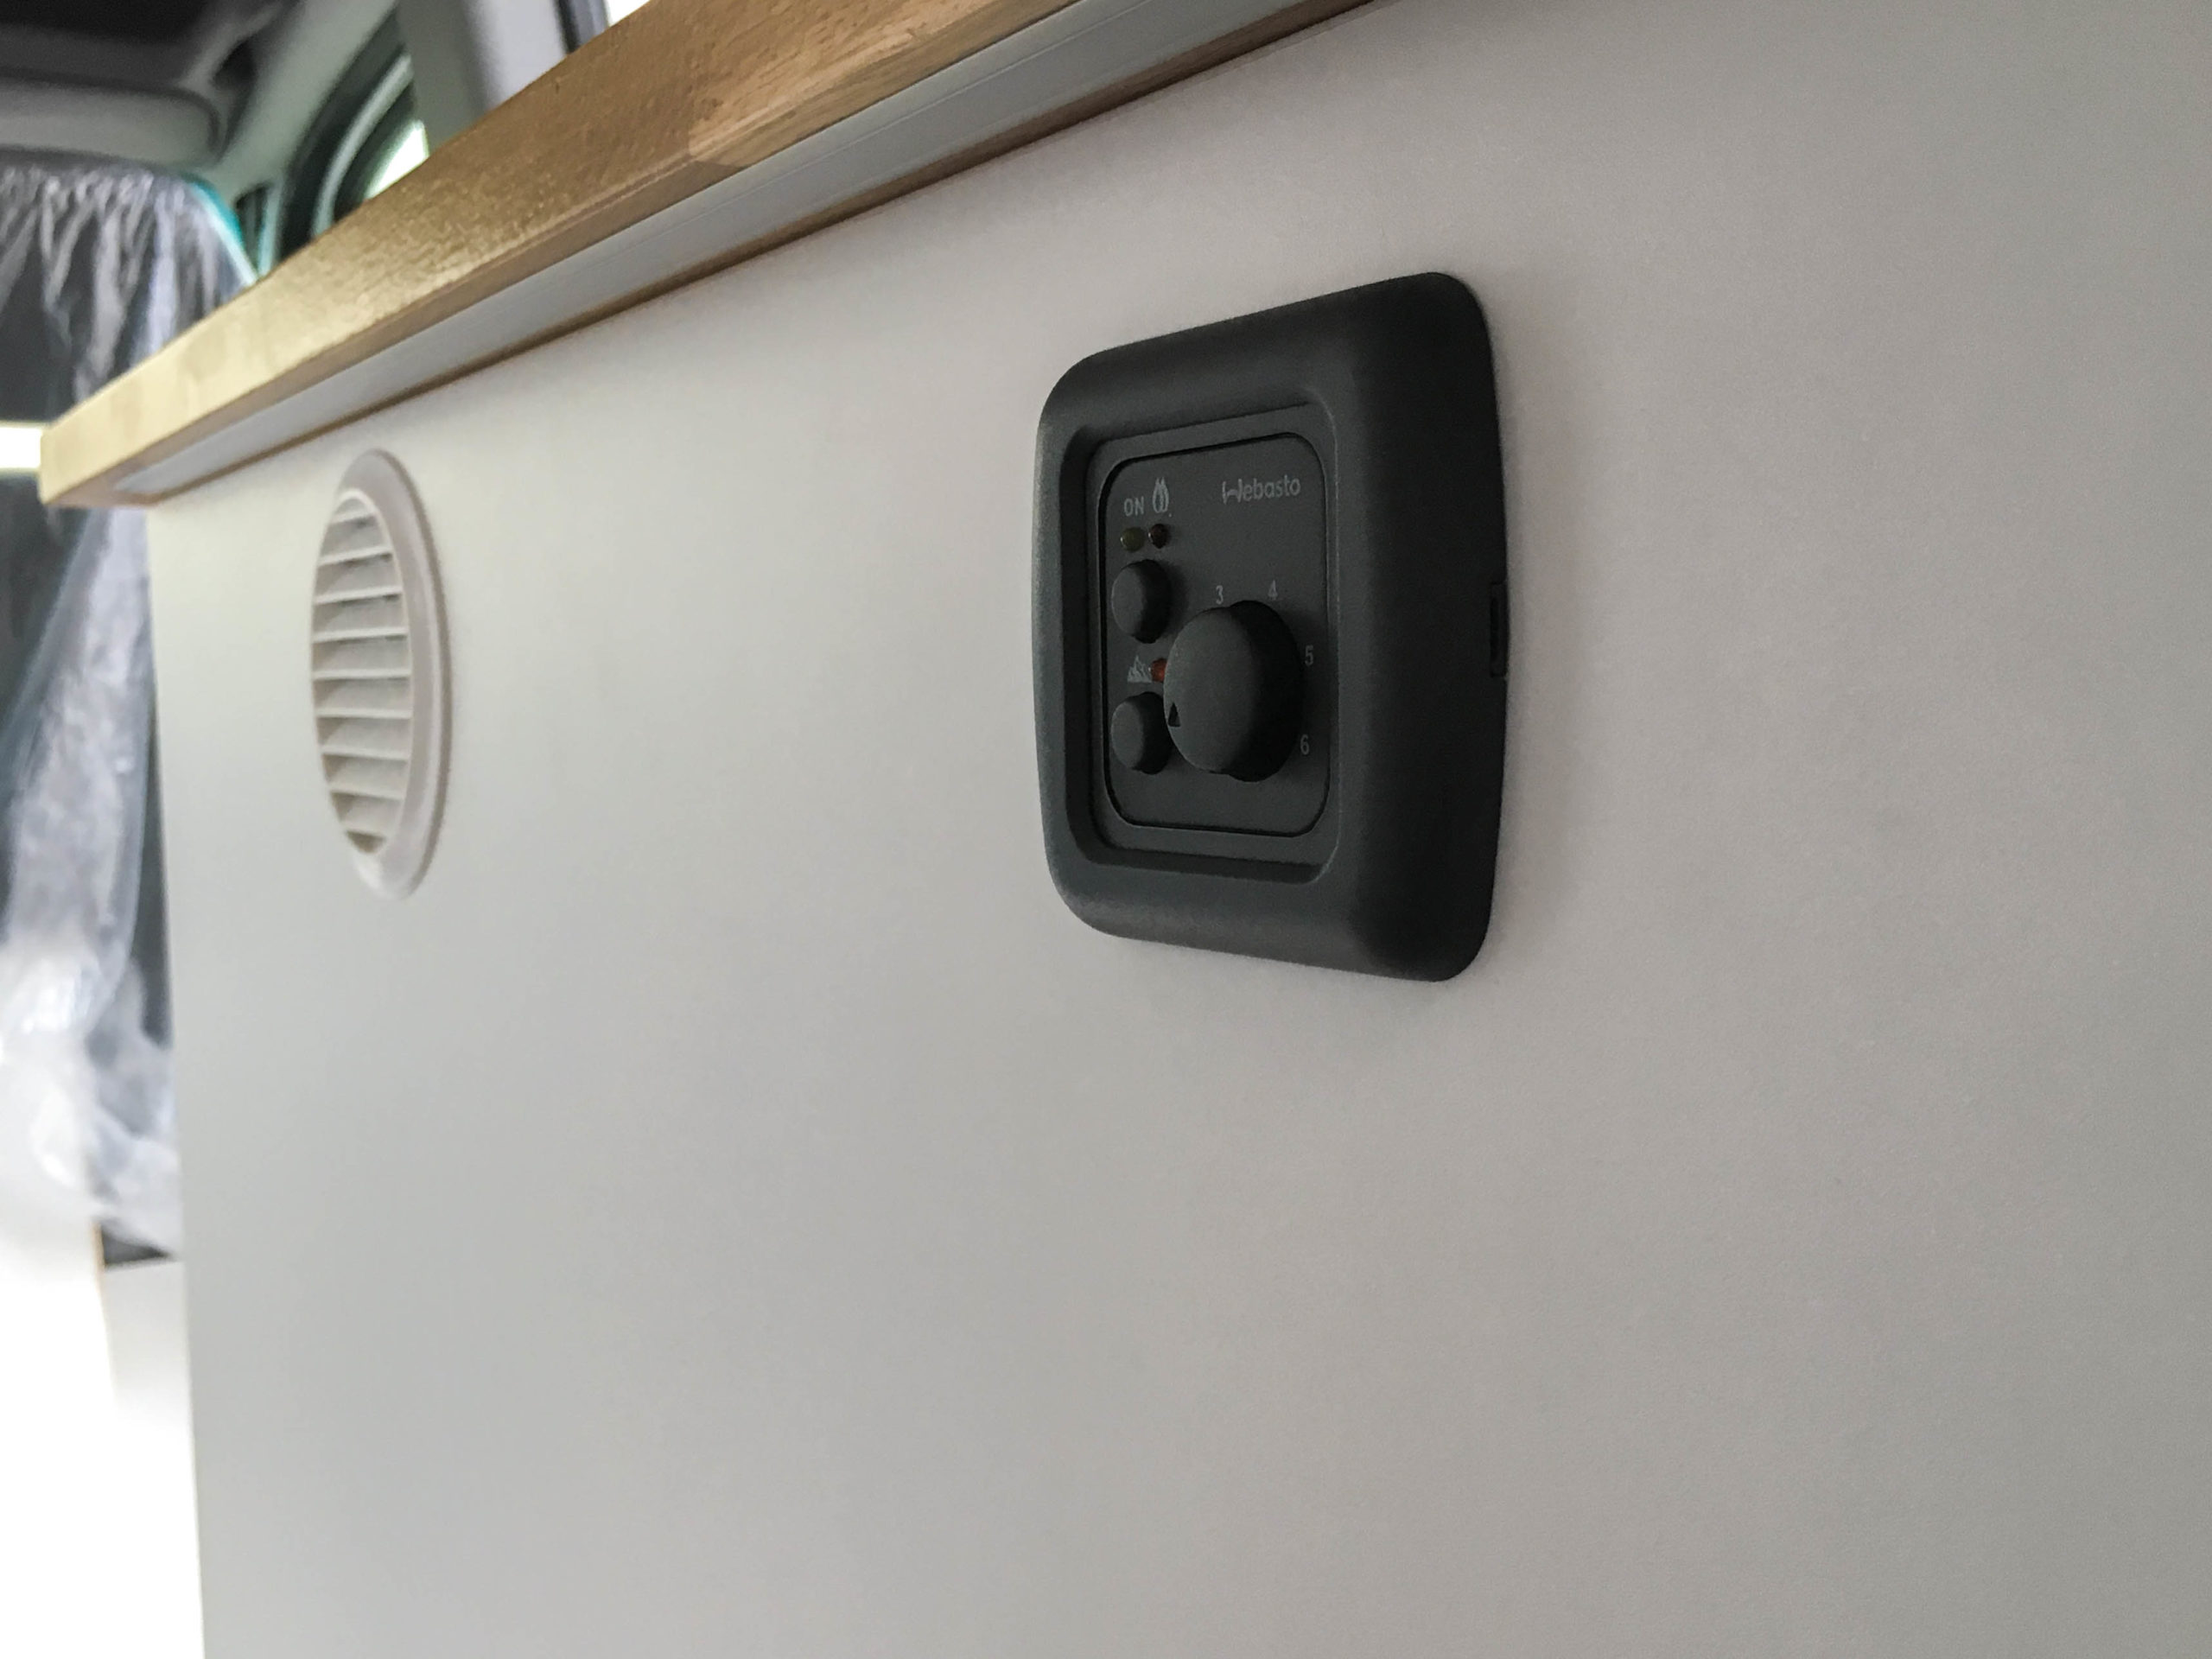
Installation of the control panel
The control panel has to be arranged vertically. We installed it next to the vent, close to the cooker.
Fuel pipe and fuel supply
The maximum length of the fuel pipe should be 8 meters. The fuel tank has to be lower than the cooker but the discharge head of the fuel pump should not be more than 1,5 meters. The fuel is withdrawn directly from the fuel tank of the vehicle.
Fuel return pipe and fuel filter
According to the installation manual it should be possible to install the fuel pipe with a T-piece. Because of the pressure in the diesel system of the Sprinter, it’s not possible though but it might be possible in other vehicles.
The pipes have to be free and clean, there should not be any dirt between the pump and the filter or the pump could be damaged. The filter should be installed in the inside of the vehicle.
Electrical connections
The cooker works with 12 V direct current. To keep possible voltage losses as low as possible, the manufacturer recommends to keep the power cable as short as possible and use as little connecting plugs as possible.
Exhaust system
For the exhaust pipe as well as for the cooling air pipe, we drilled holes into the ground. While positioning the devices, note that the cooling air pipe has to stick out under the vehicle floor for at least 10 mm. Because we couldn’t lead the pipes down directly but to a place where we could drill a hole in the floor, the length of the cooling air pipe just fit. We sealed the bottom outlets with heat-resistant silicone. To prevent the accumulation of water in the pipes, the exhaust pipe and the cooling air pipe have to be laid downhill.
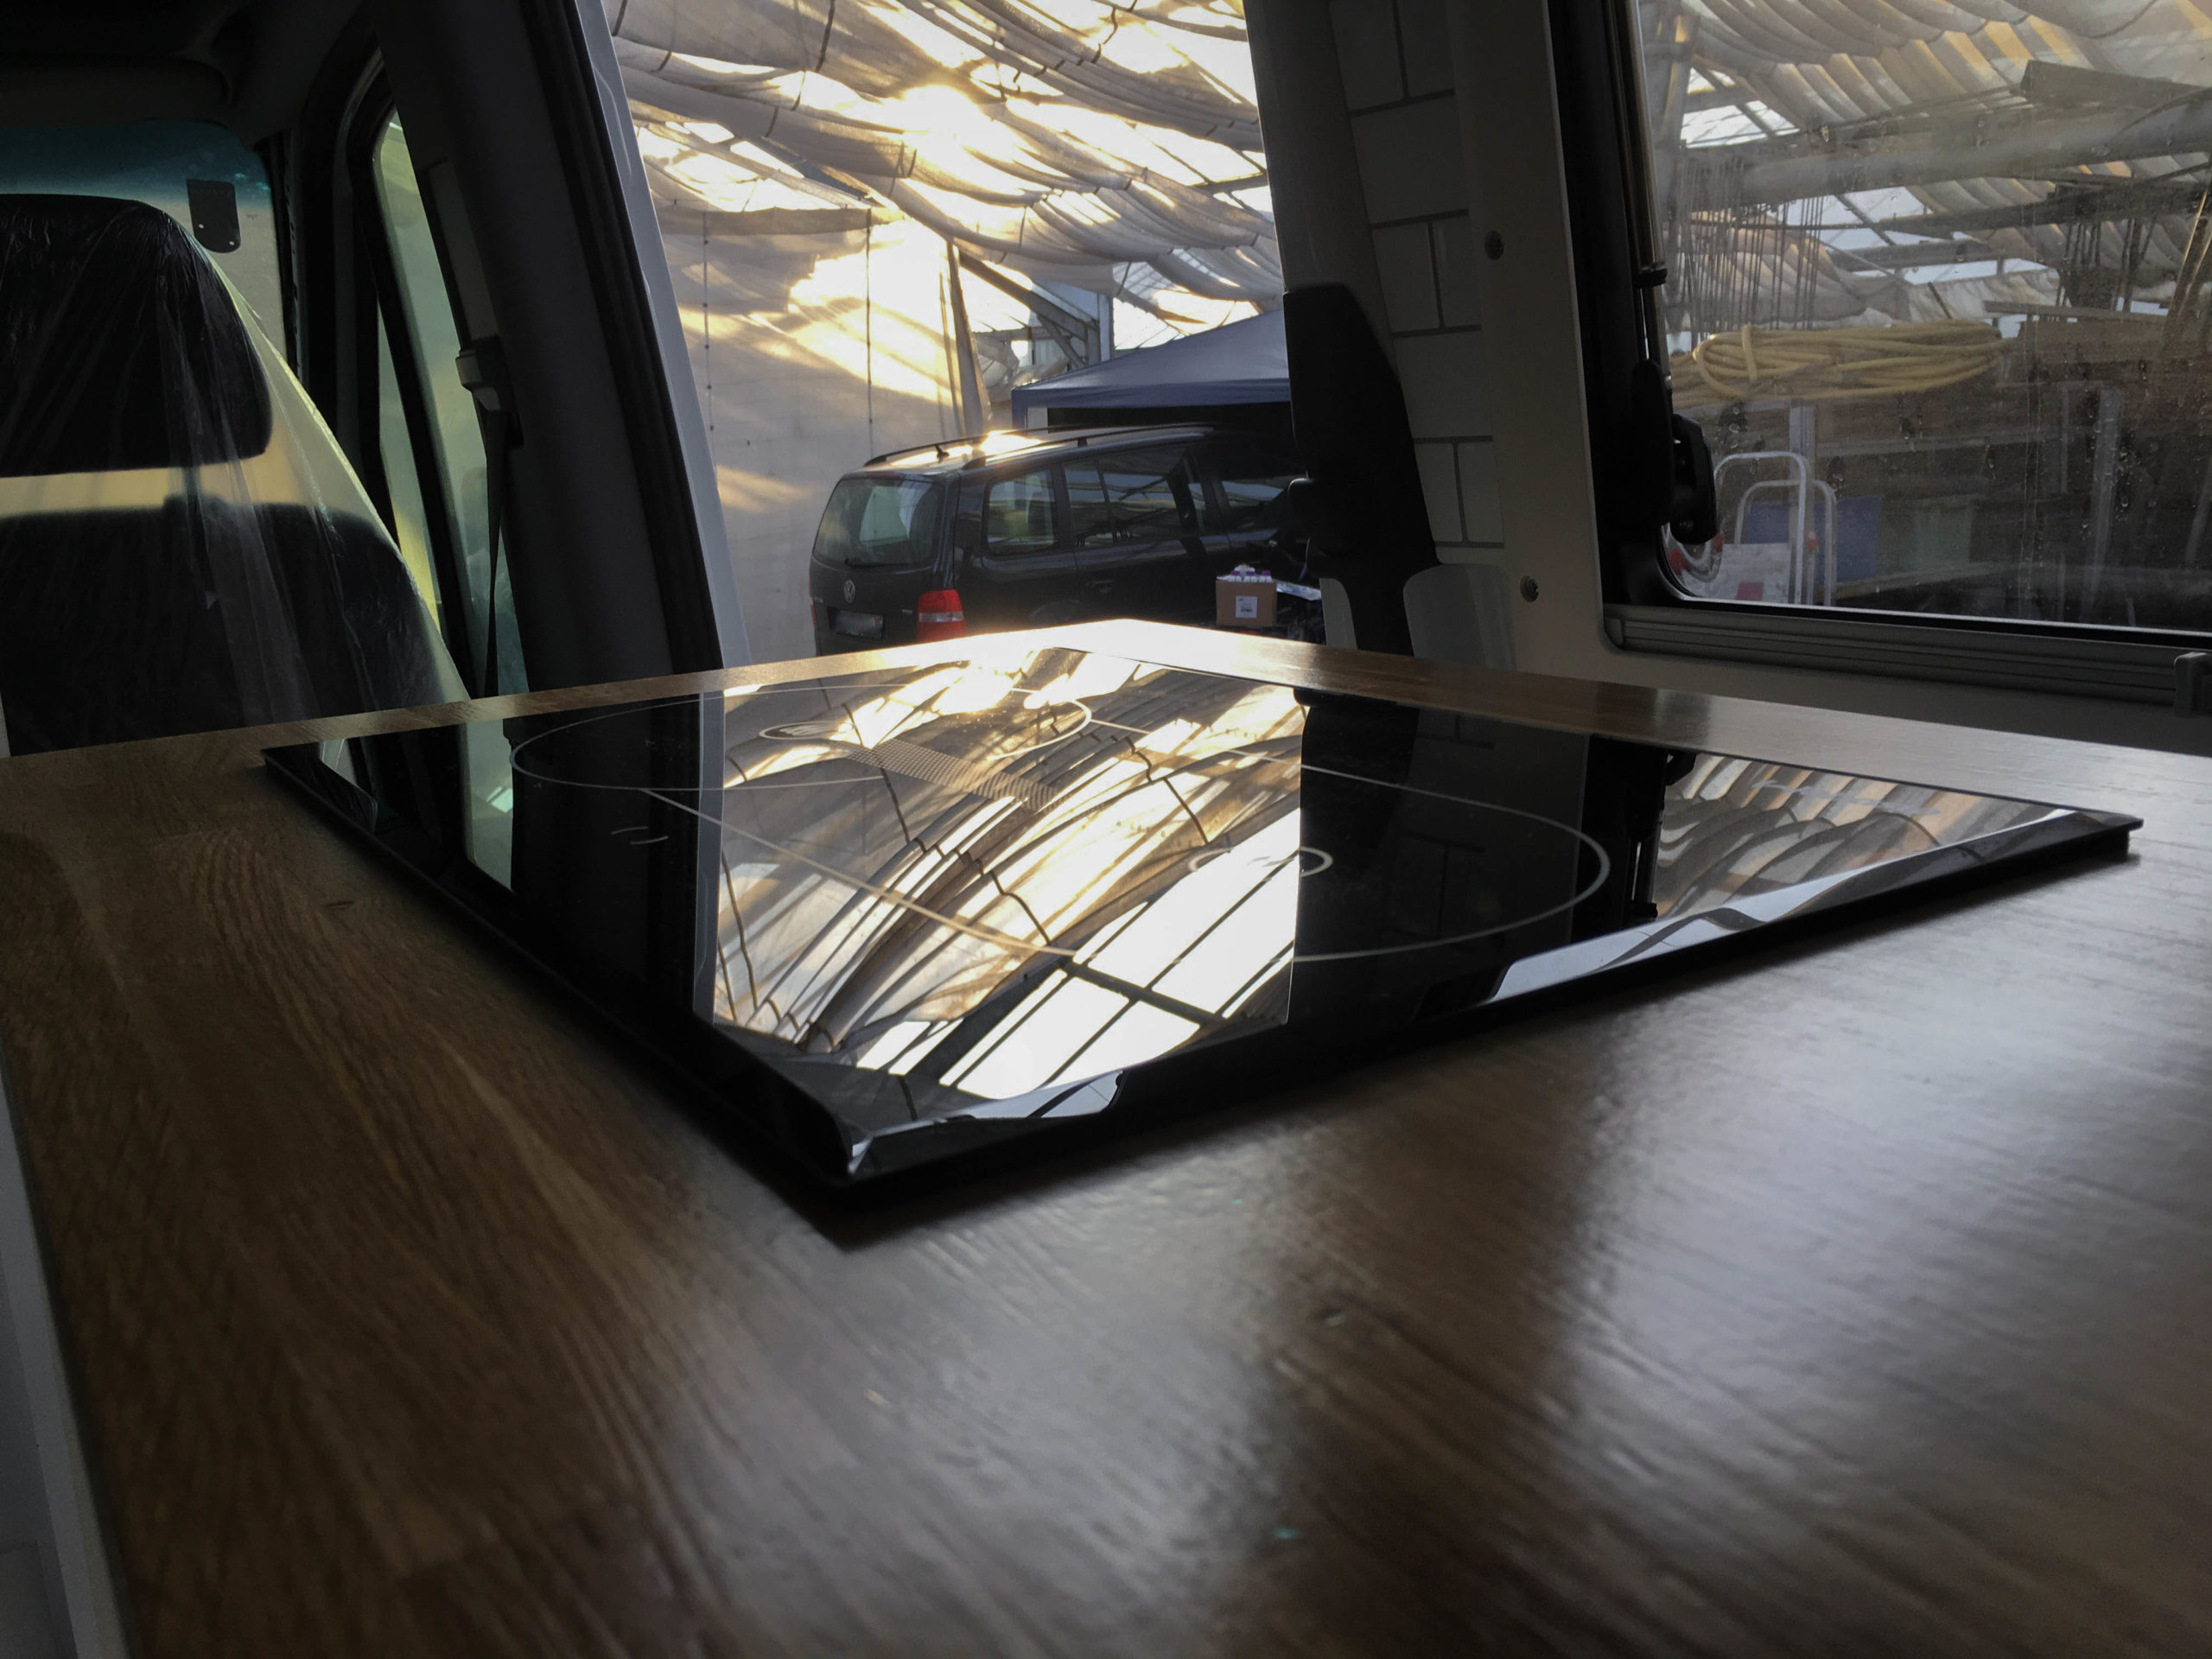
Installation in the Camper
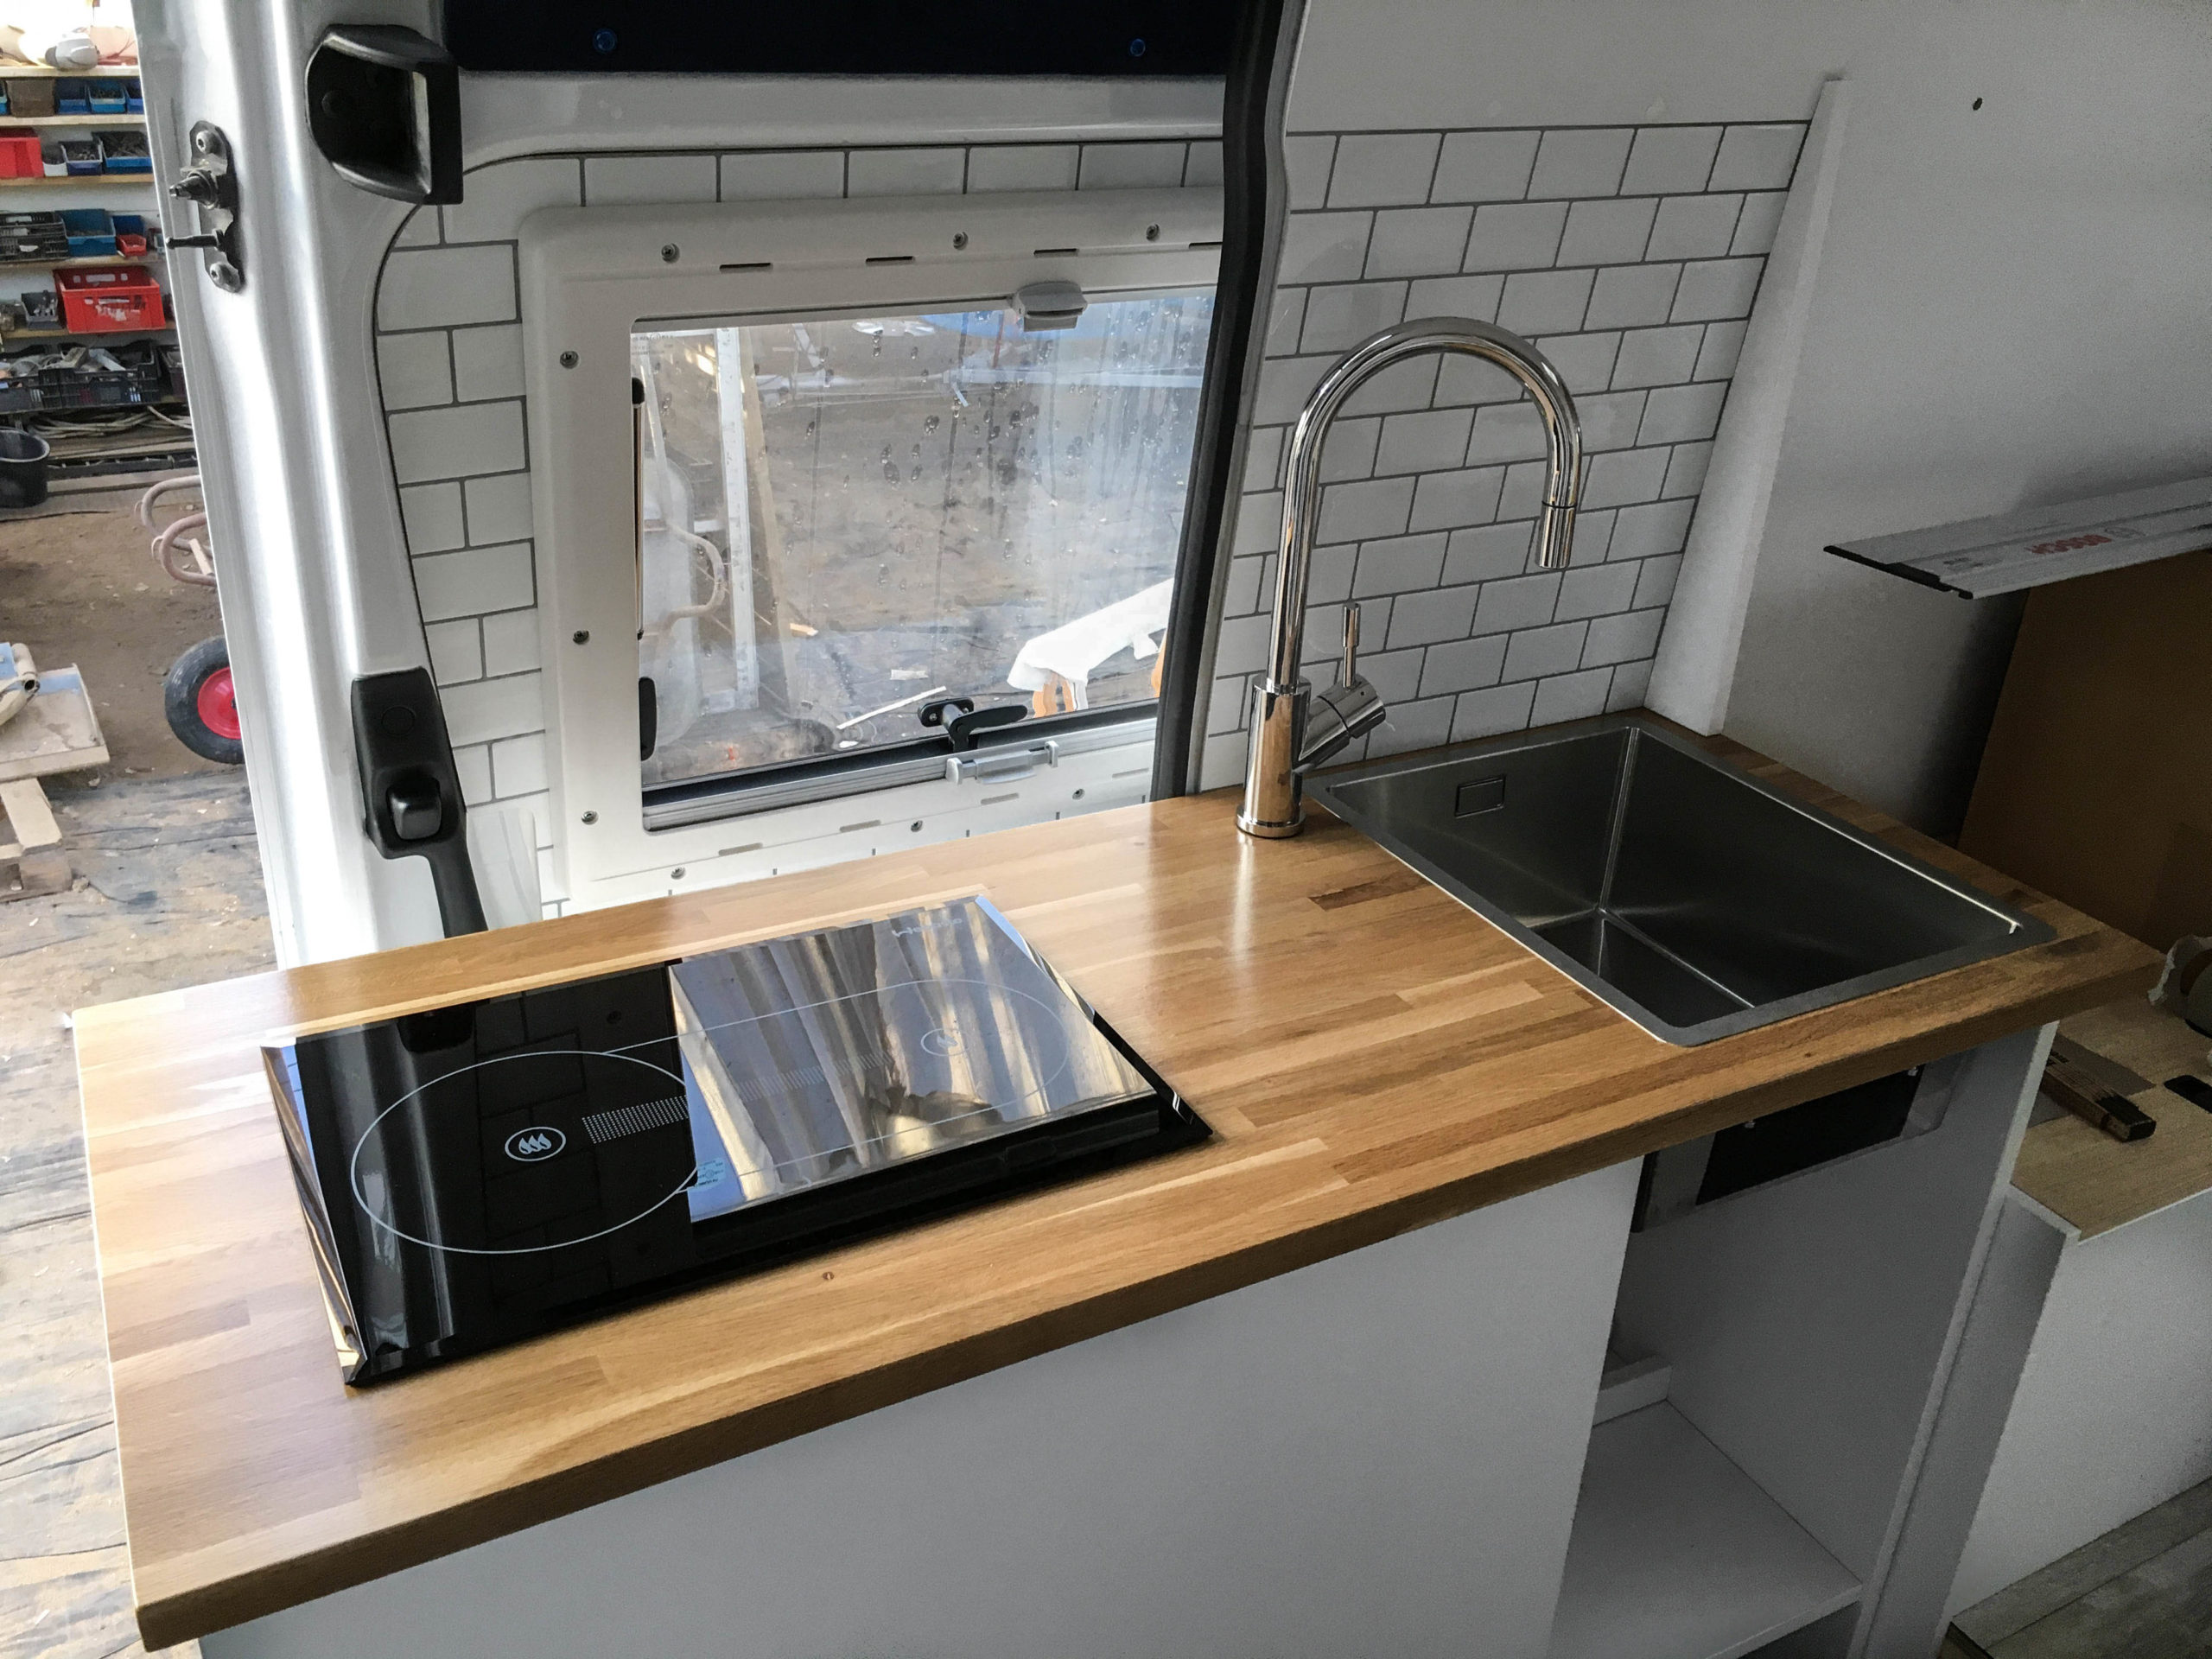
After installing the cooker as well as all pipes (except the cooling air pipe) into the worktop, we finally installed it, including the cooker, in the vehicle.
Worktop with cooker in the Camper!
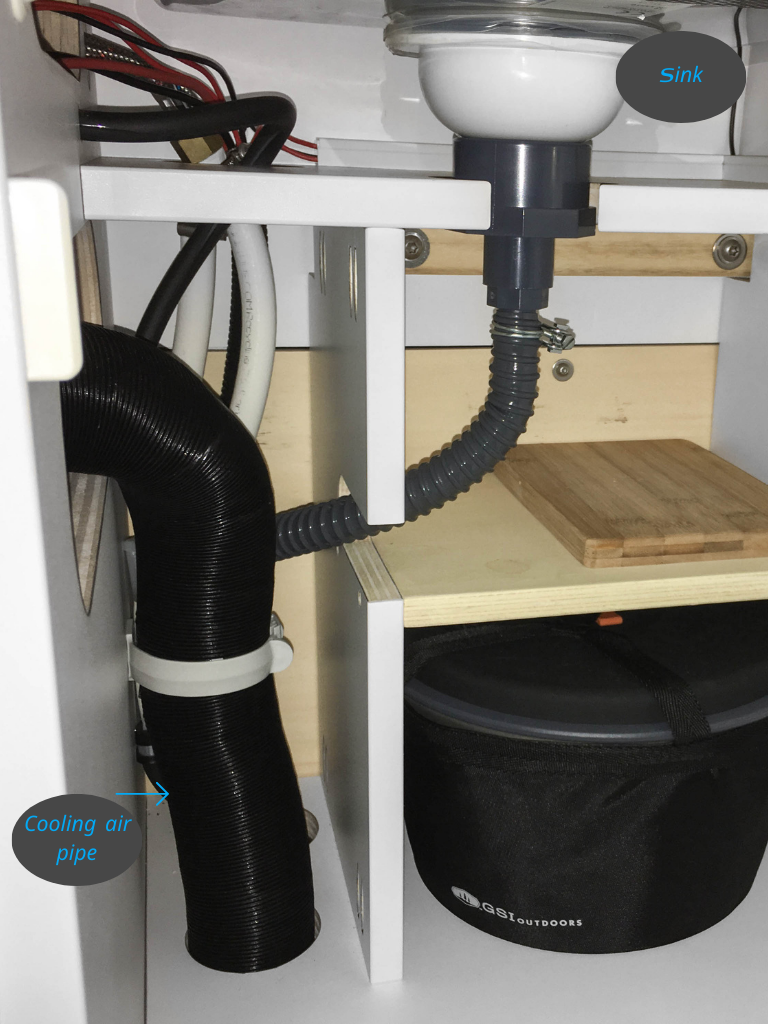
Then we only had to install the cooling air pipe and had to connect the cooker to the fuel tank. As already mentioned, we could not lay the cooling air pipe straight down (beneath the cooker is the fridge). So we had to lay it that the outlet is below the sink.
First activation
The maufacturer notes that after the installation of the cooker, it might not start right away – this was the case when we tried it, too. The pump had to pump the diesel up to the combustion chamber and build up pressure in the system. But be patient, after various tries, the cooker runs just perfect! Just stick to the manual the first time you use the cooker 😉
PS. If you are unsure about the installation or any repairs – please contact the manufacturer or a trained specialist who has the necessary technical knowledge, tools and equipment!
Read more about our DIY Camper Kitchen here!