
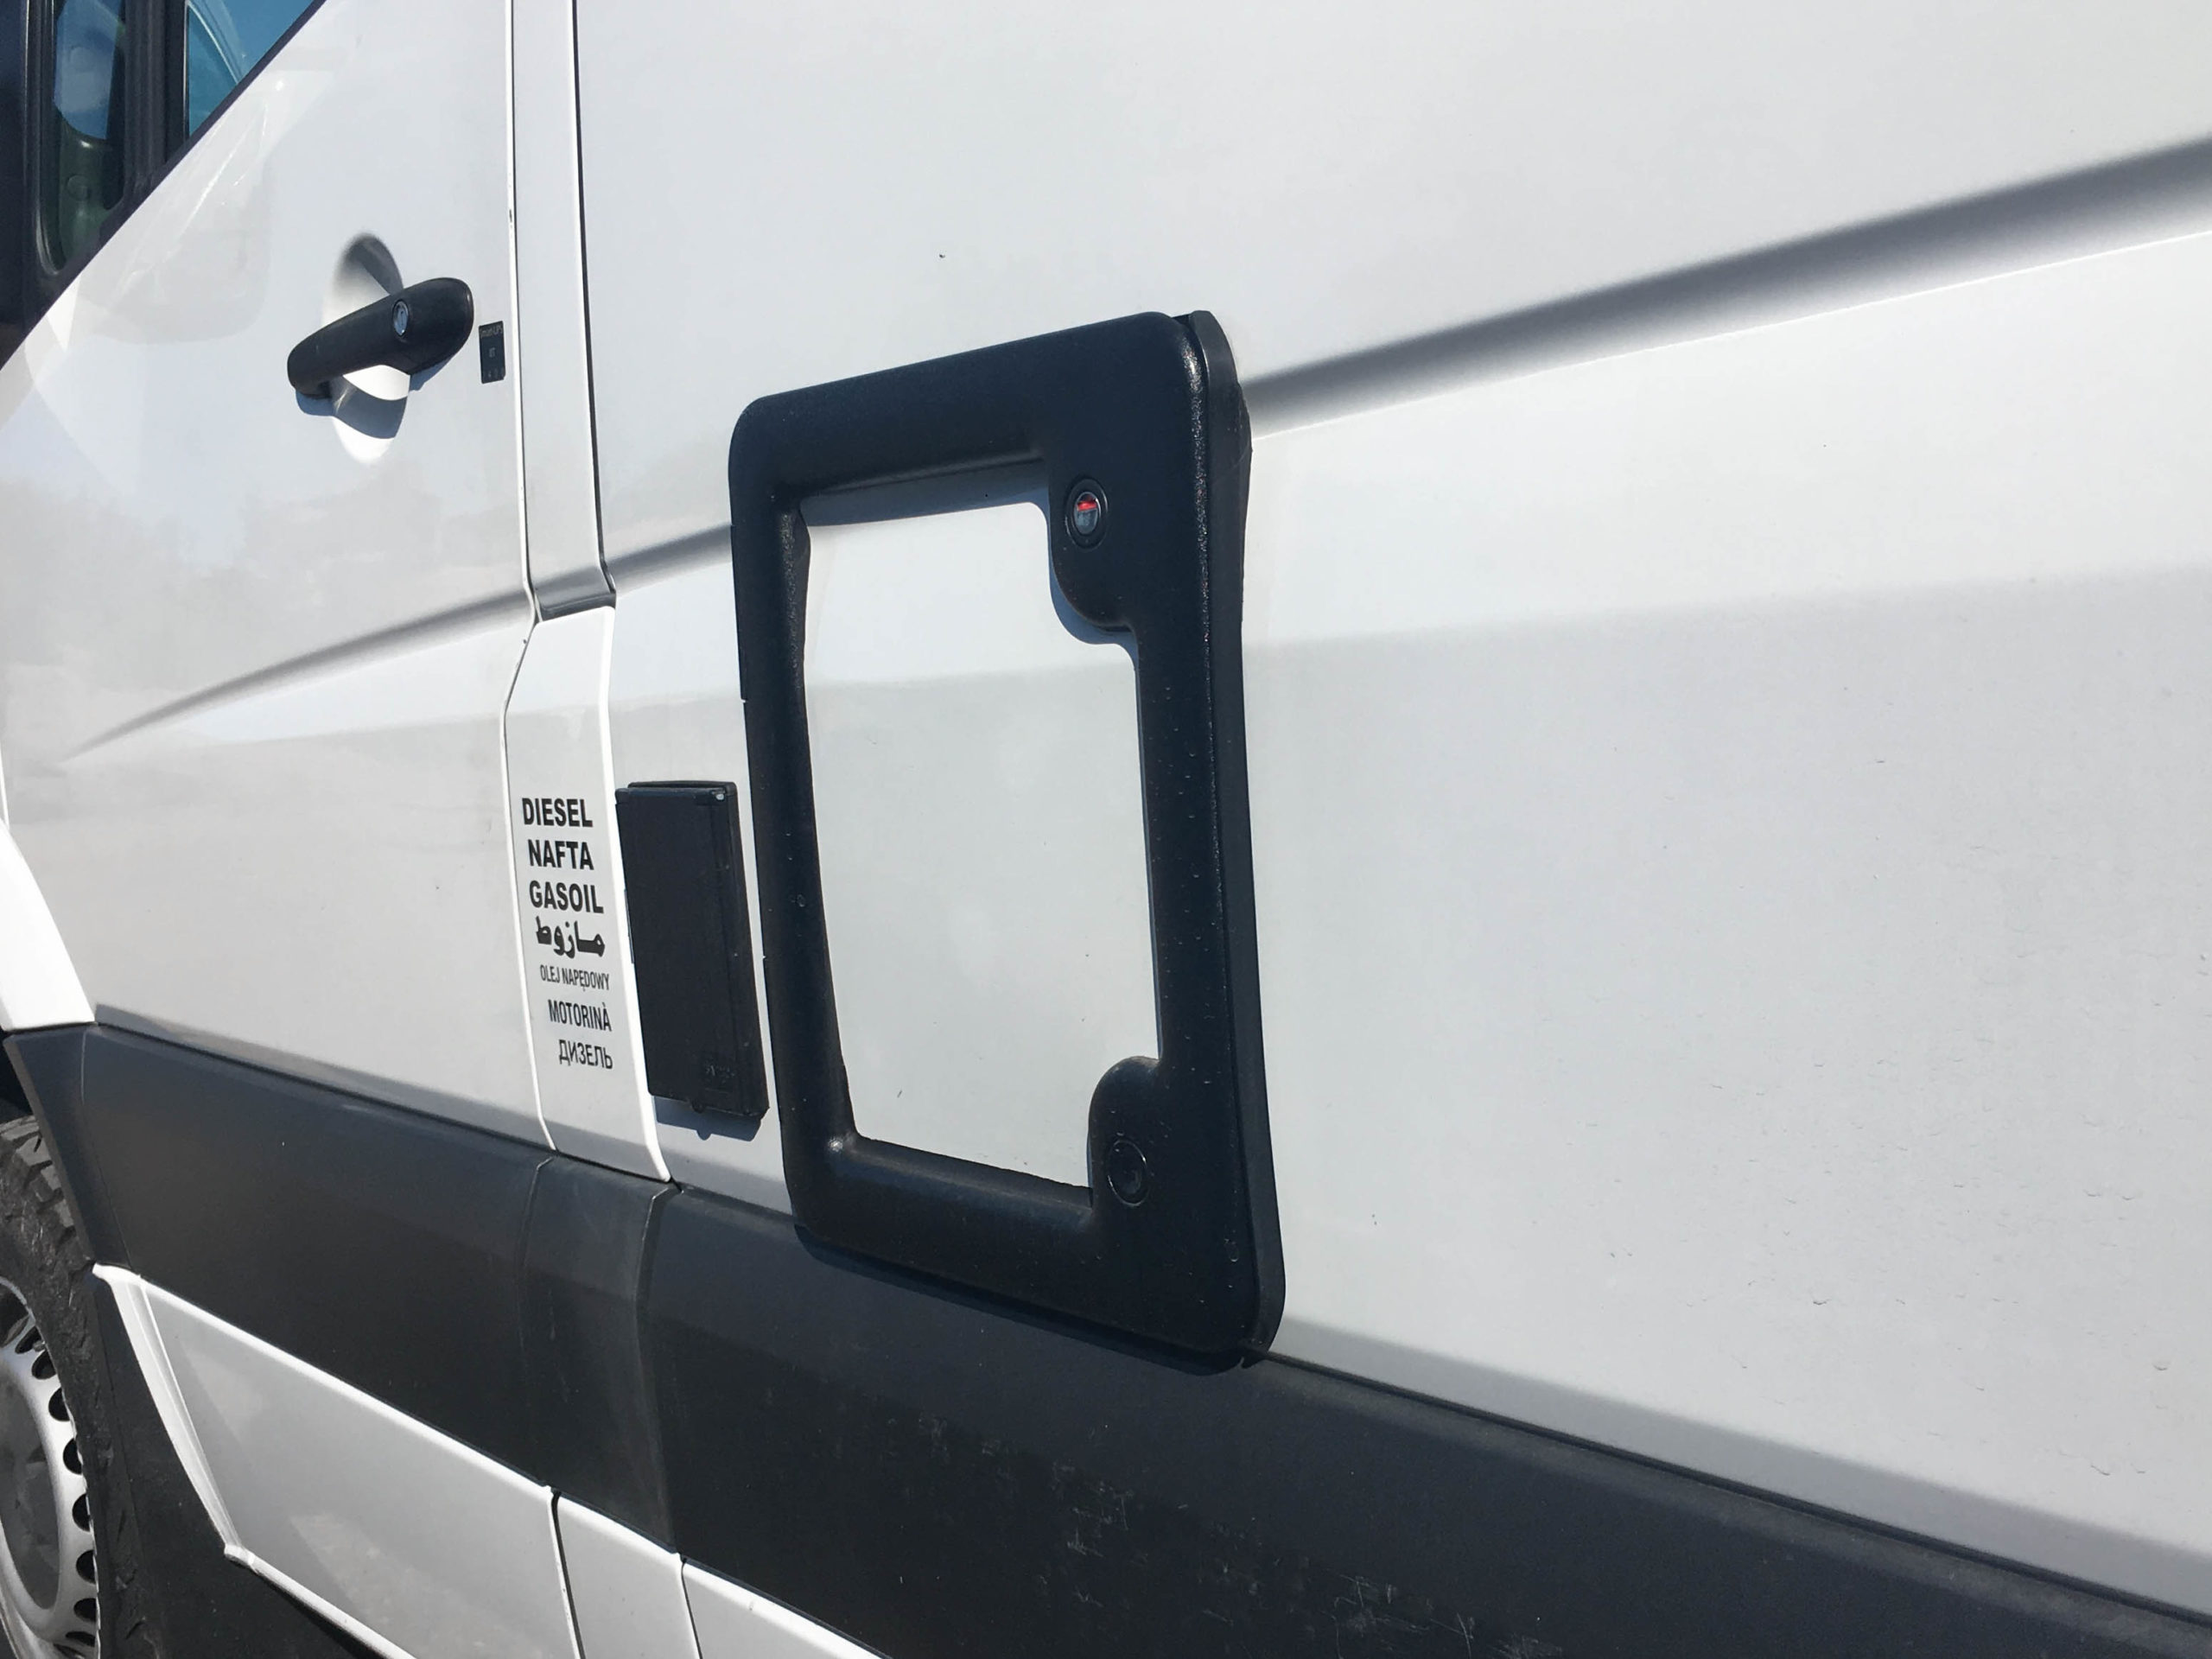
Our Campervan has a bathroom with a shower and toilet! To remove and clean the waste tank from the outside, let’s show the step-by-step installation of the Service Door.
The Thetford toilet model C223-CS with a toilet bowl that revolves 180 degrees on the base and locks into place by simply pressing down on the seat is made of light plastic material with an electric flush system, measures only 534 x 394 x 580 mm with a sitting height of 492 mm and net weight of 7,2 kg. To easily remove the 18 liter waste tank we install the Service Door Model 3 in black. The Door is made of plastic material, it’s water resistent, UV-resistent and with the push-lock you can easily open and close the Door.
Thetford Service Door Model 3
When installing the door vertically (like we do), the manufacturer advises that the door frame hinges face the driving direction.
First off, we checked the minimum available space for the door. For the door to be above the black plastic sidebar, we had to raise the shower tray on which the toilet and the waste tank will be standing – more on this here.
The maufacturer of the service door supplies all paper-templates for the cutouts of the vehicle wall. Just cut them out, draw the outlines and drill the holes. To not scratch the car paint, we stuck protective tape on before drilling and sawing.
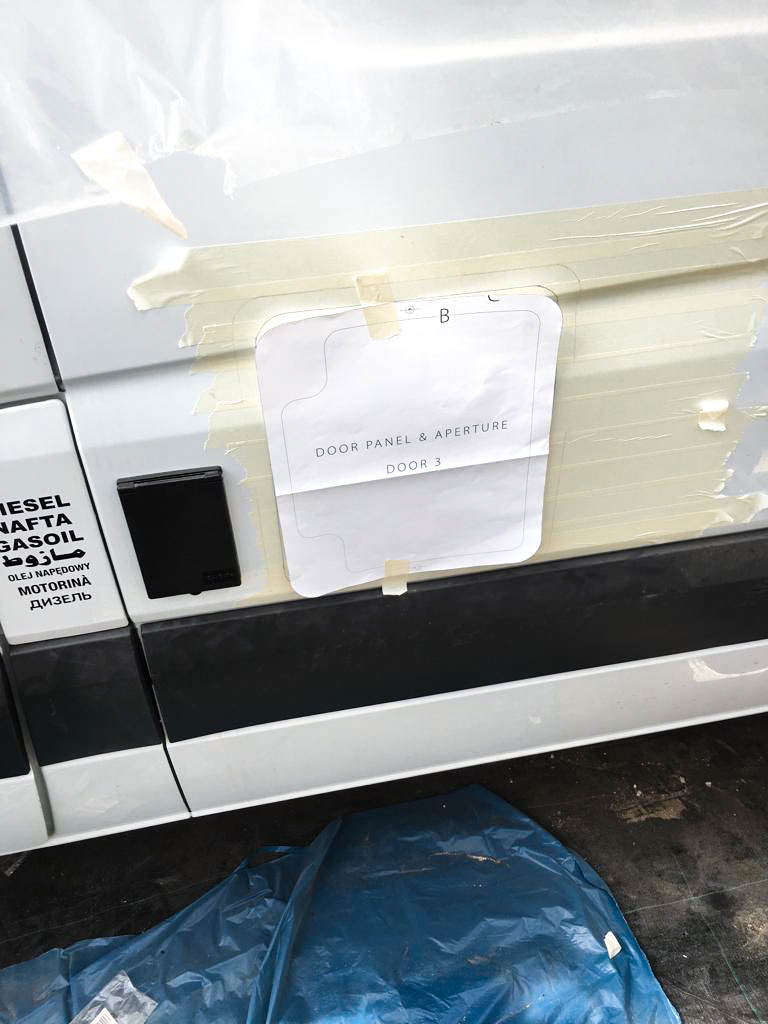
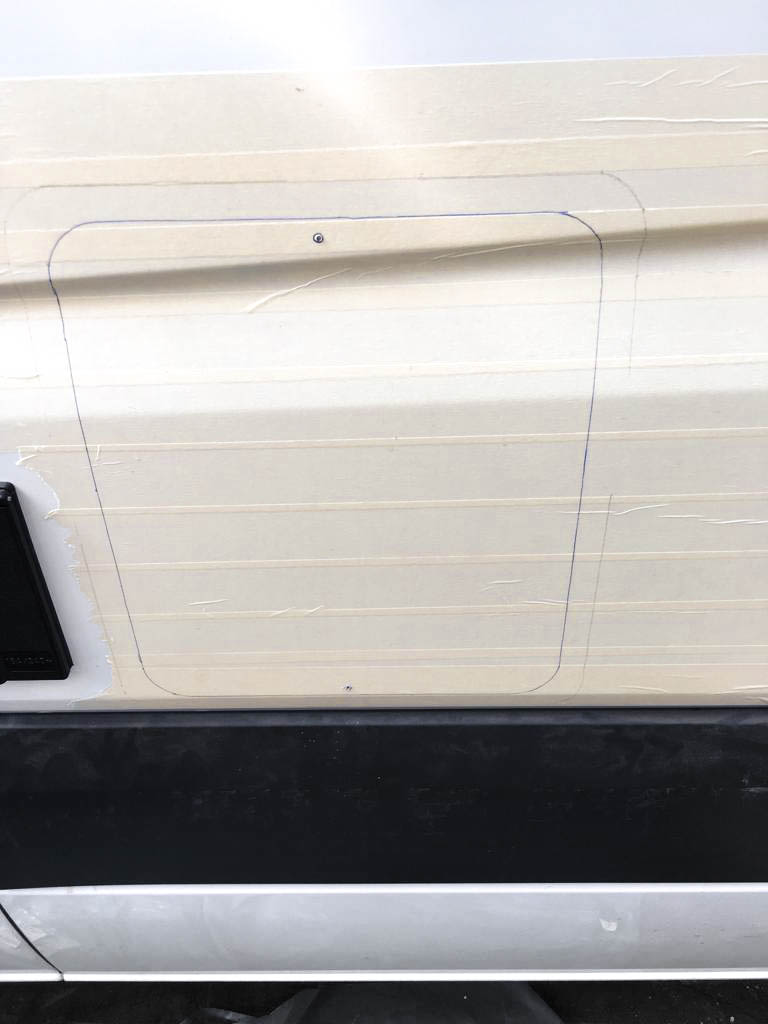
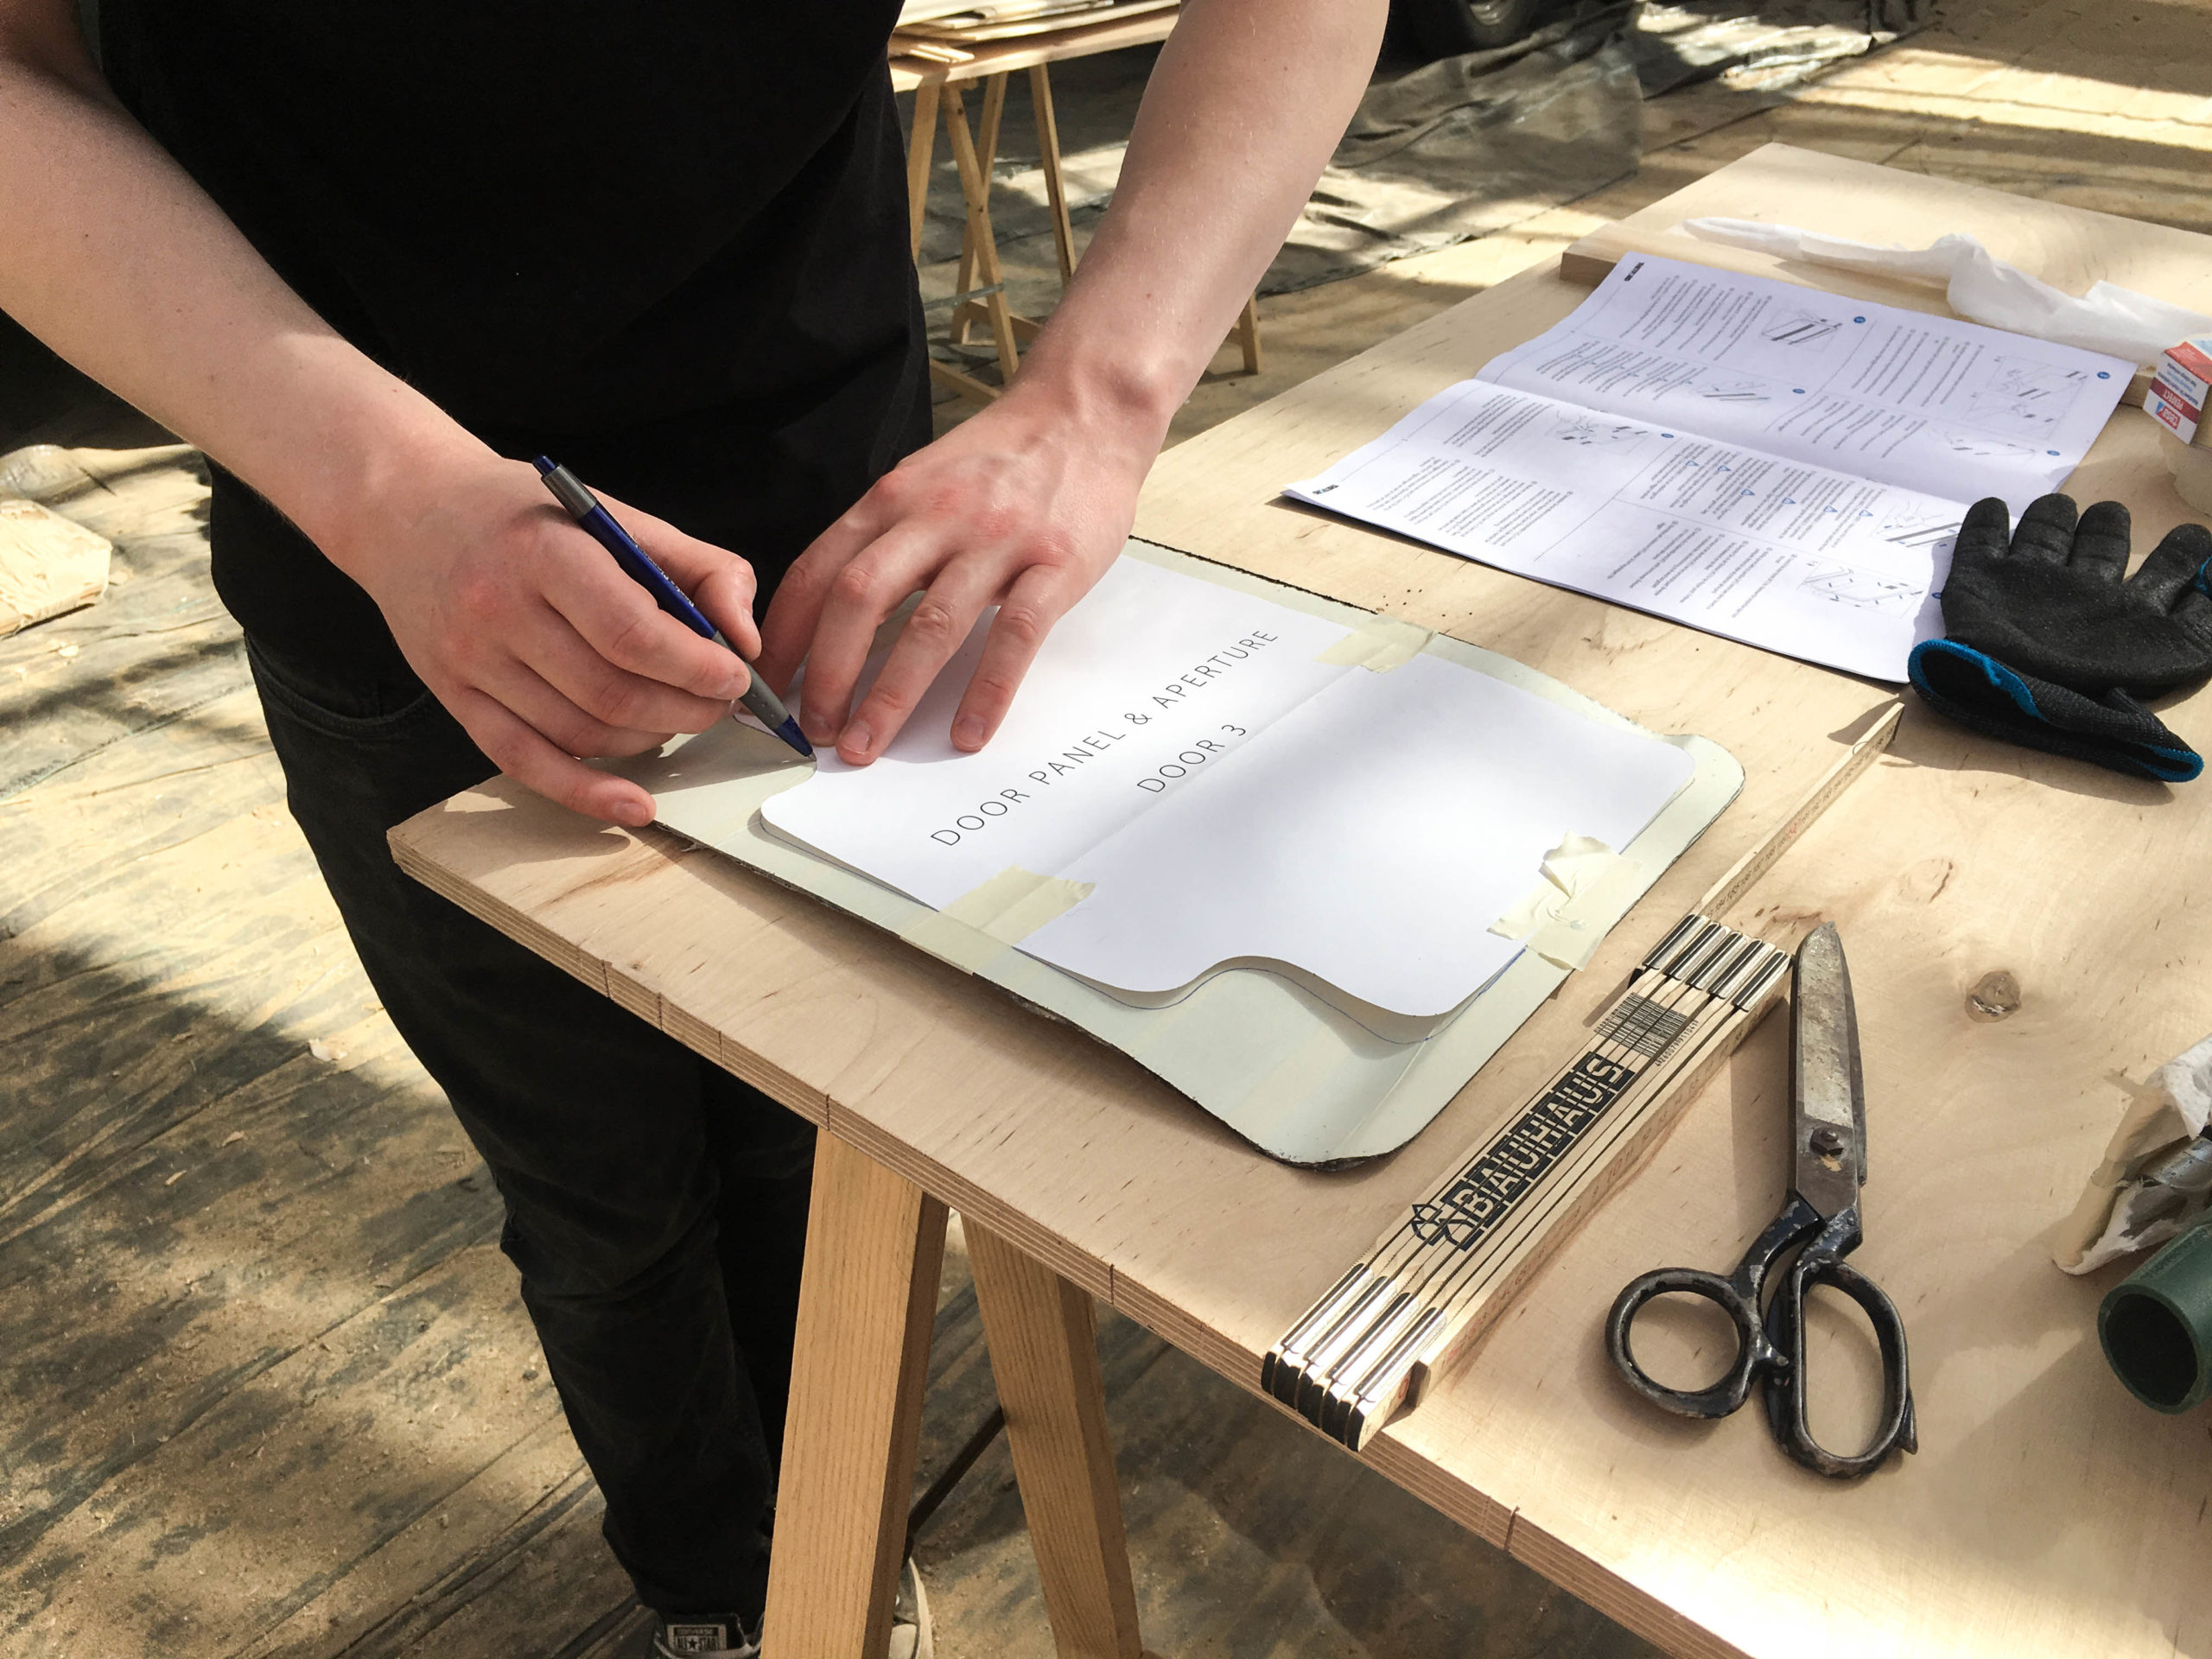
The cut out wall panel will be the door panel, so you should only saw in the indicated places, especially so you can keep any decorative stripes on the final piece for the door panel.
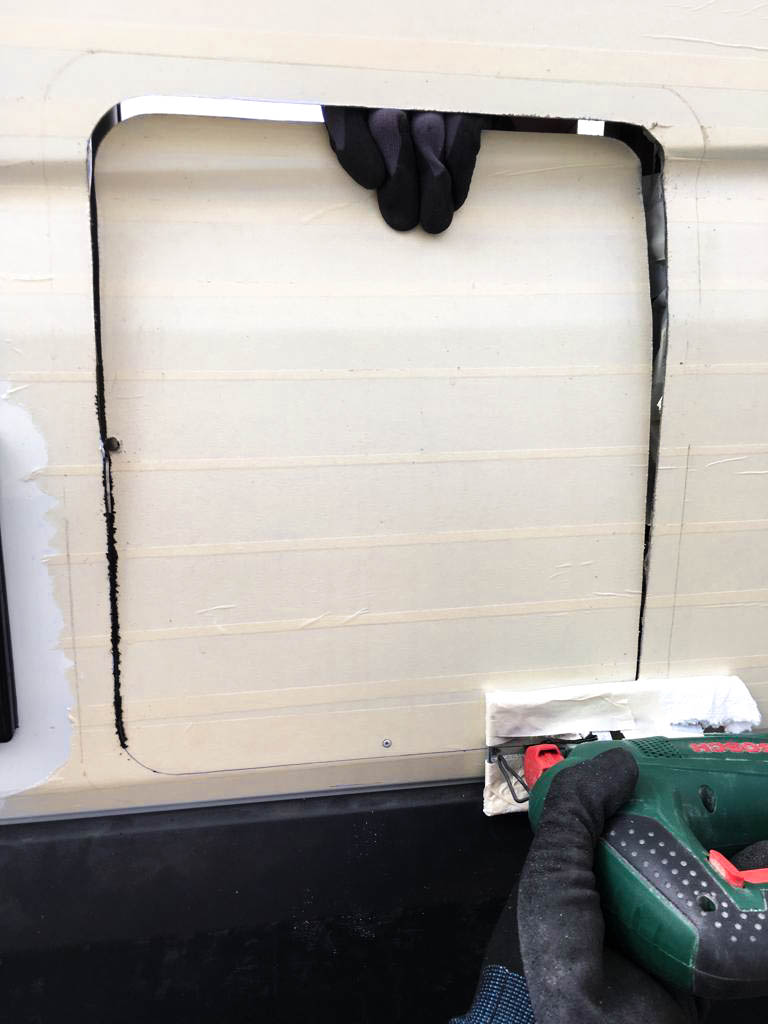
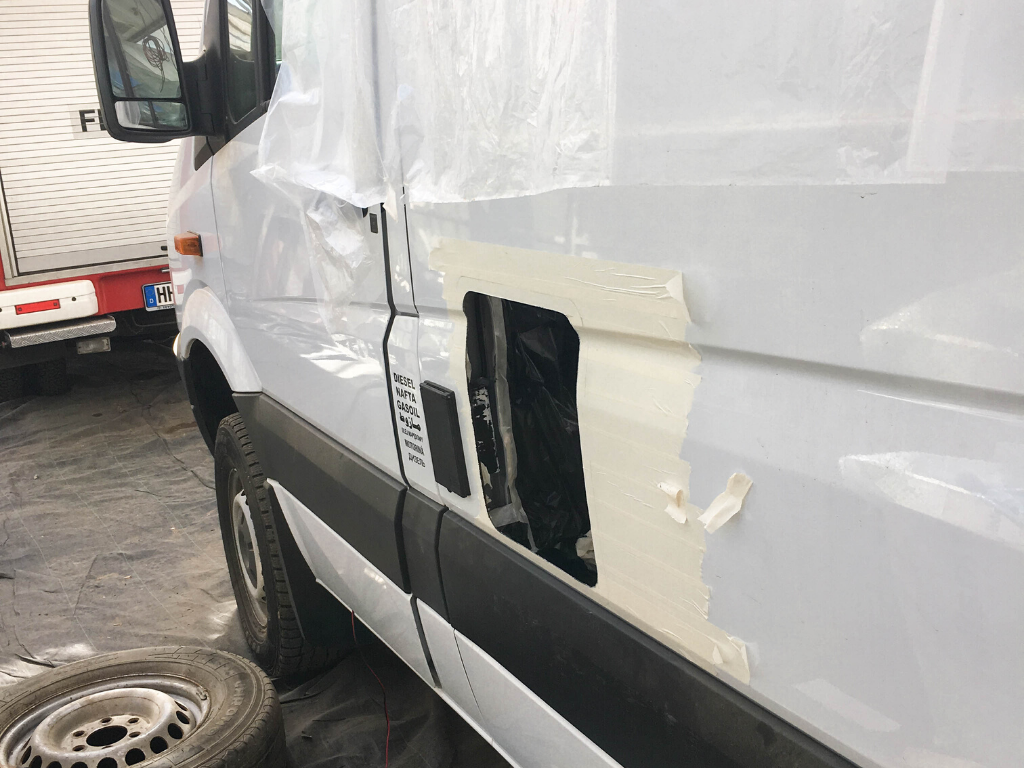
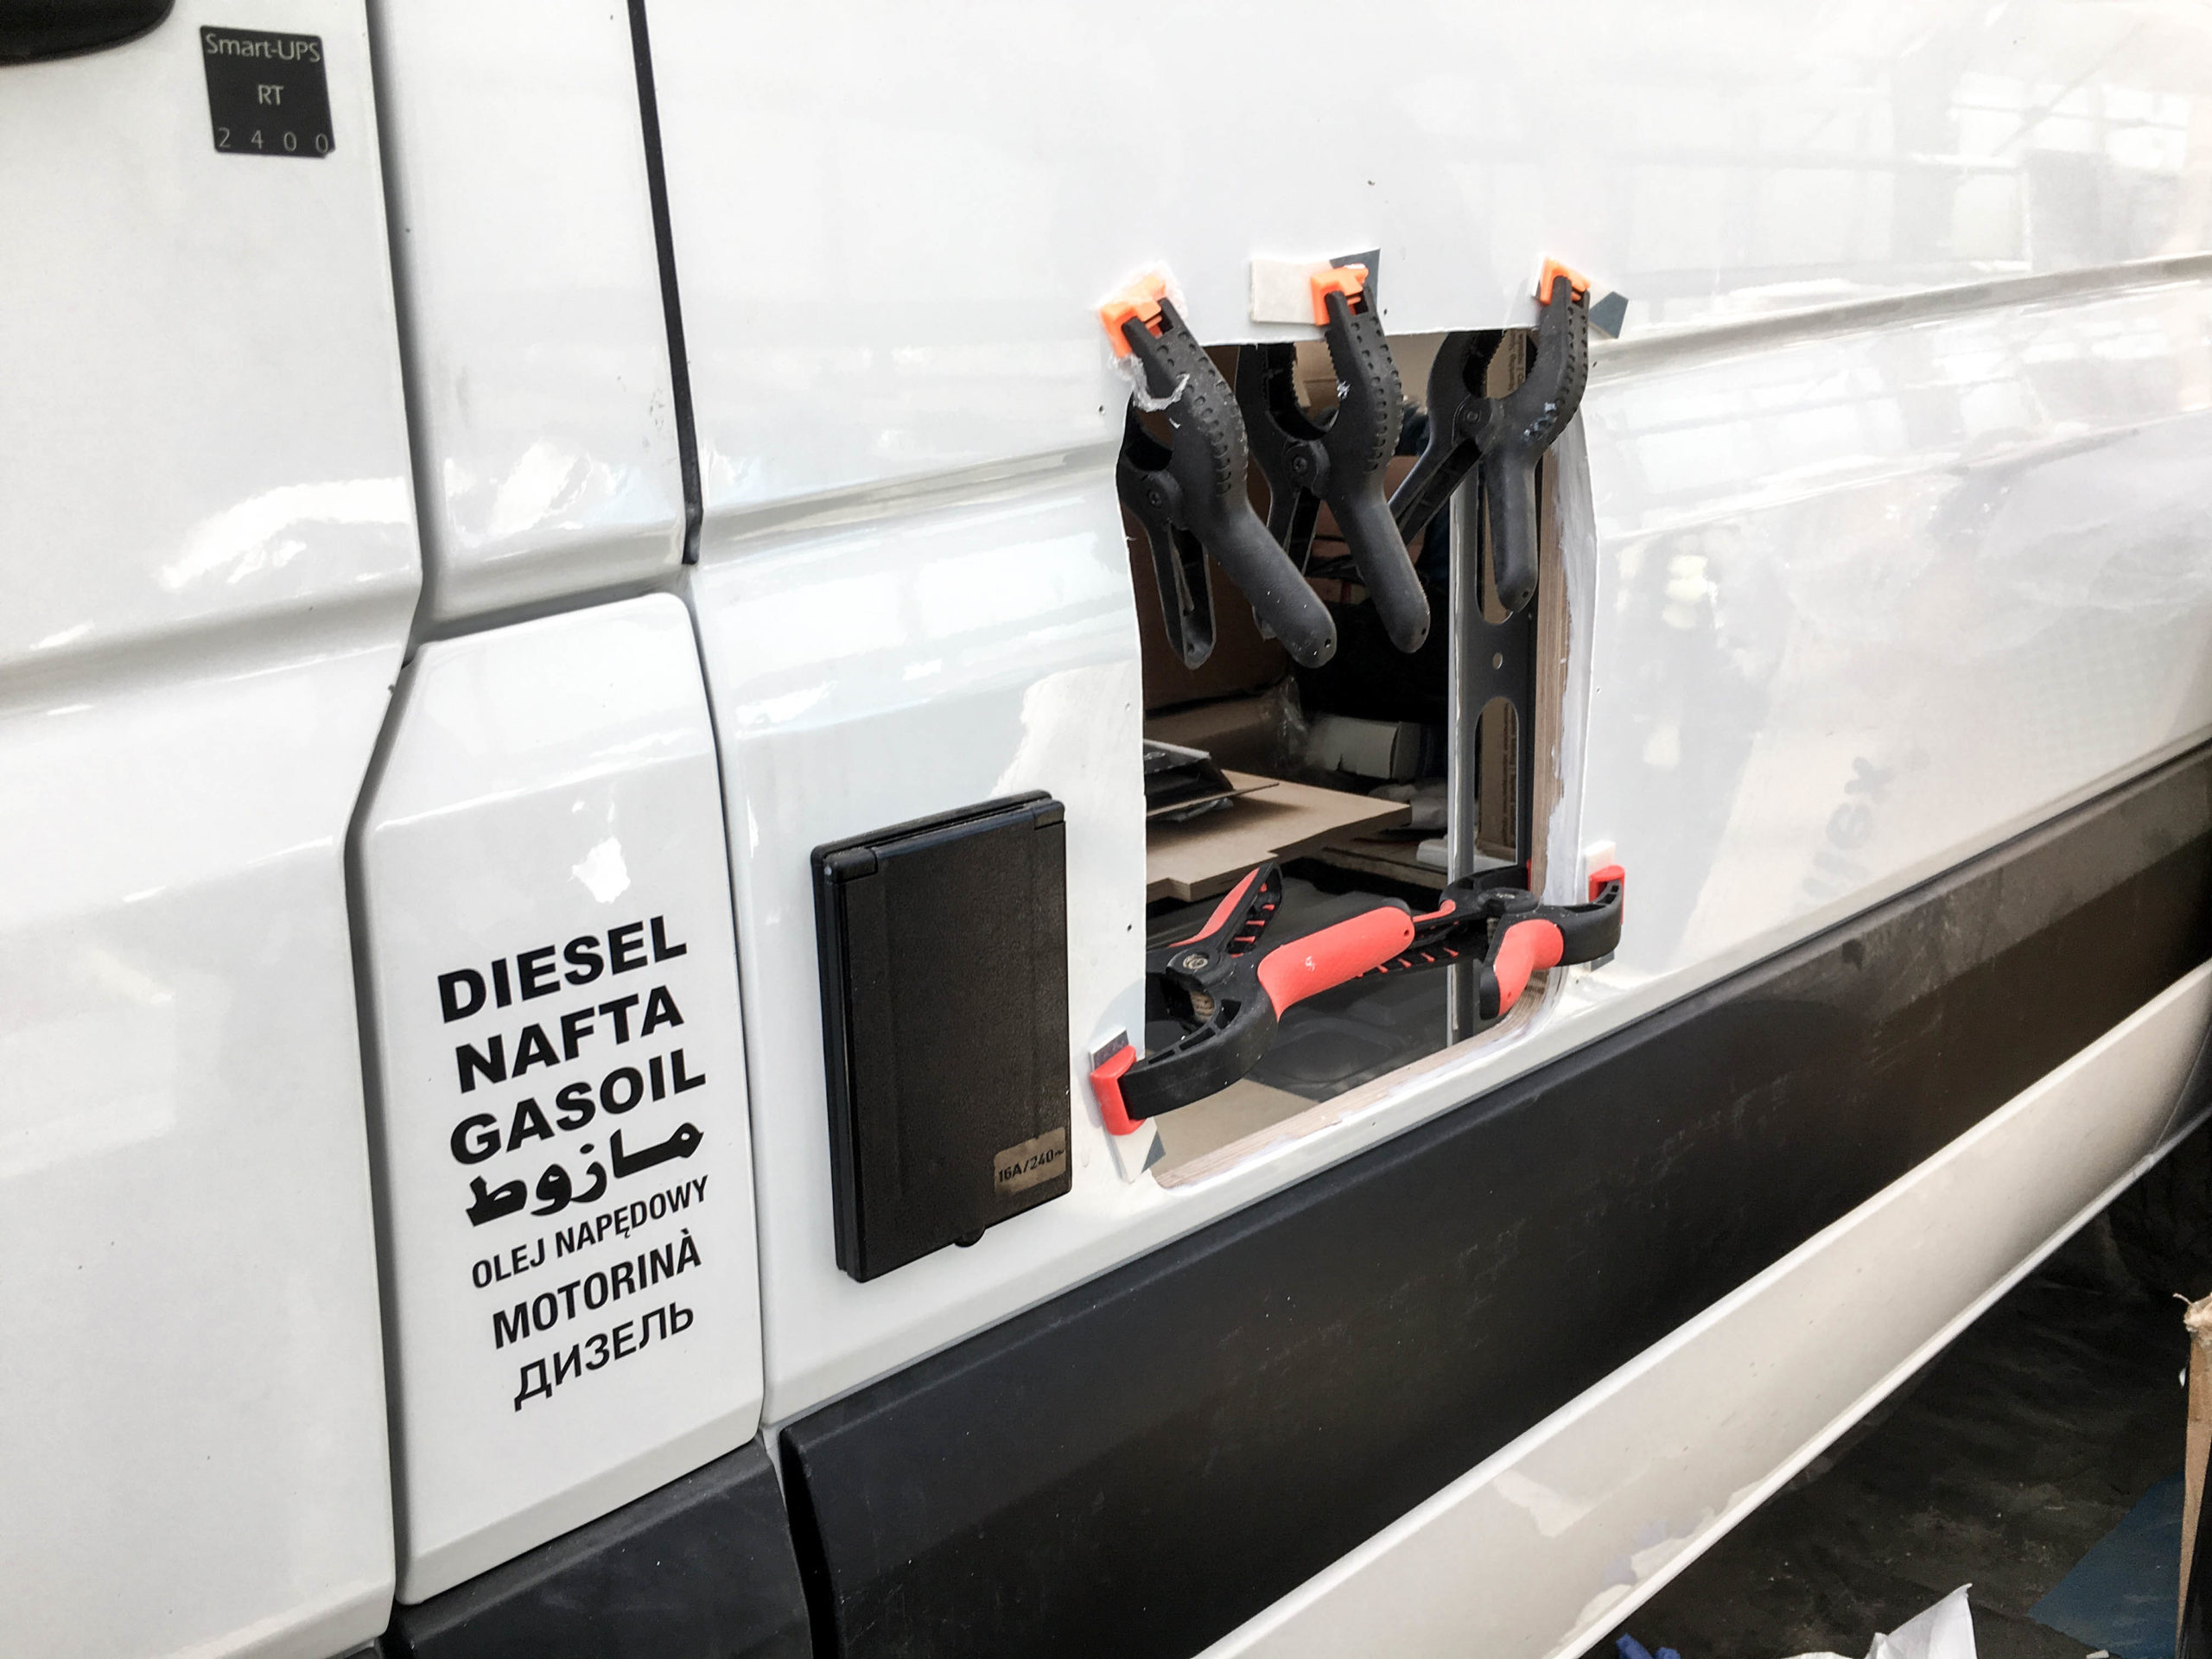
And then there’s quite a big hole in the vehicle wall! 😉 Now you can check if the plastic frame fits and then remove the tape.
Another template is for the cut out panel, the door panel. Now you really have to focus on the right position so the color or any decorative straps on the panel will match and align the ones on the vehicle. To prevent any scratches we again used some tape and drew the outlines.
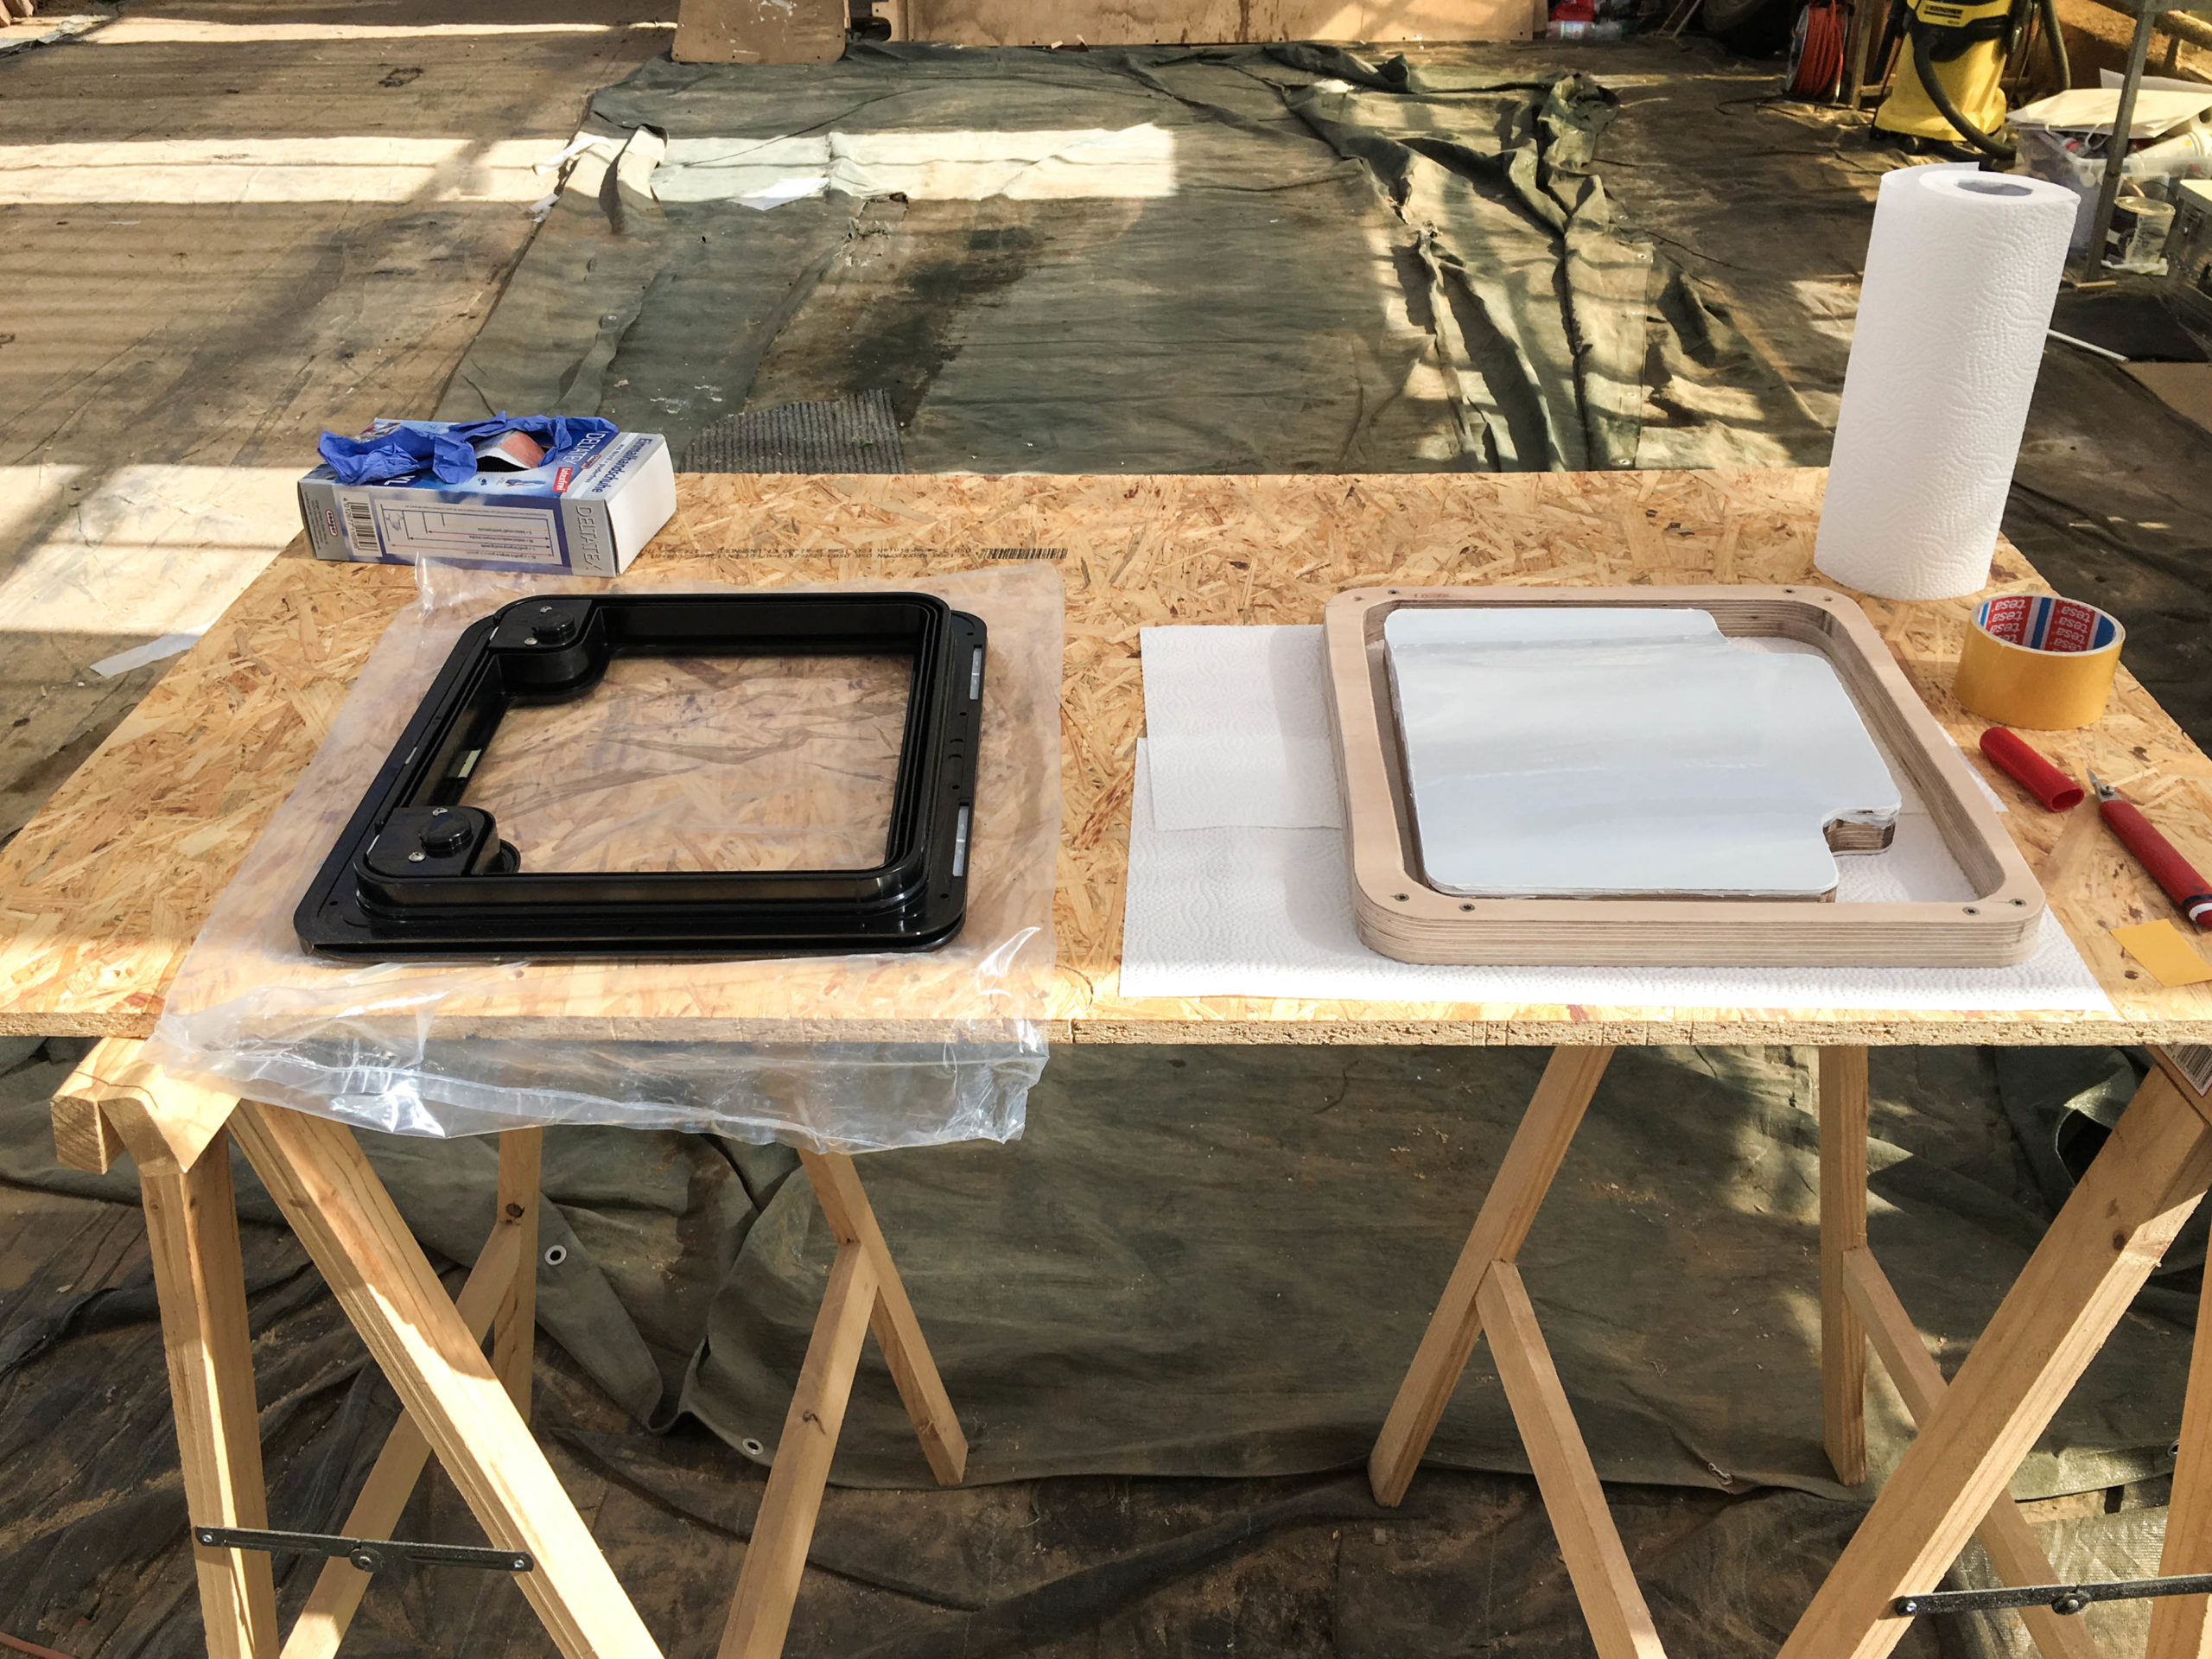
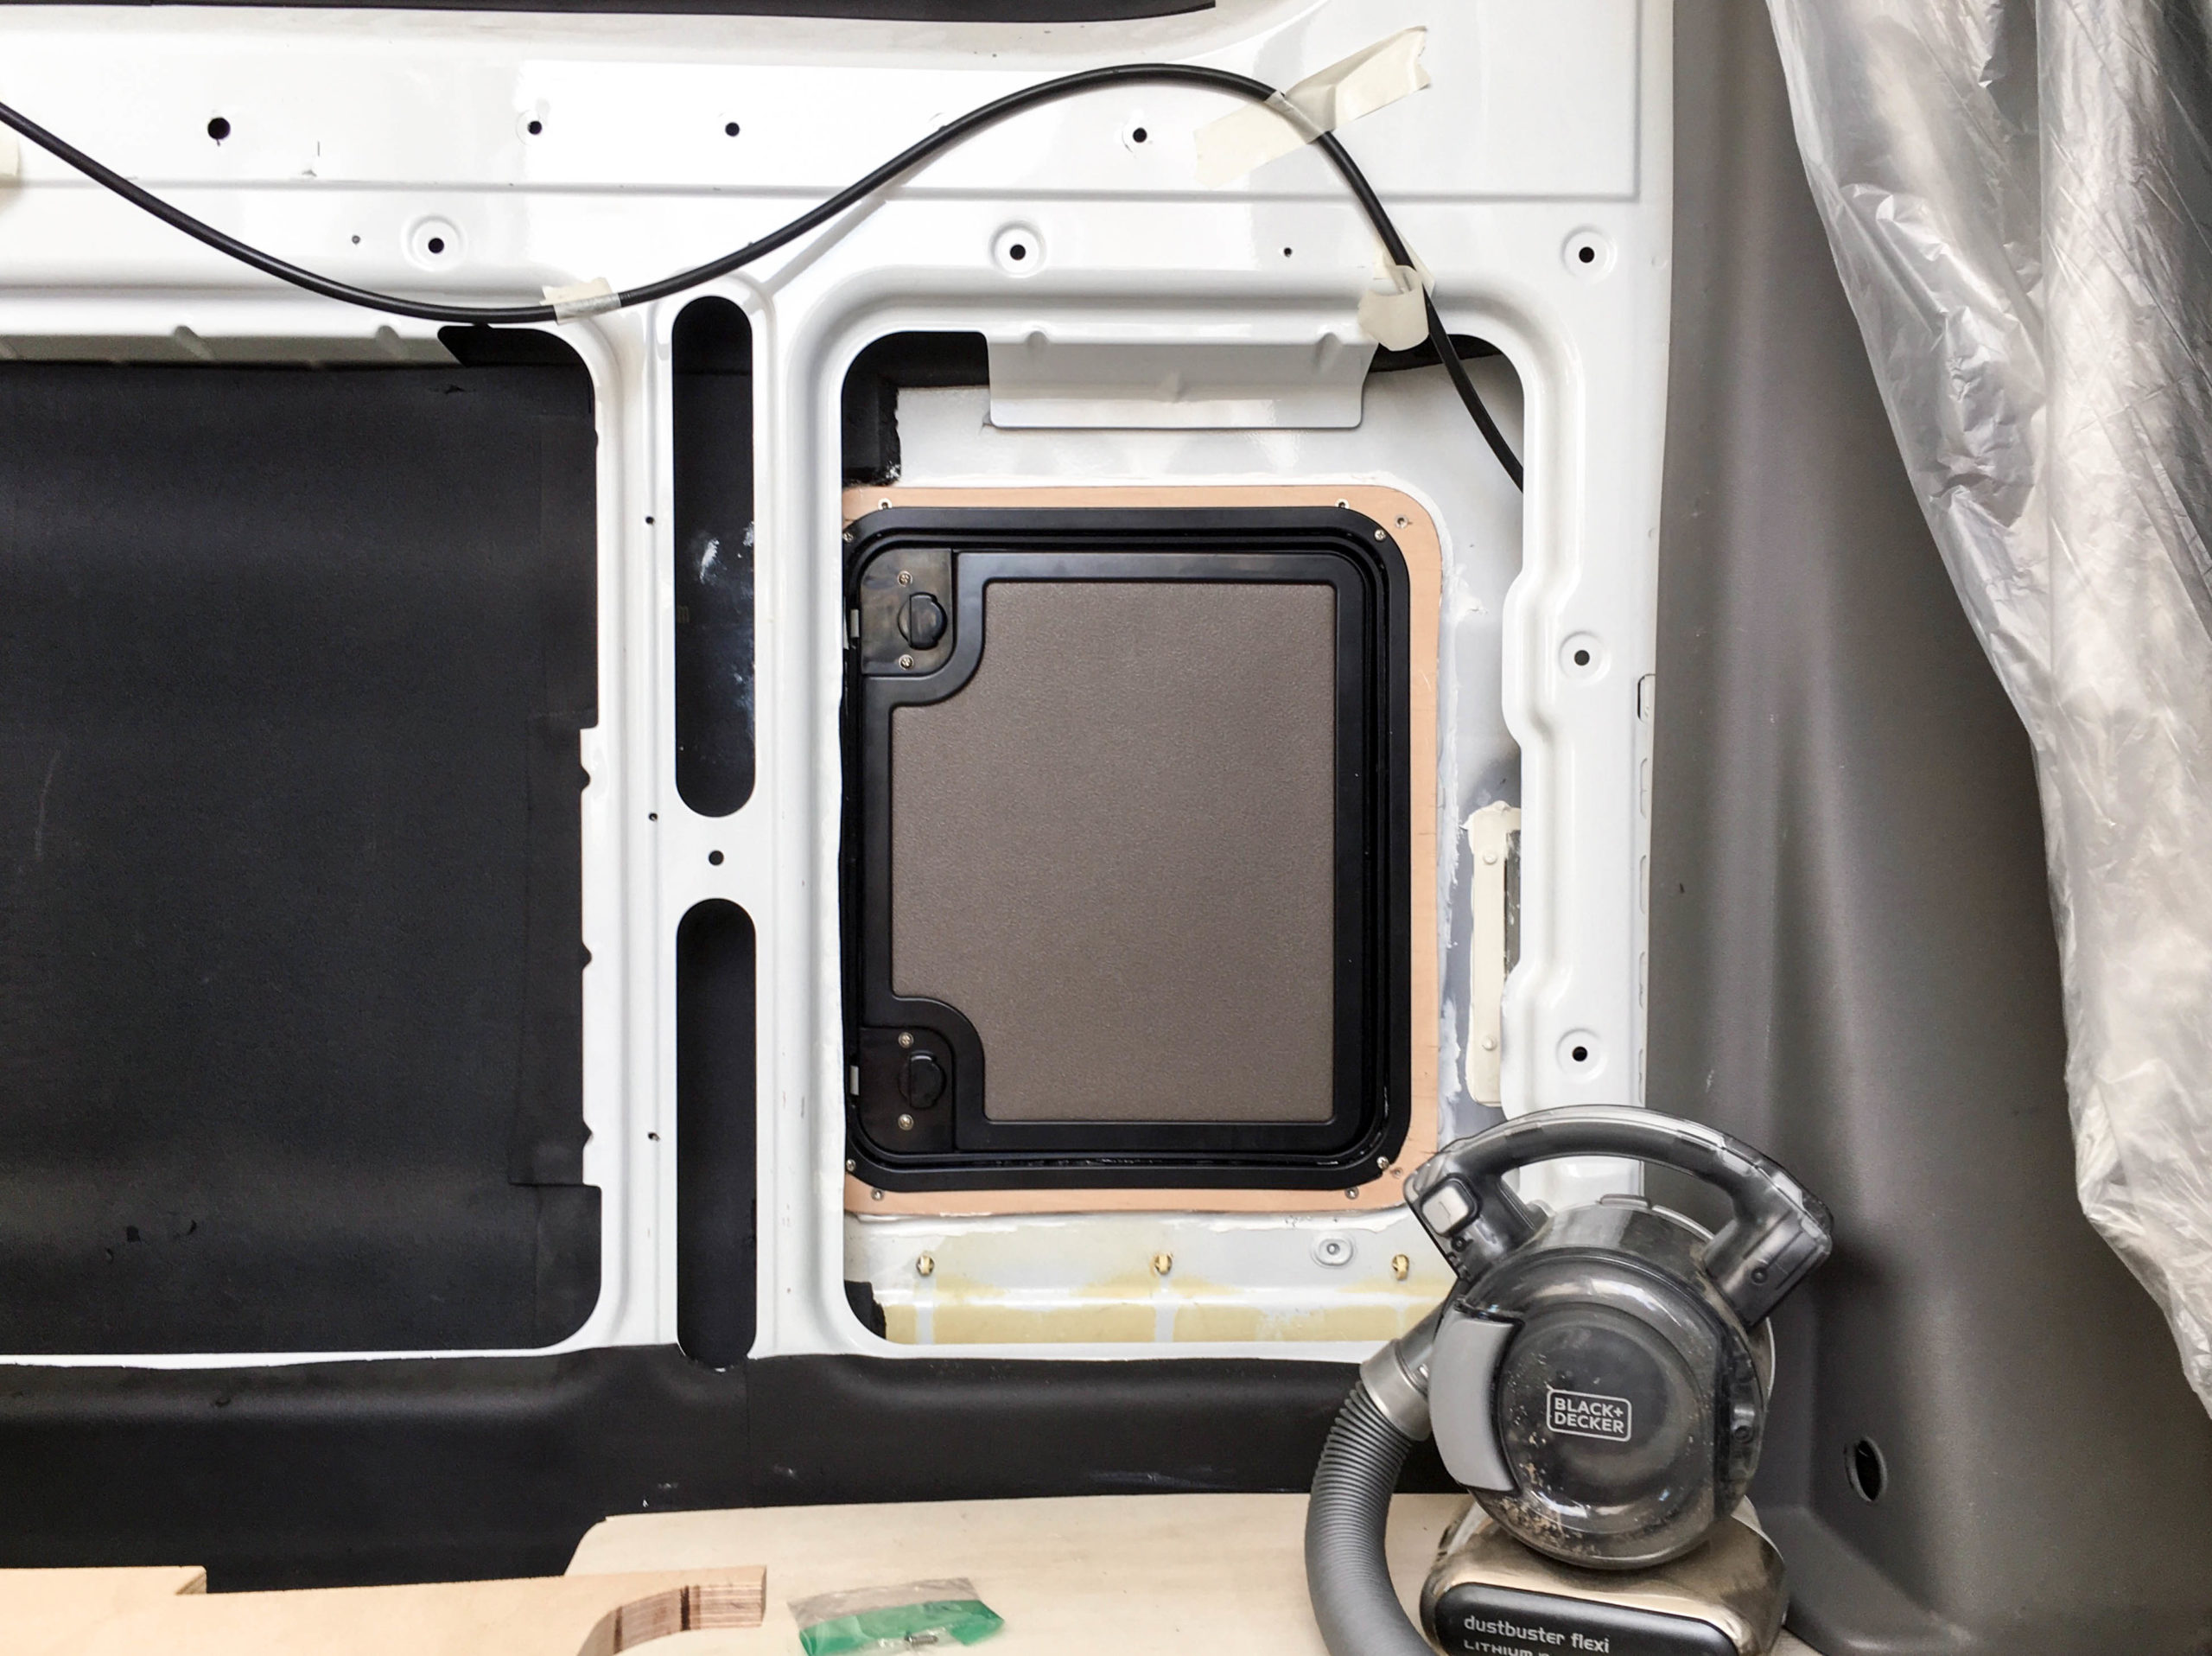
To properly install the panel, the manufacturer remarks that the wall thickness of the camper must be between 23 and 39 mm, this is usually the case with „regular“ Campervans and Mobilehomes that are sandwich constructed. Because the wall of the Sprinter is not this thick, we build a wooden frame of Multiplex to thicken the vehicle wall for the door installation. In order for the door panel to have the same thickness as the thickened wall, we also thickened the door panel with wood. 😉
Then we glued the wooden frame to the cut out hole of the vehicle wall with Sikaflex 252i and fastened it with clamps until it was dry. The wooden frame has to be fixed and the glue dried completely before installing the plastic frame of the service door. Otherwise the pull of the screws would push in the metal. You can prevent this from happening by installing the wooden frame first and then the plastic frame.

In the meantime we put some leftover PVC-flooring on the door panel to make it waterproof, before placing the brackets on the inner side of the door, applied sealant in the groove of the outer side of the door and then fitted the door panel in the outer side of the door frame.
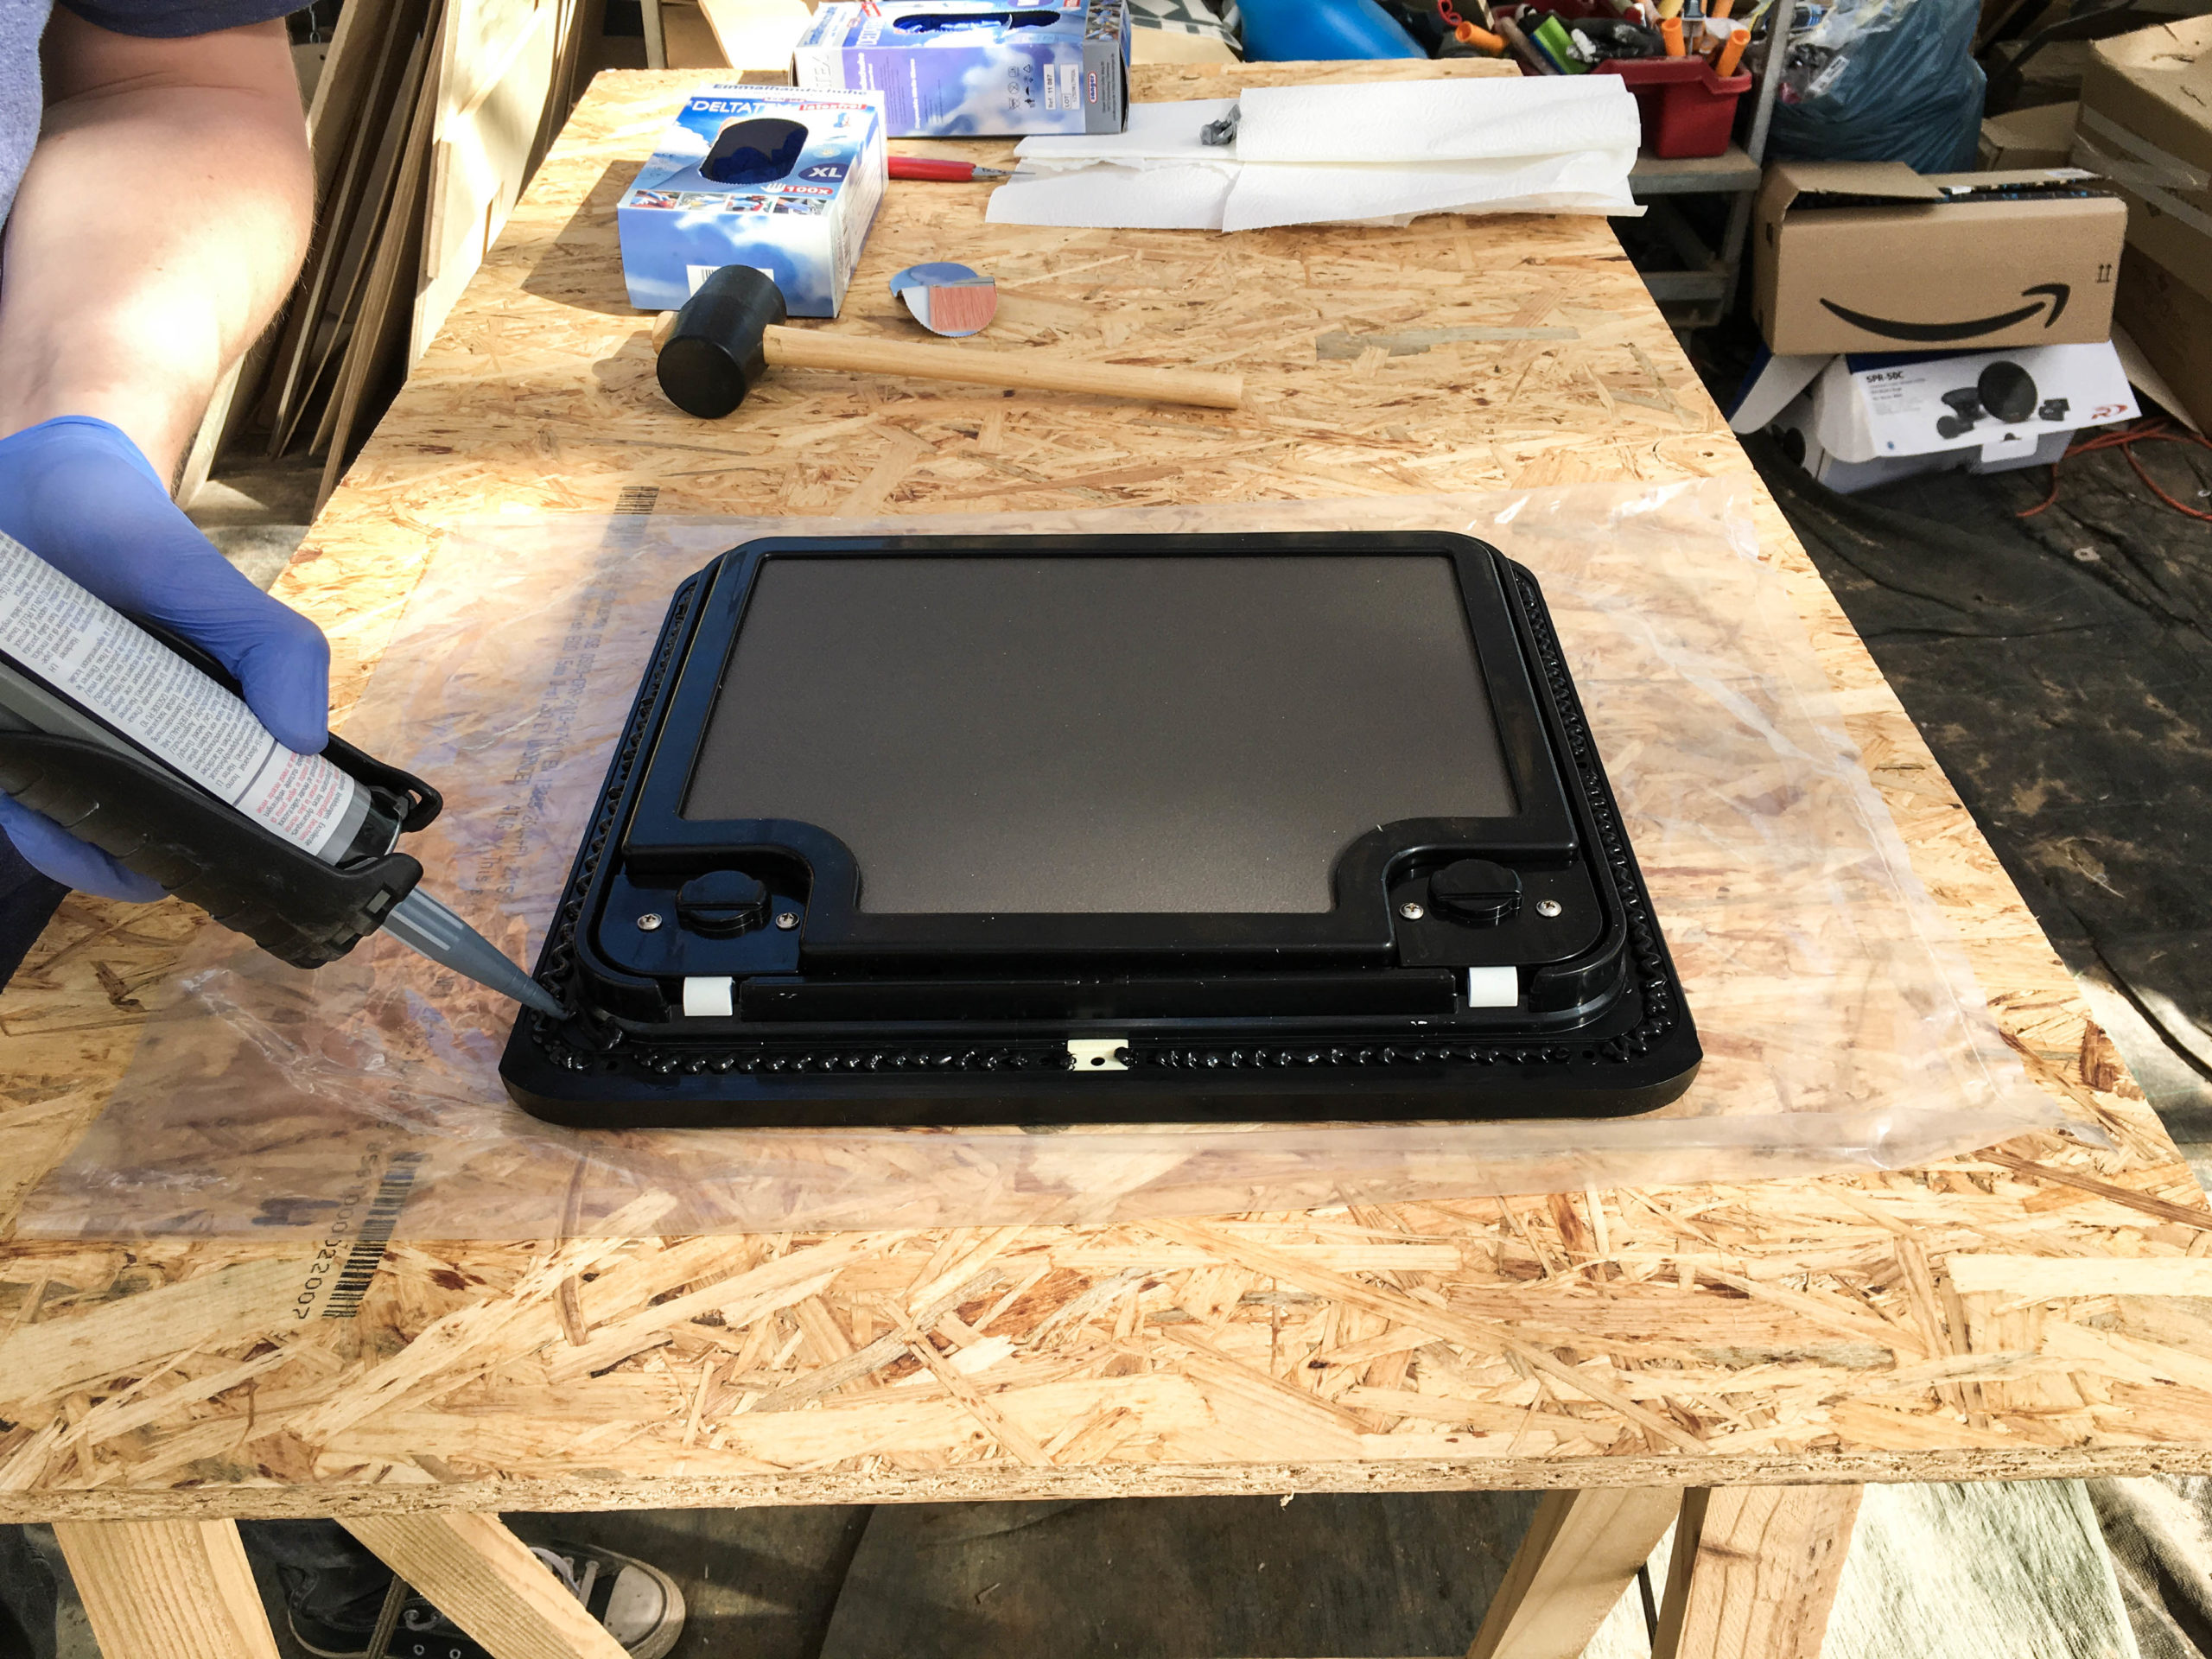
The last step was to fill the groove of the outer frame with sealant, we used Sikaflex 252i, and then screwed the outer frame to the outside wall of the vehicle. The inner side of the frame was then connected to the inside of the vehicle, in our case the wooden frame, with small screws.
Read more about the wetroom / „bathroom“ in a Campervan here!

