
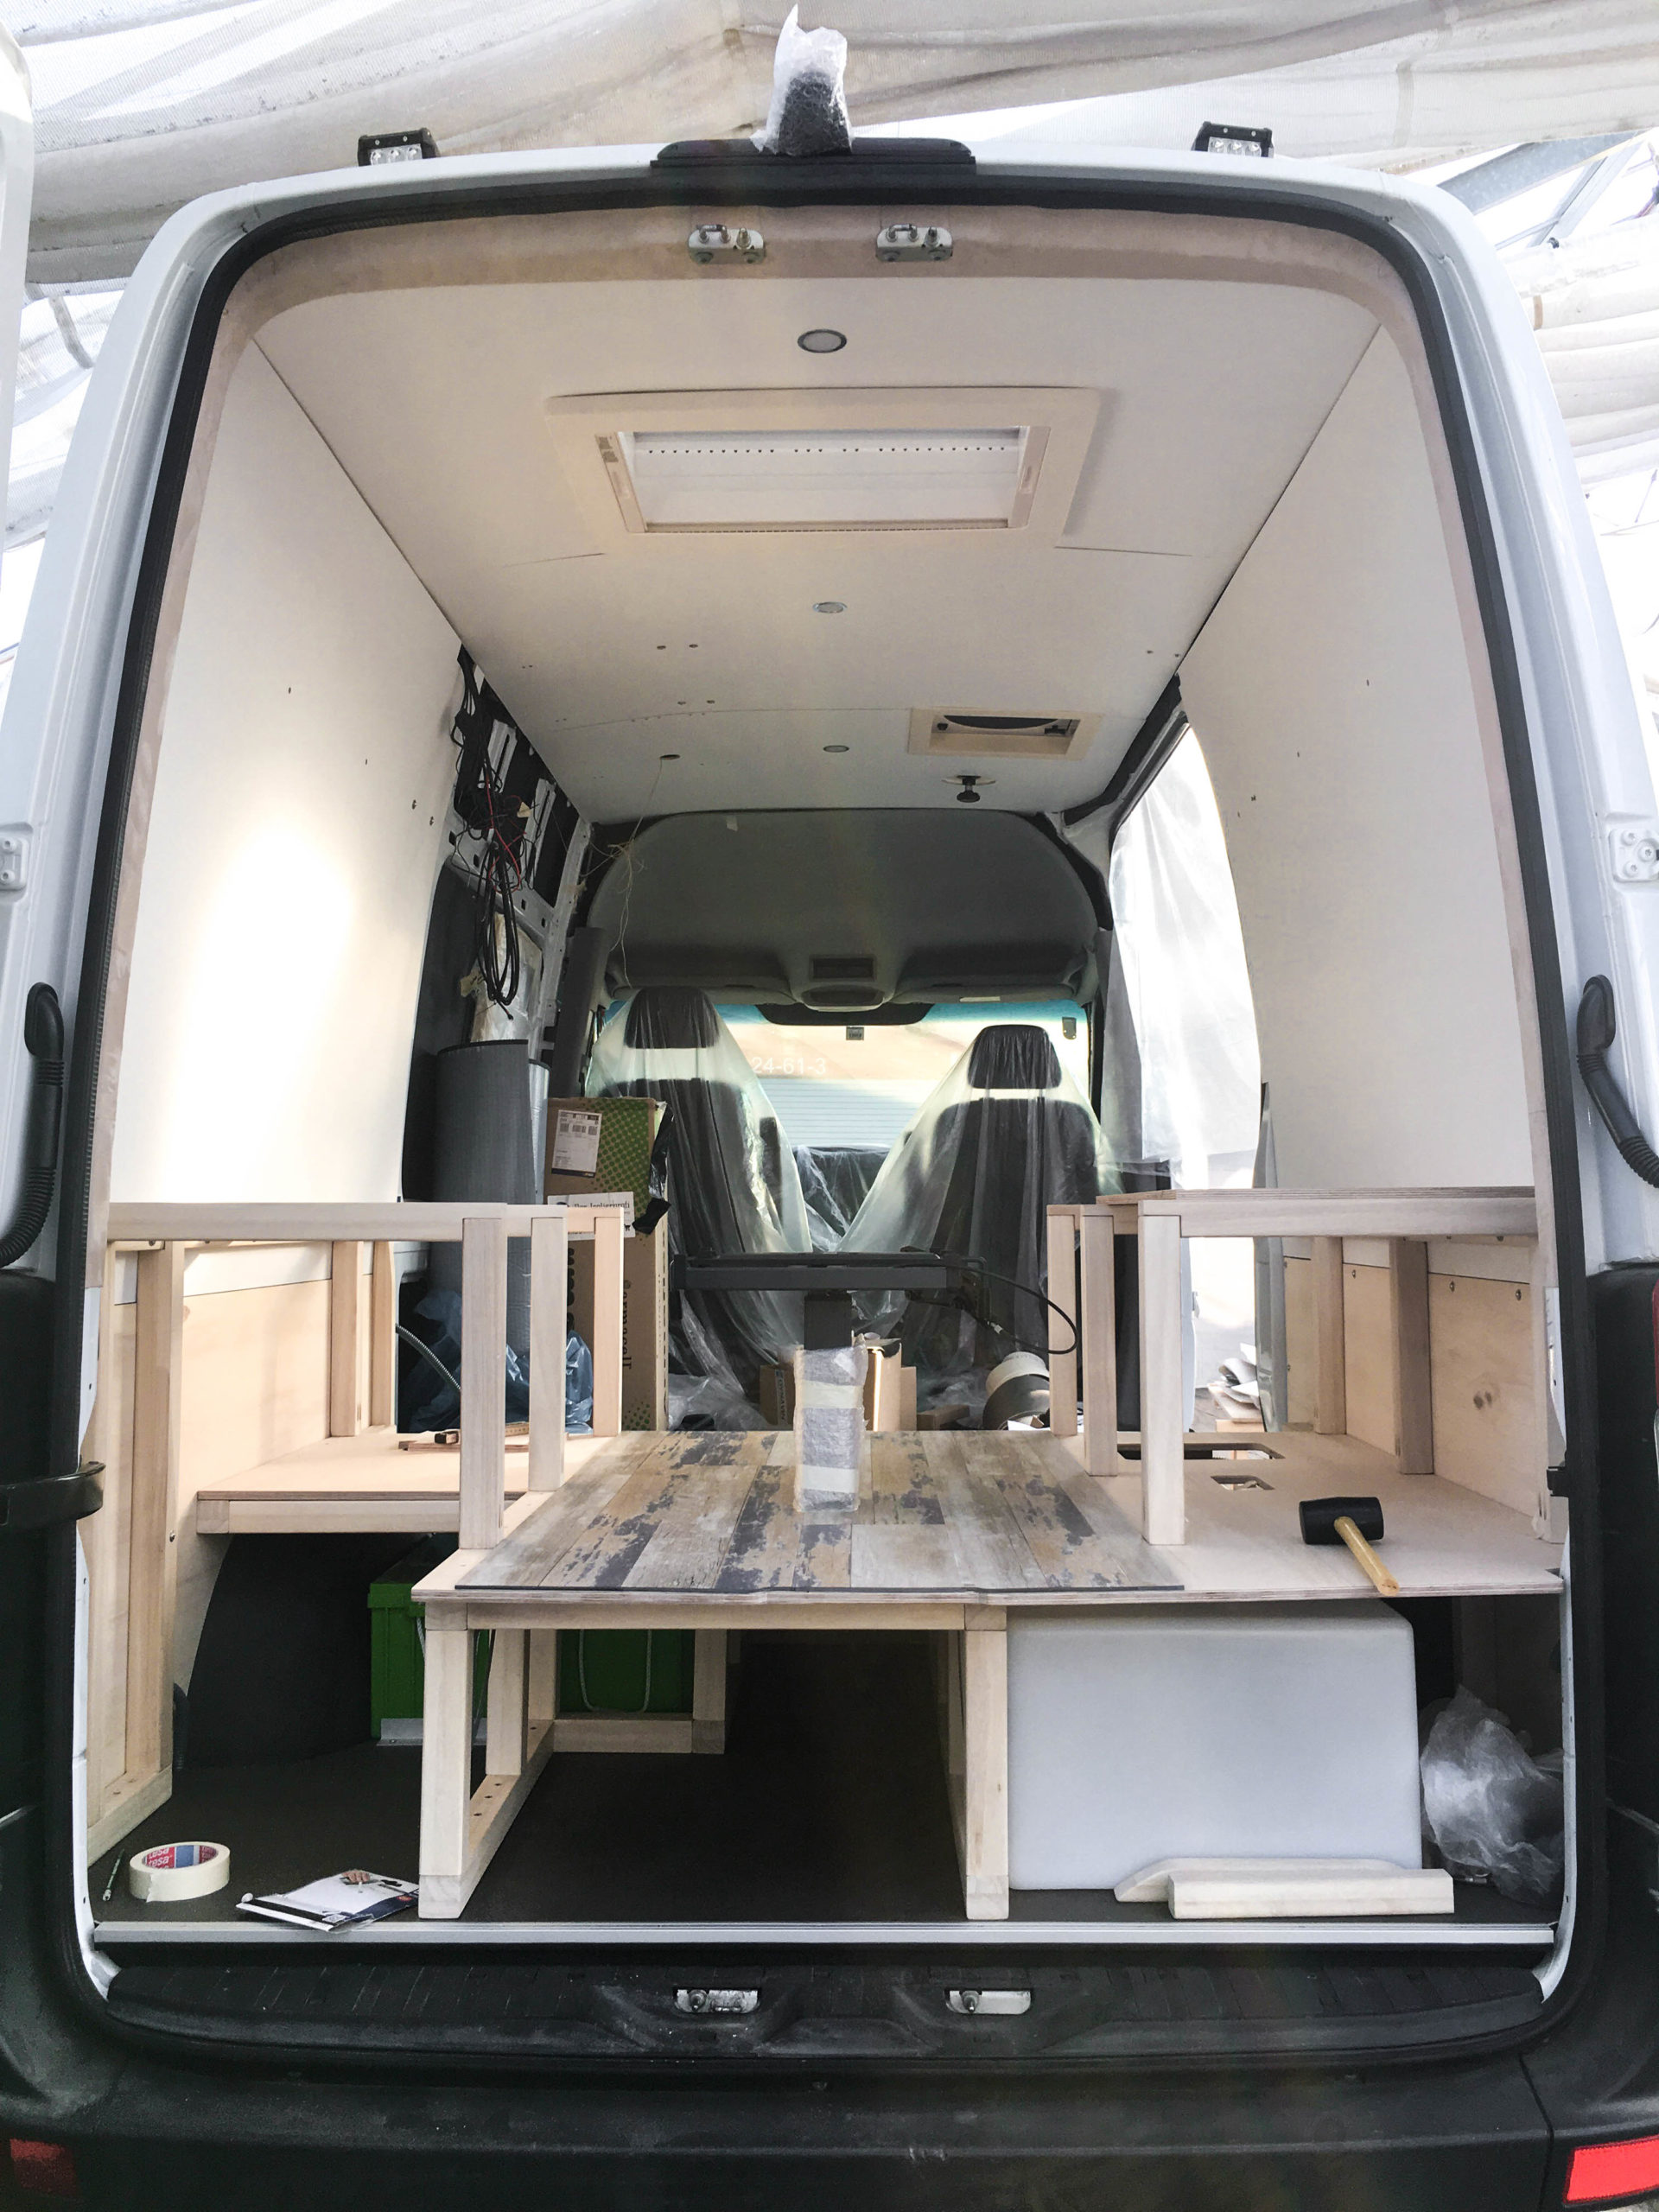
A full home needs a place to sit and a bed, of course. In our small house on wheels, the benches and table at daytime will be a flat bed surface by night!
Campervans are as individual as their owners. When it comes to designing the interior and layout of a van, everything is possible! We introduced you to our layout right at the beginning. For seating and sleeping, we chose a flexible combination by a lowerable table.
The frame construction for the benches
Just like the frame construction for the platform, the frame for the benches is also made of shelf-studs of Paulownia wood which is known for its stability but at the same time low weight. Before putting them in, we sanded them and applied hardwax oil because the „raw“ wood is soft and not water repellant.
Paulownia wood is available at the hardware store where we made us of their free cutting service. That way, the cutting surfaces are straight and even. Of course you can cut them to size yourself, a miter saw would work great. By now, we own lots of tools, but this is not one of it. That’s why the service at the hardware store was very convenient! Of course you need a plan with your required measurements beforehand – which we had.
The ideal seating height is 45 cm, the depth is 50 cm (depends on your size and height though; we are rather short or really tall, that’s why we chose to go with the „norm“). We checked the measurements at our dining room chairs and can confirm 😉 The cushions for the benches will be about 10 cm; we took this into consideration, too. That’s the plan so far!
And then we made the plan reality! The bars, which we installed to the walls while mounting the wall panels, are part of the frame construction of the benches to add stability.
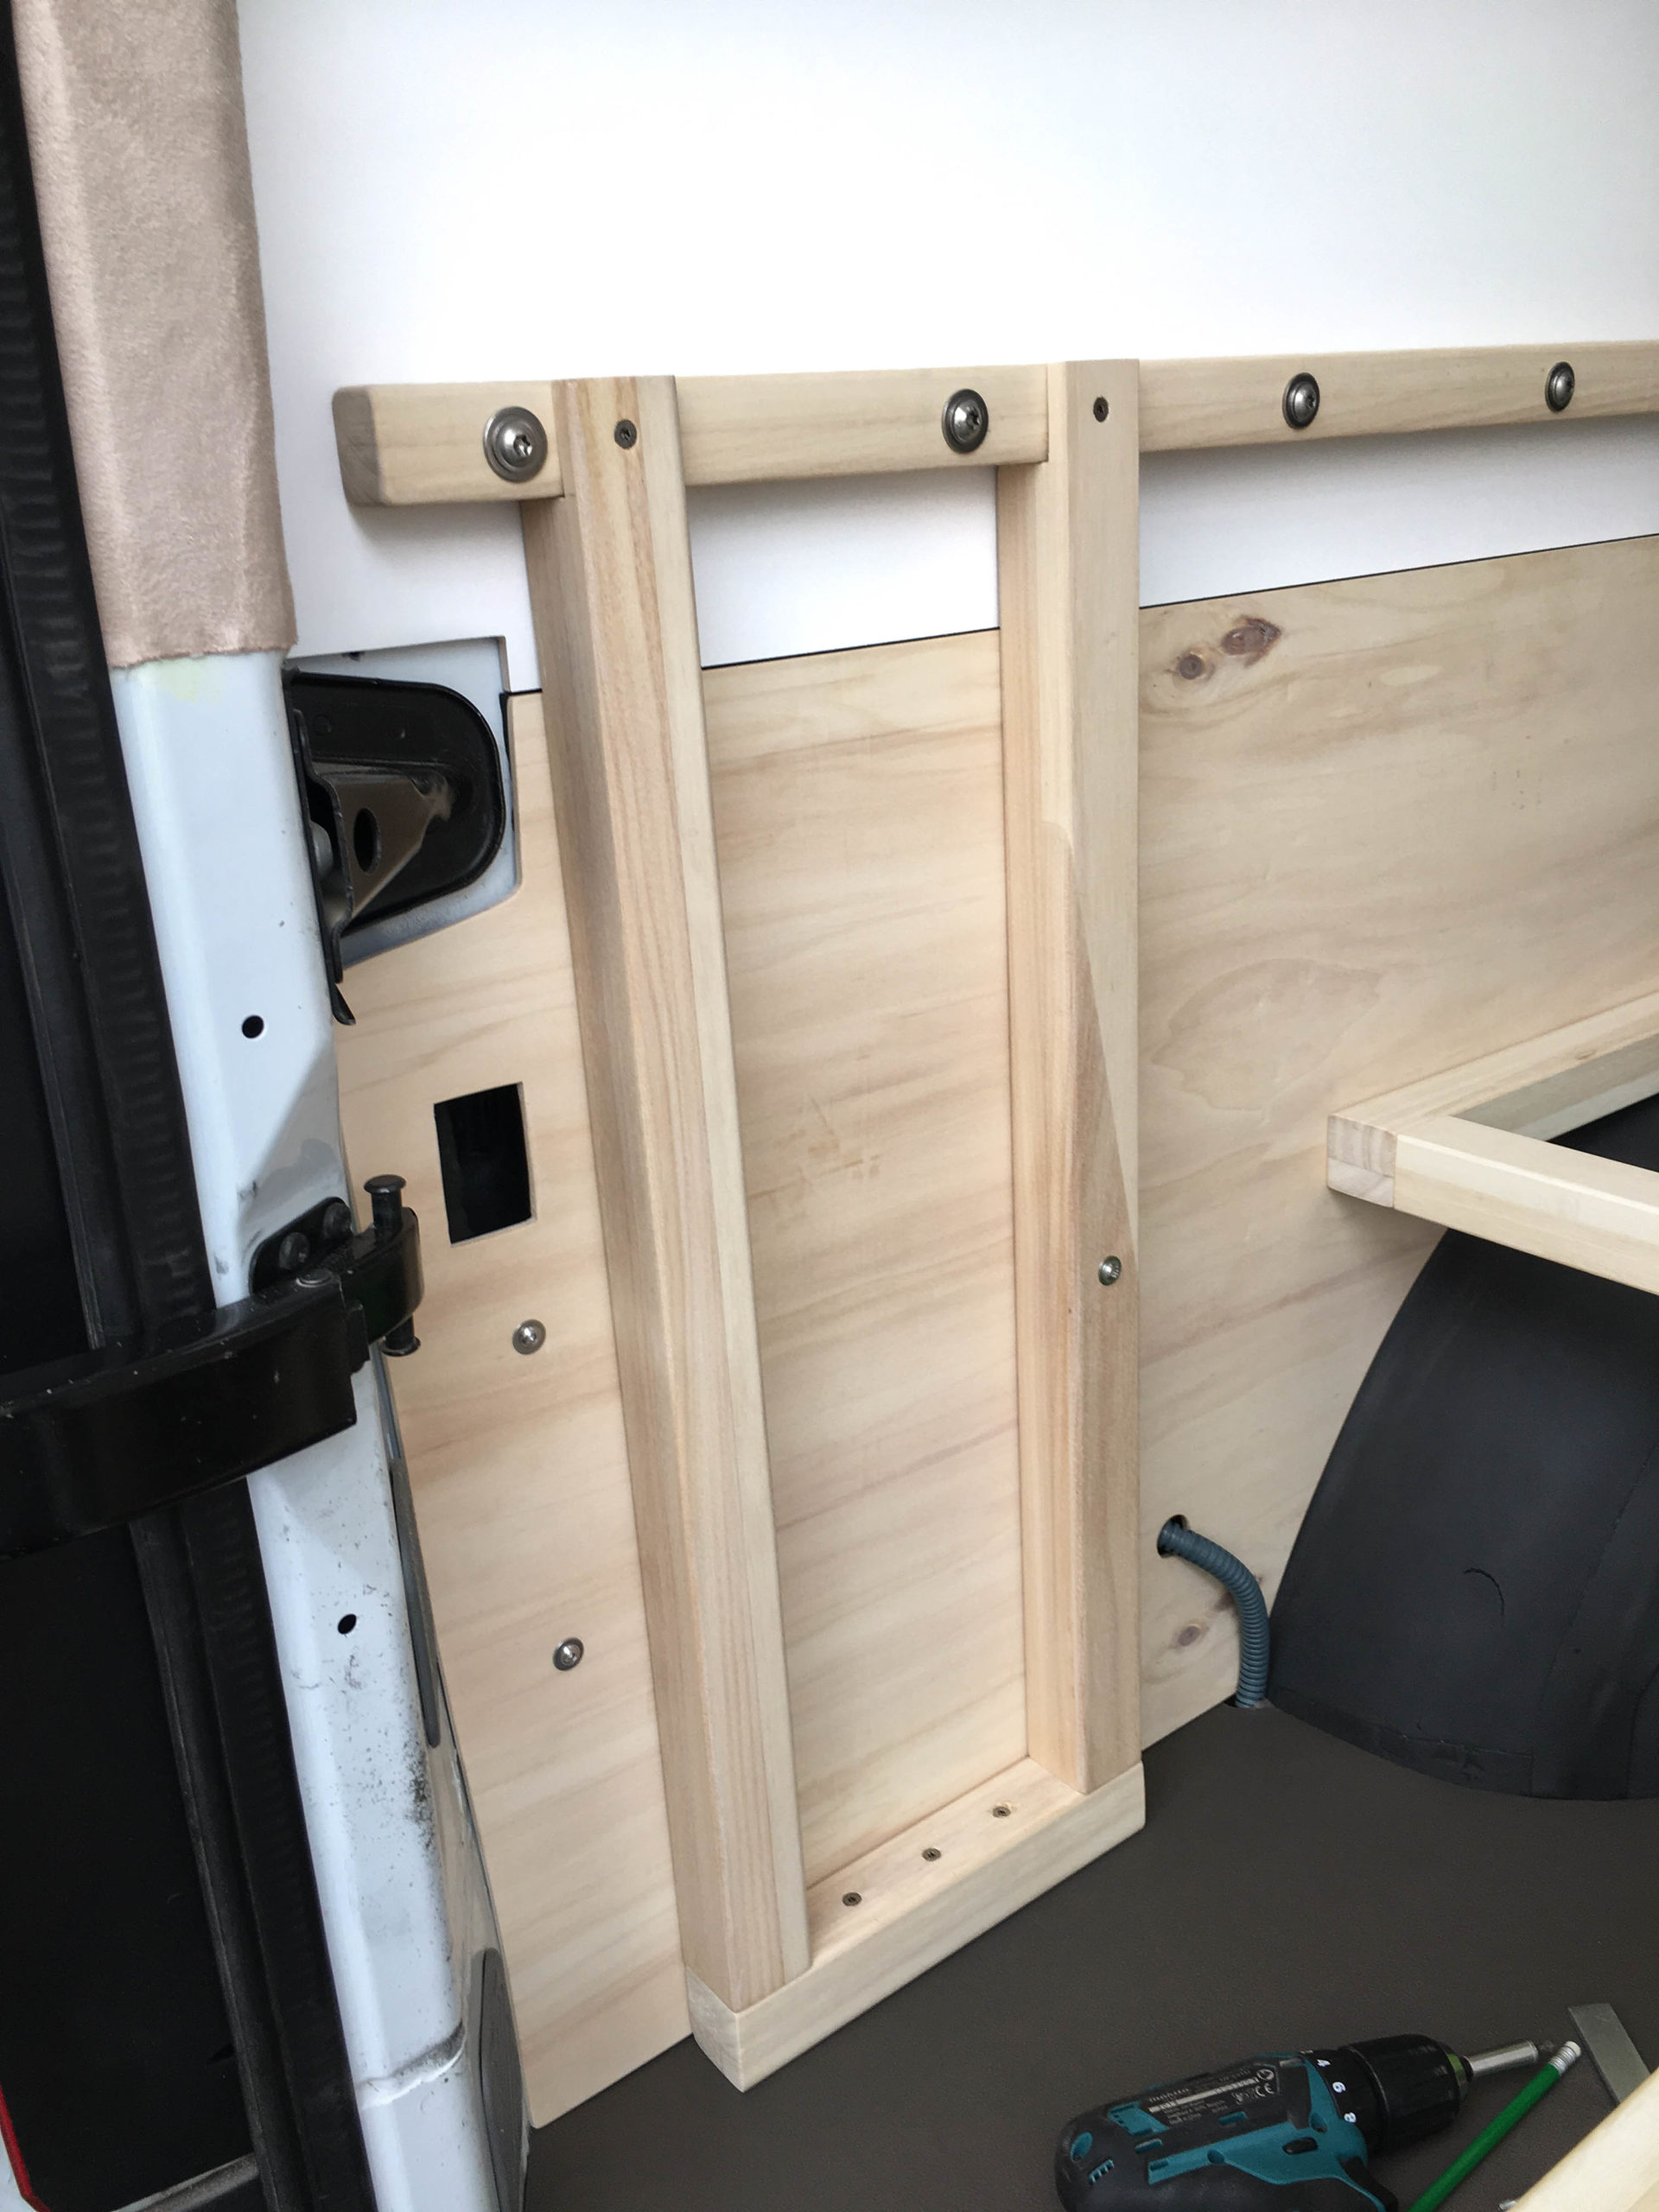
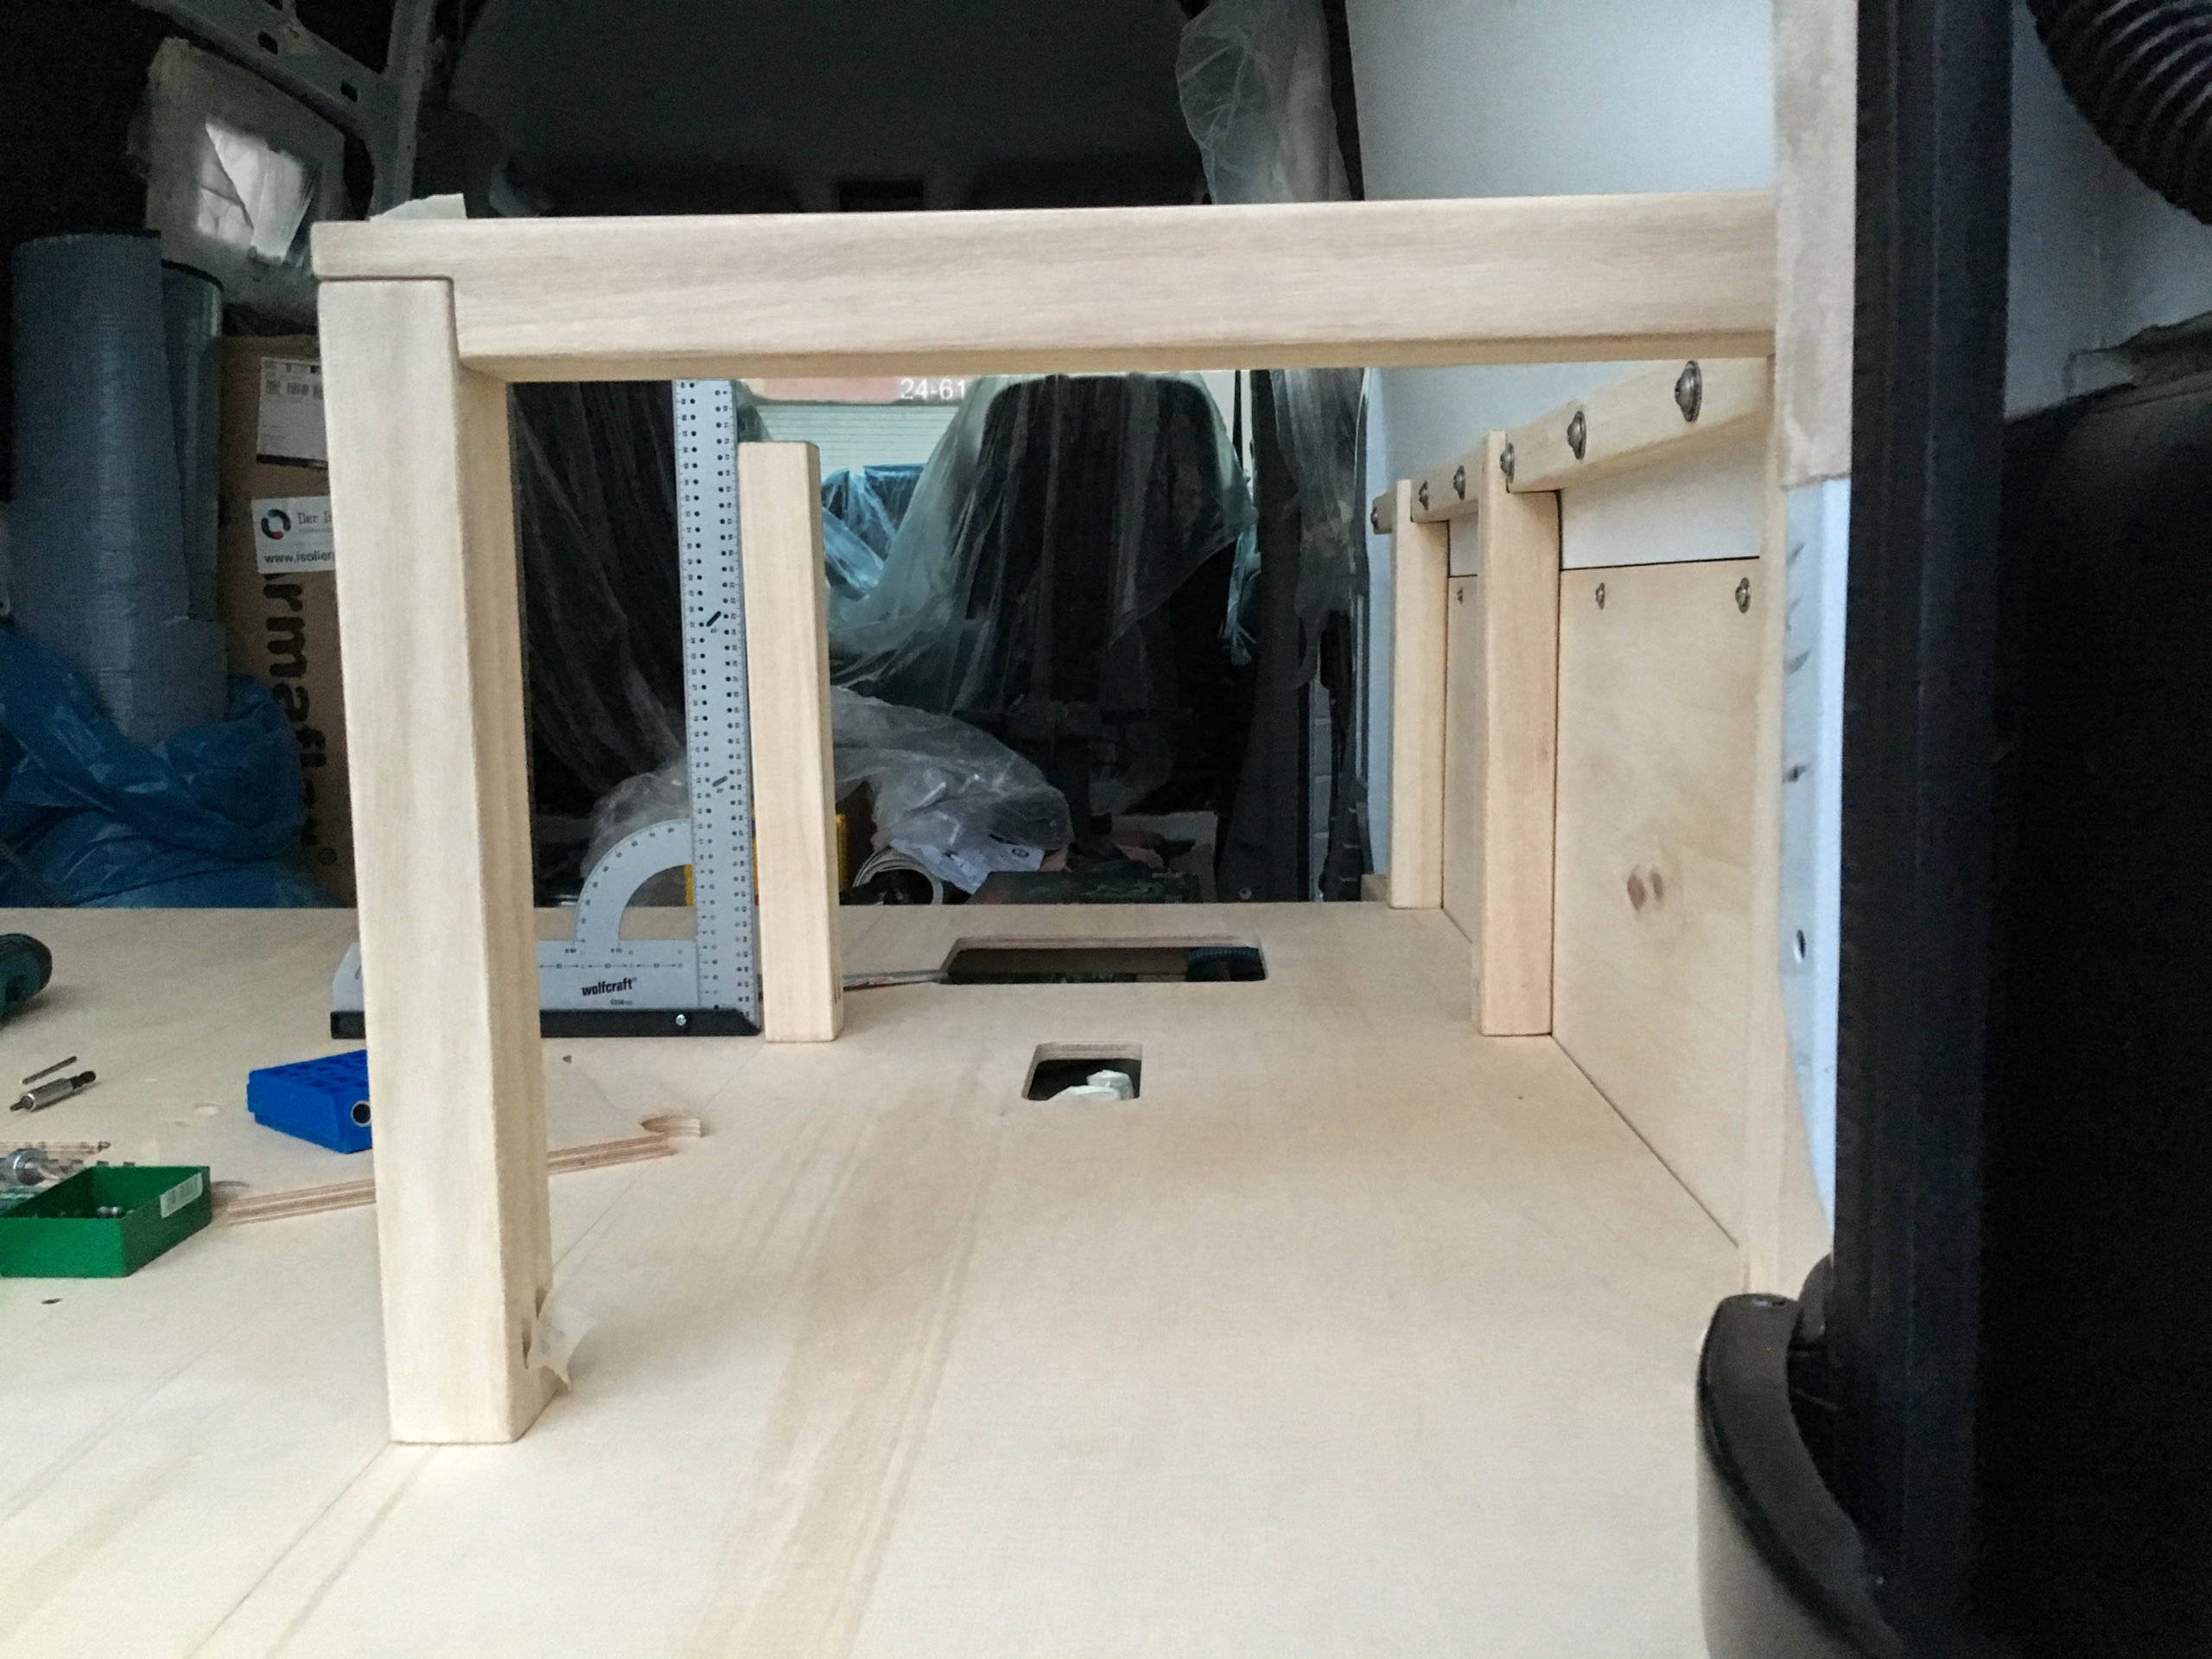
Also regarding stability, we didn’t connect the studs with just a simple butt joint, but interlocked them, as you can see on the pictures.
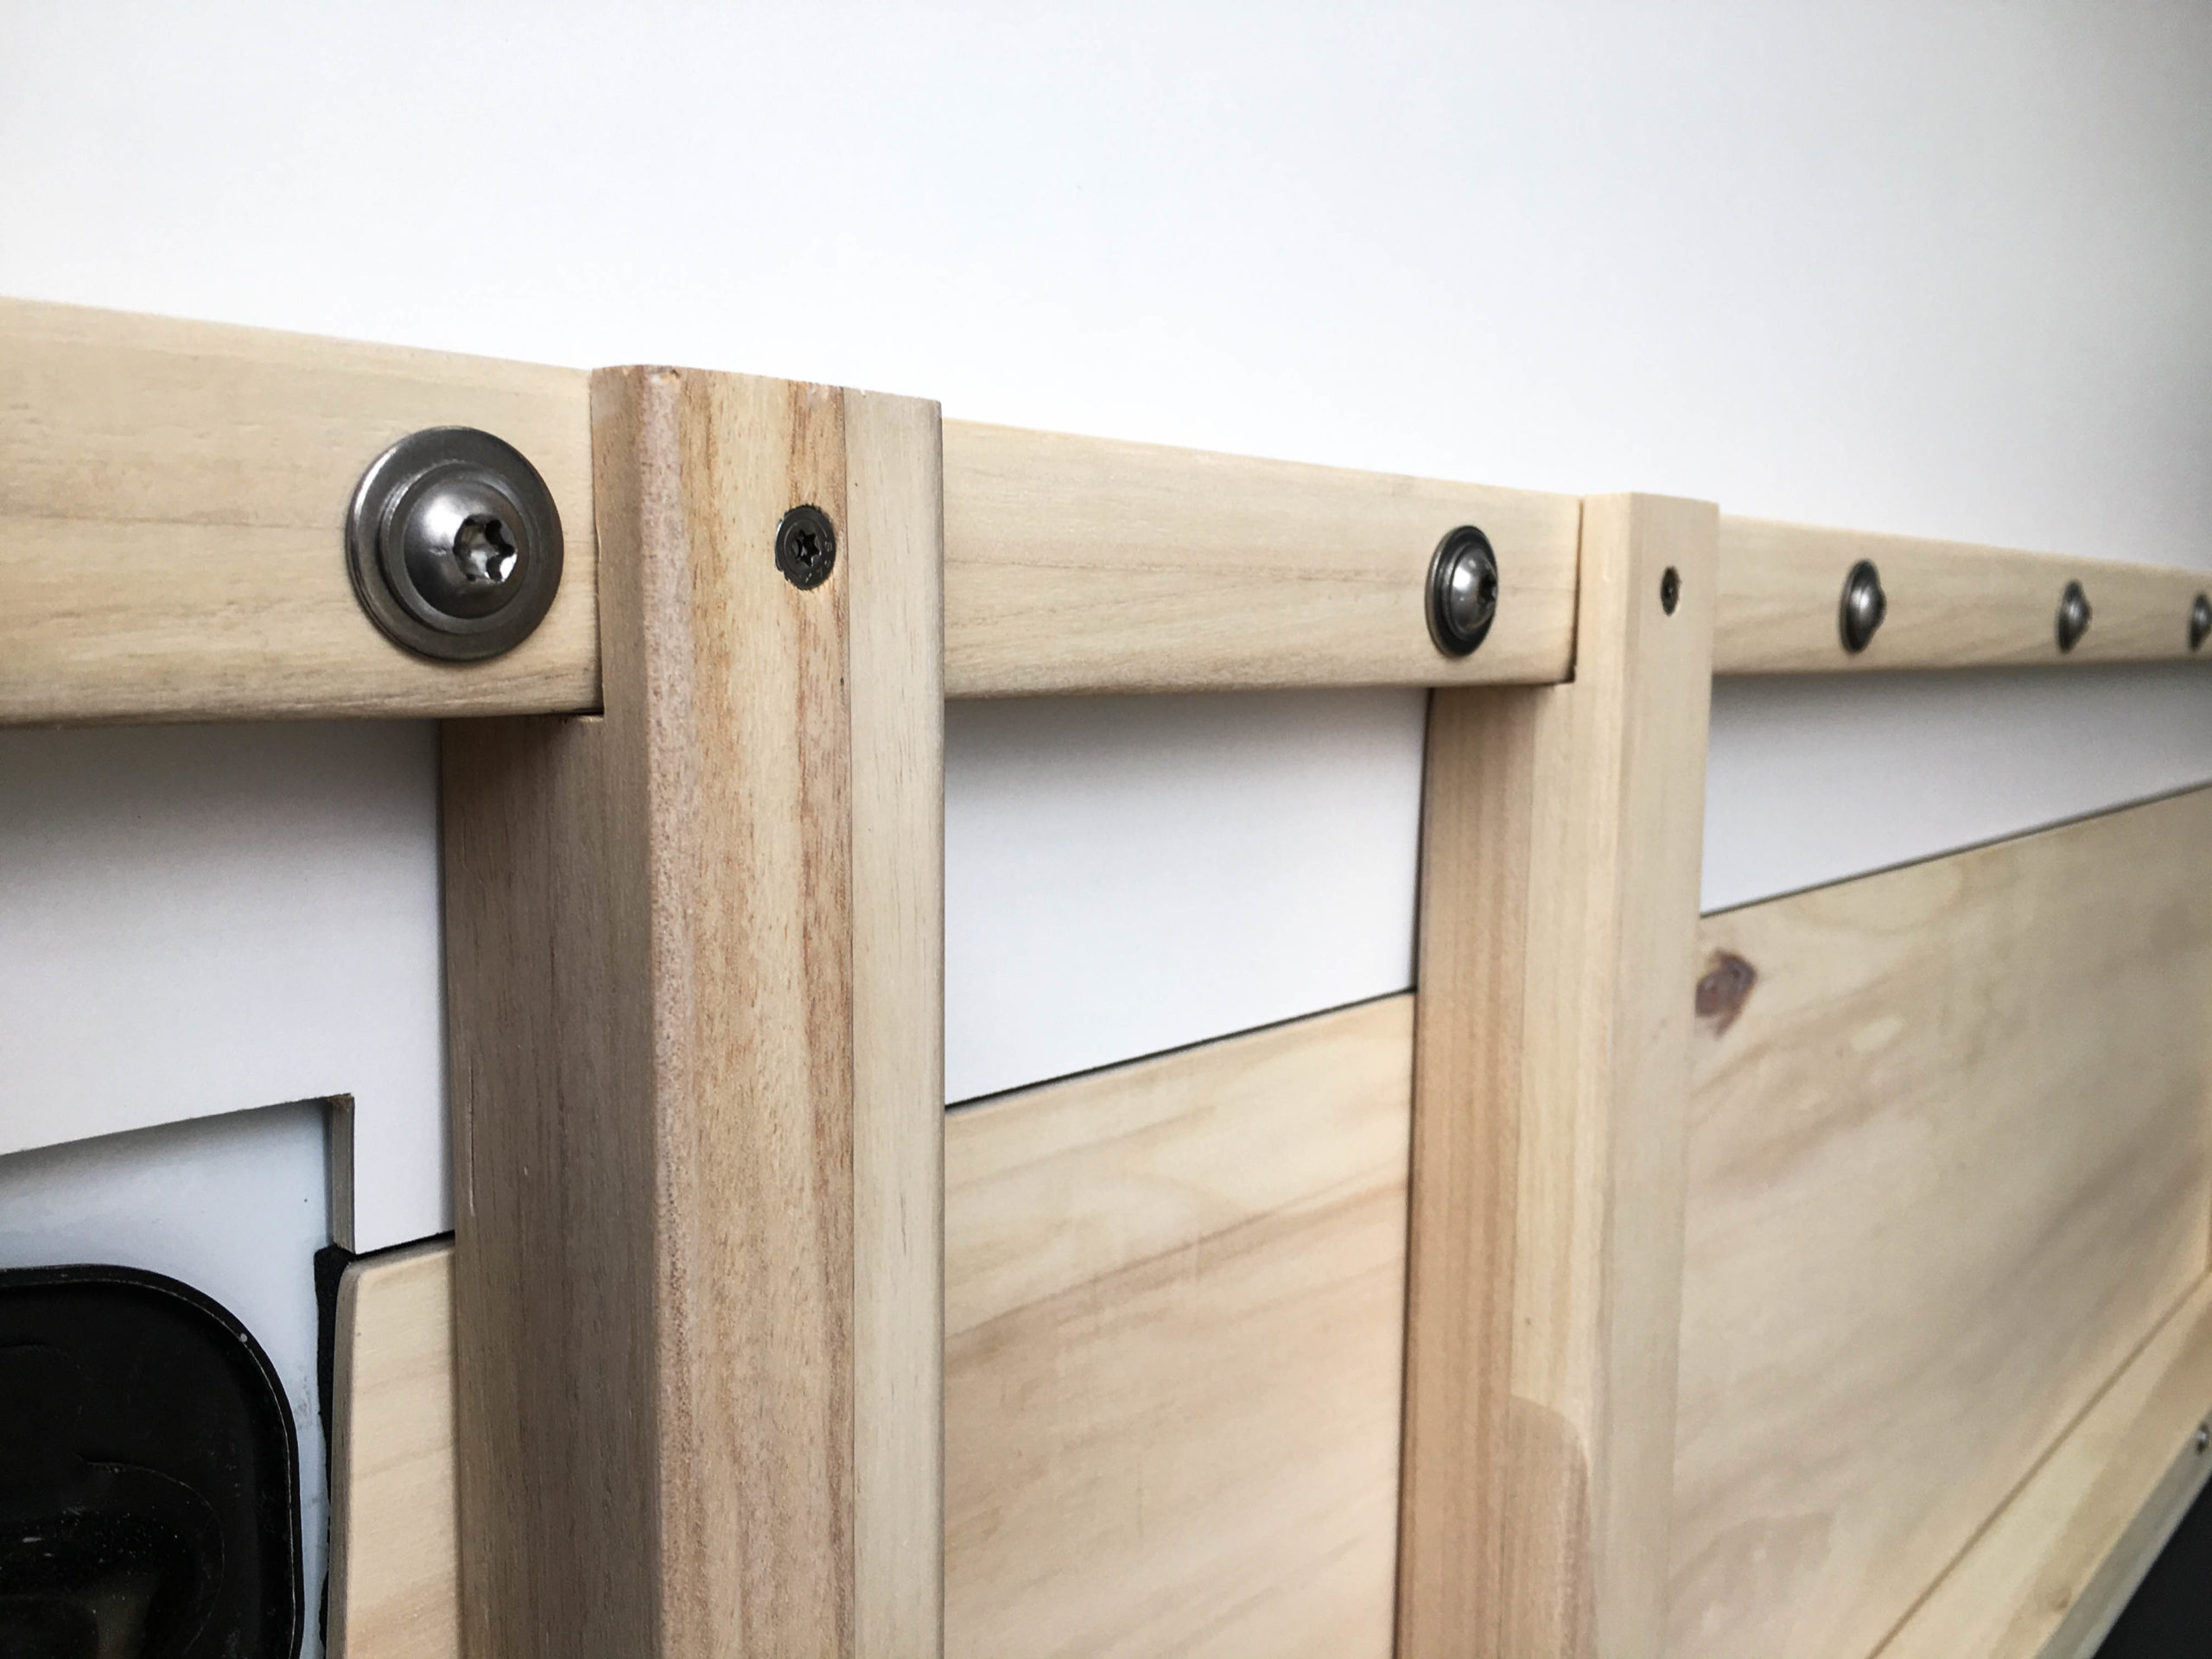
Interlocking the wood surface using a dovetail-groove is very complex, so we only processed the top stud at about half so the vertical stud is stabilized to the inside and backwards. Then we added an extra screw to connect the frame parts.

Here you can finally see the height extension of the storage room by the cutout of the platform plate all the way up into the benches on the left side!
Using a pocket hole jig we screwed the studs of the frame into the platform plate as well as into the frame of the platform. The more elements are screwed with and into each other, the more stability we have for the overall construction.
Fitting the studs into each other precisely was like a jigsaw puzzle; time-consuming and tedious. But we’re sure it’ll be worth it! 😉
The table
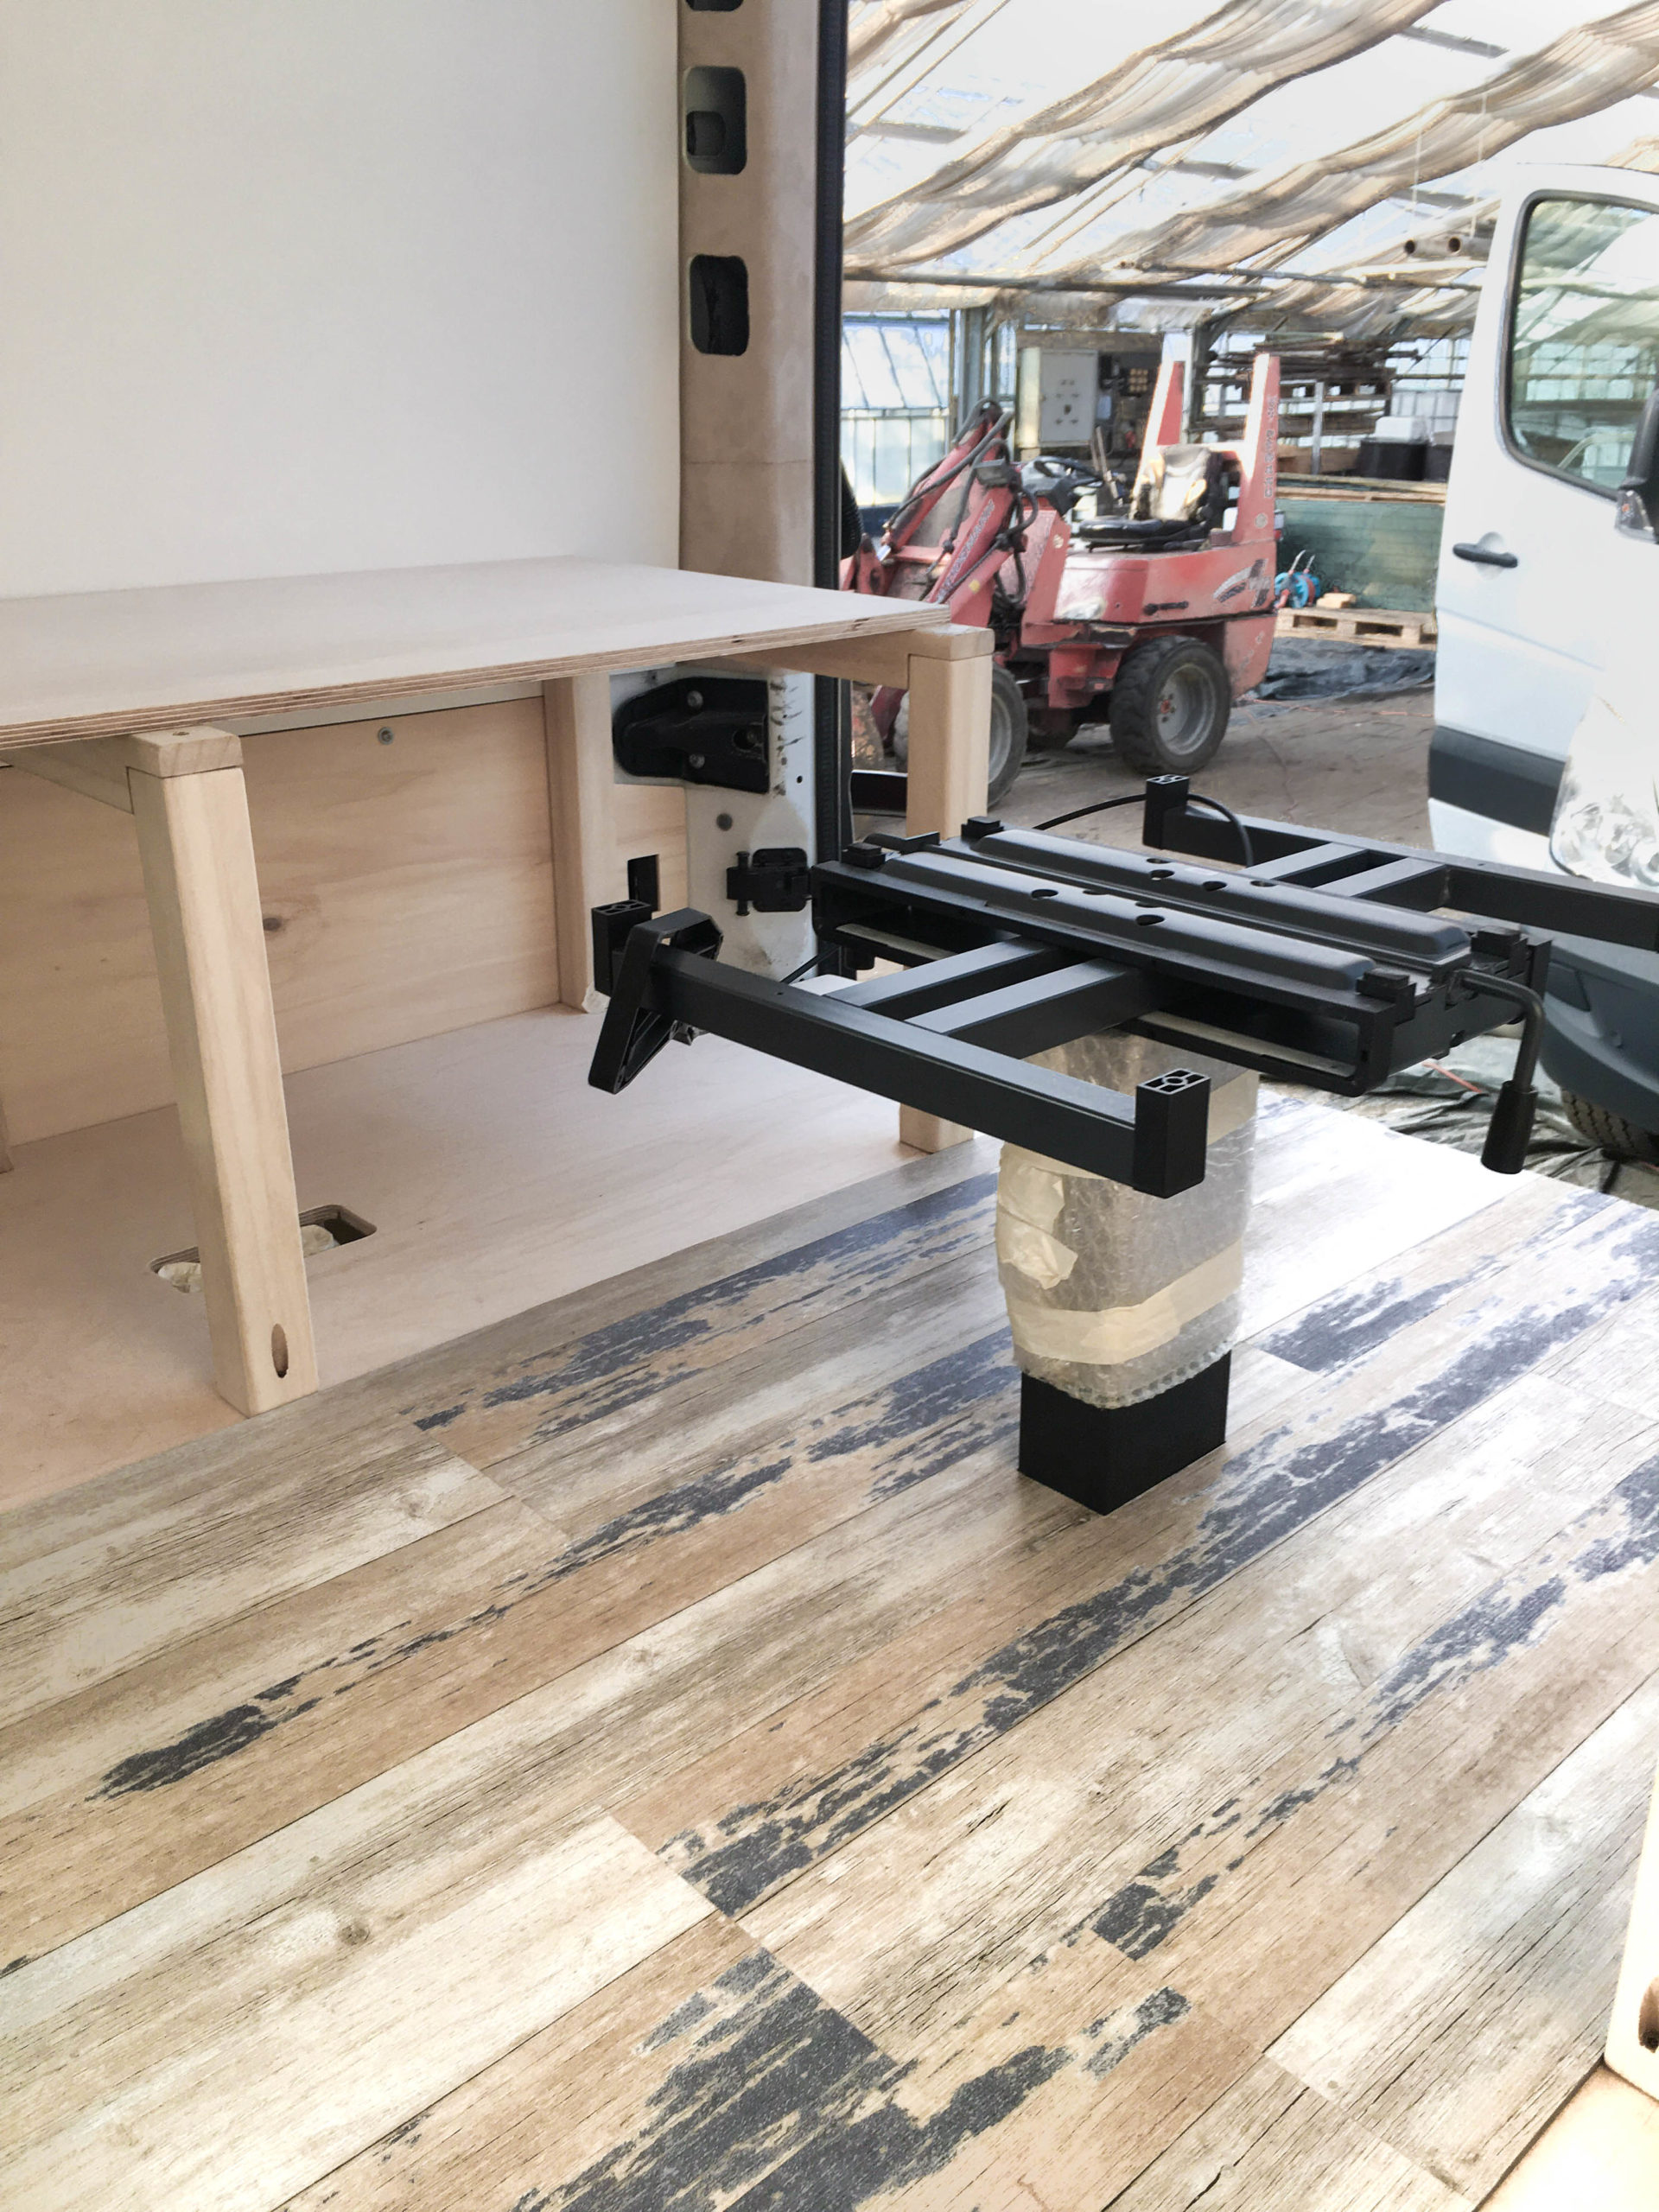
Up next was the table! It’s a steplessly lowerable lift table. At daytime it will be „up“ and used as a table for eating and working, at night it will be lowered and thereby complete the bed surface in between the two benches.
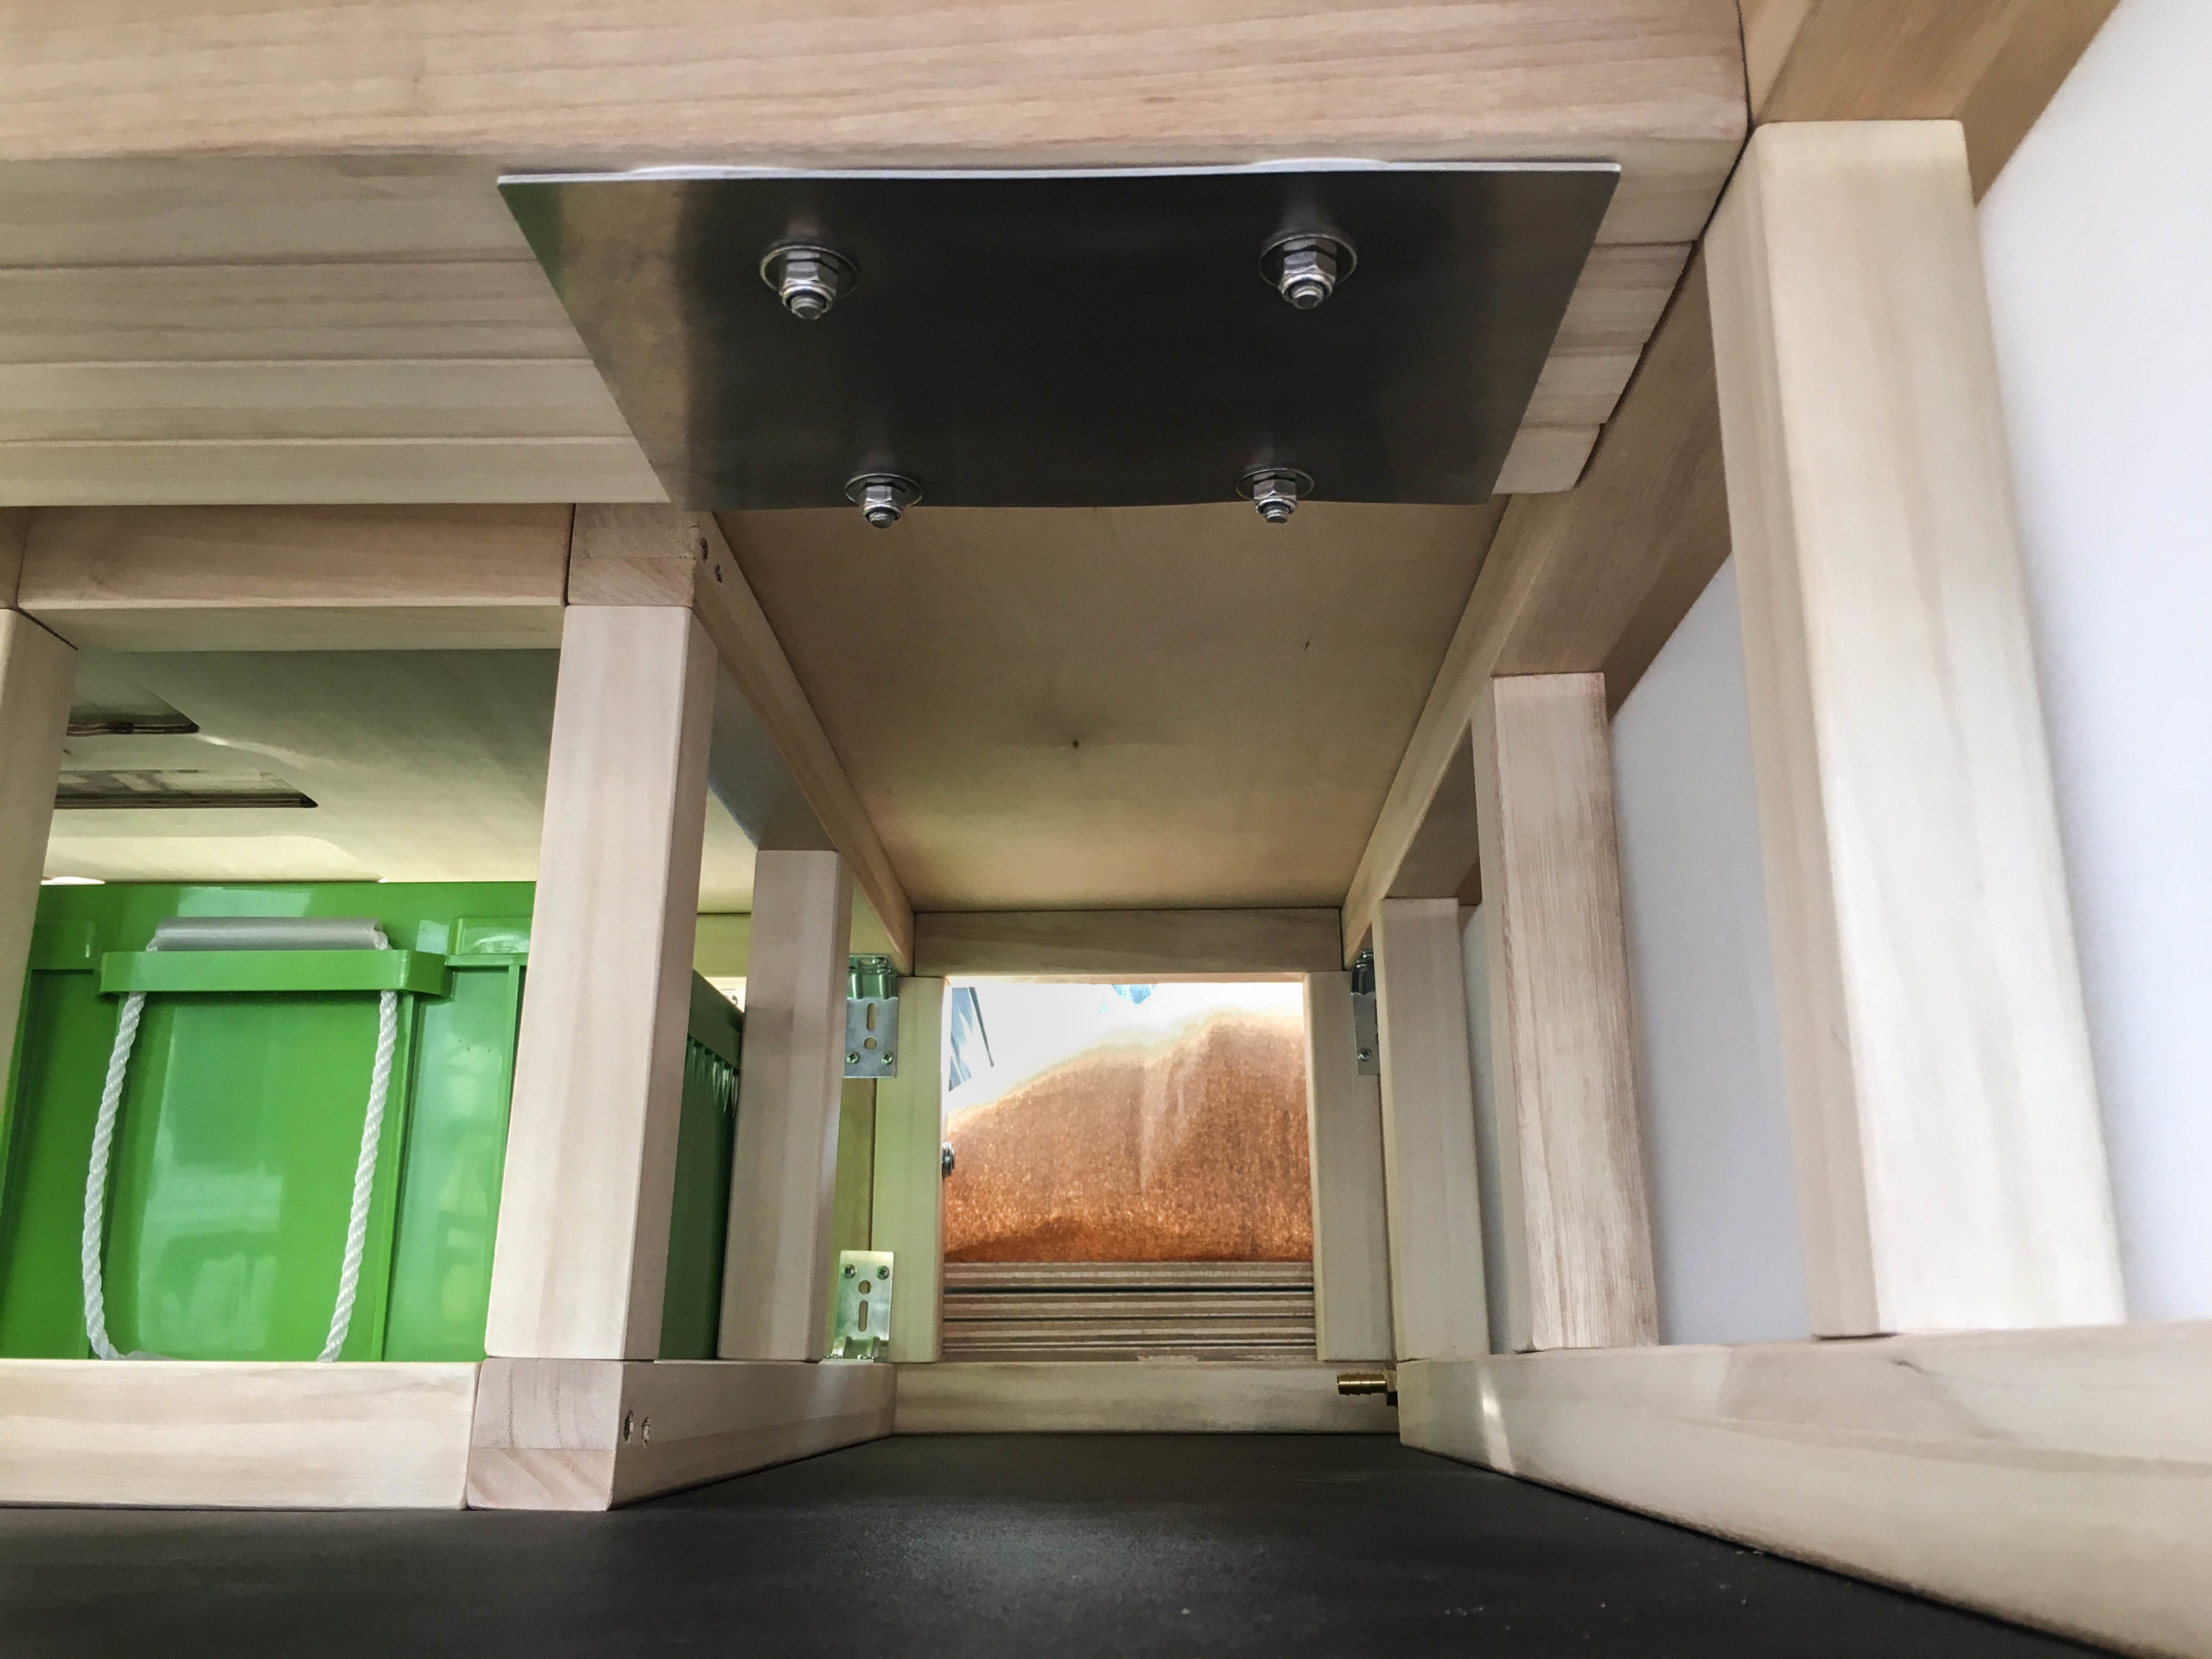
We already prepared the platform plate for the table. By milling the plate, the table’s foot is lowered into the multiplex-plate.
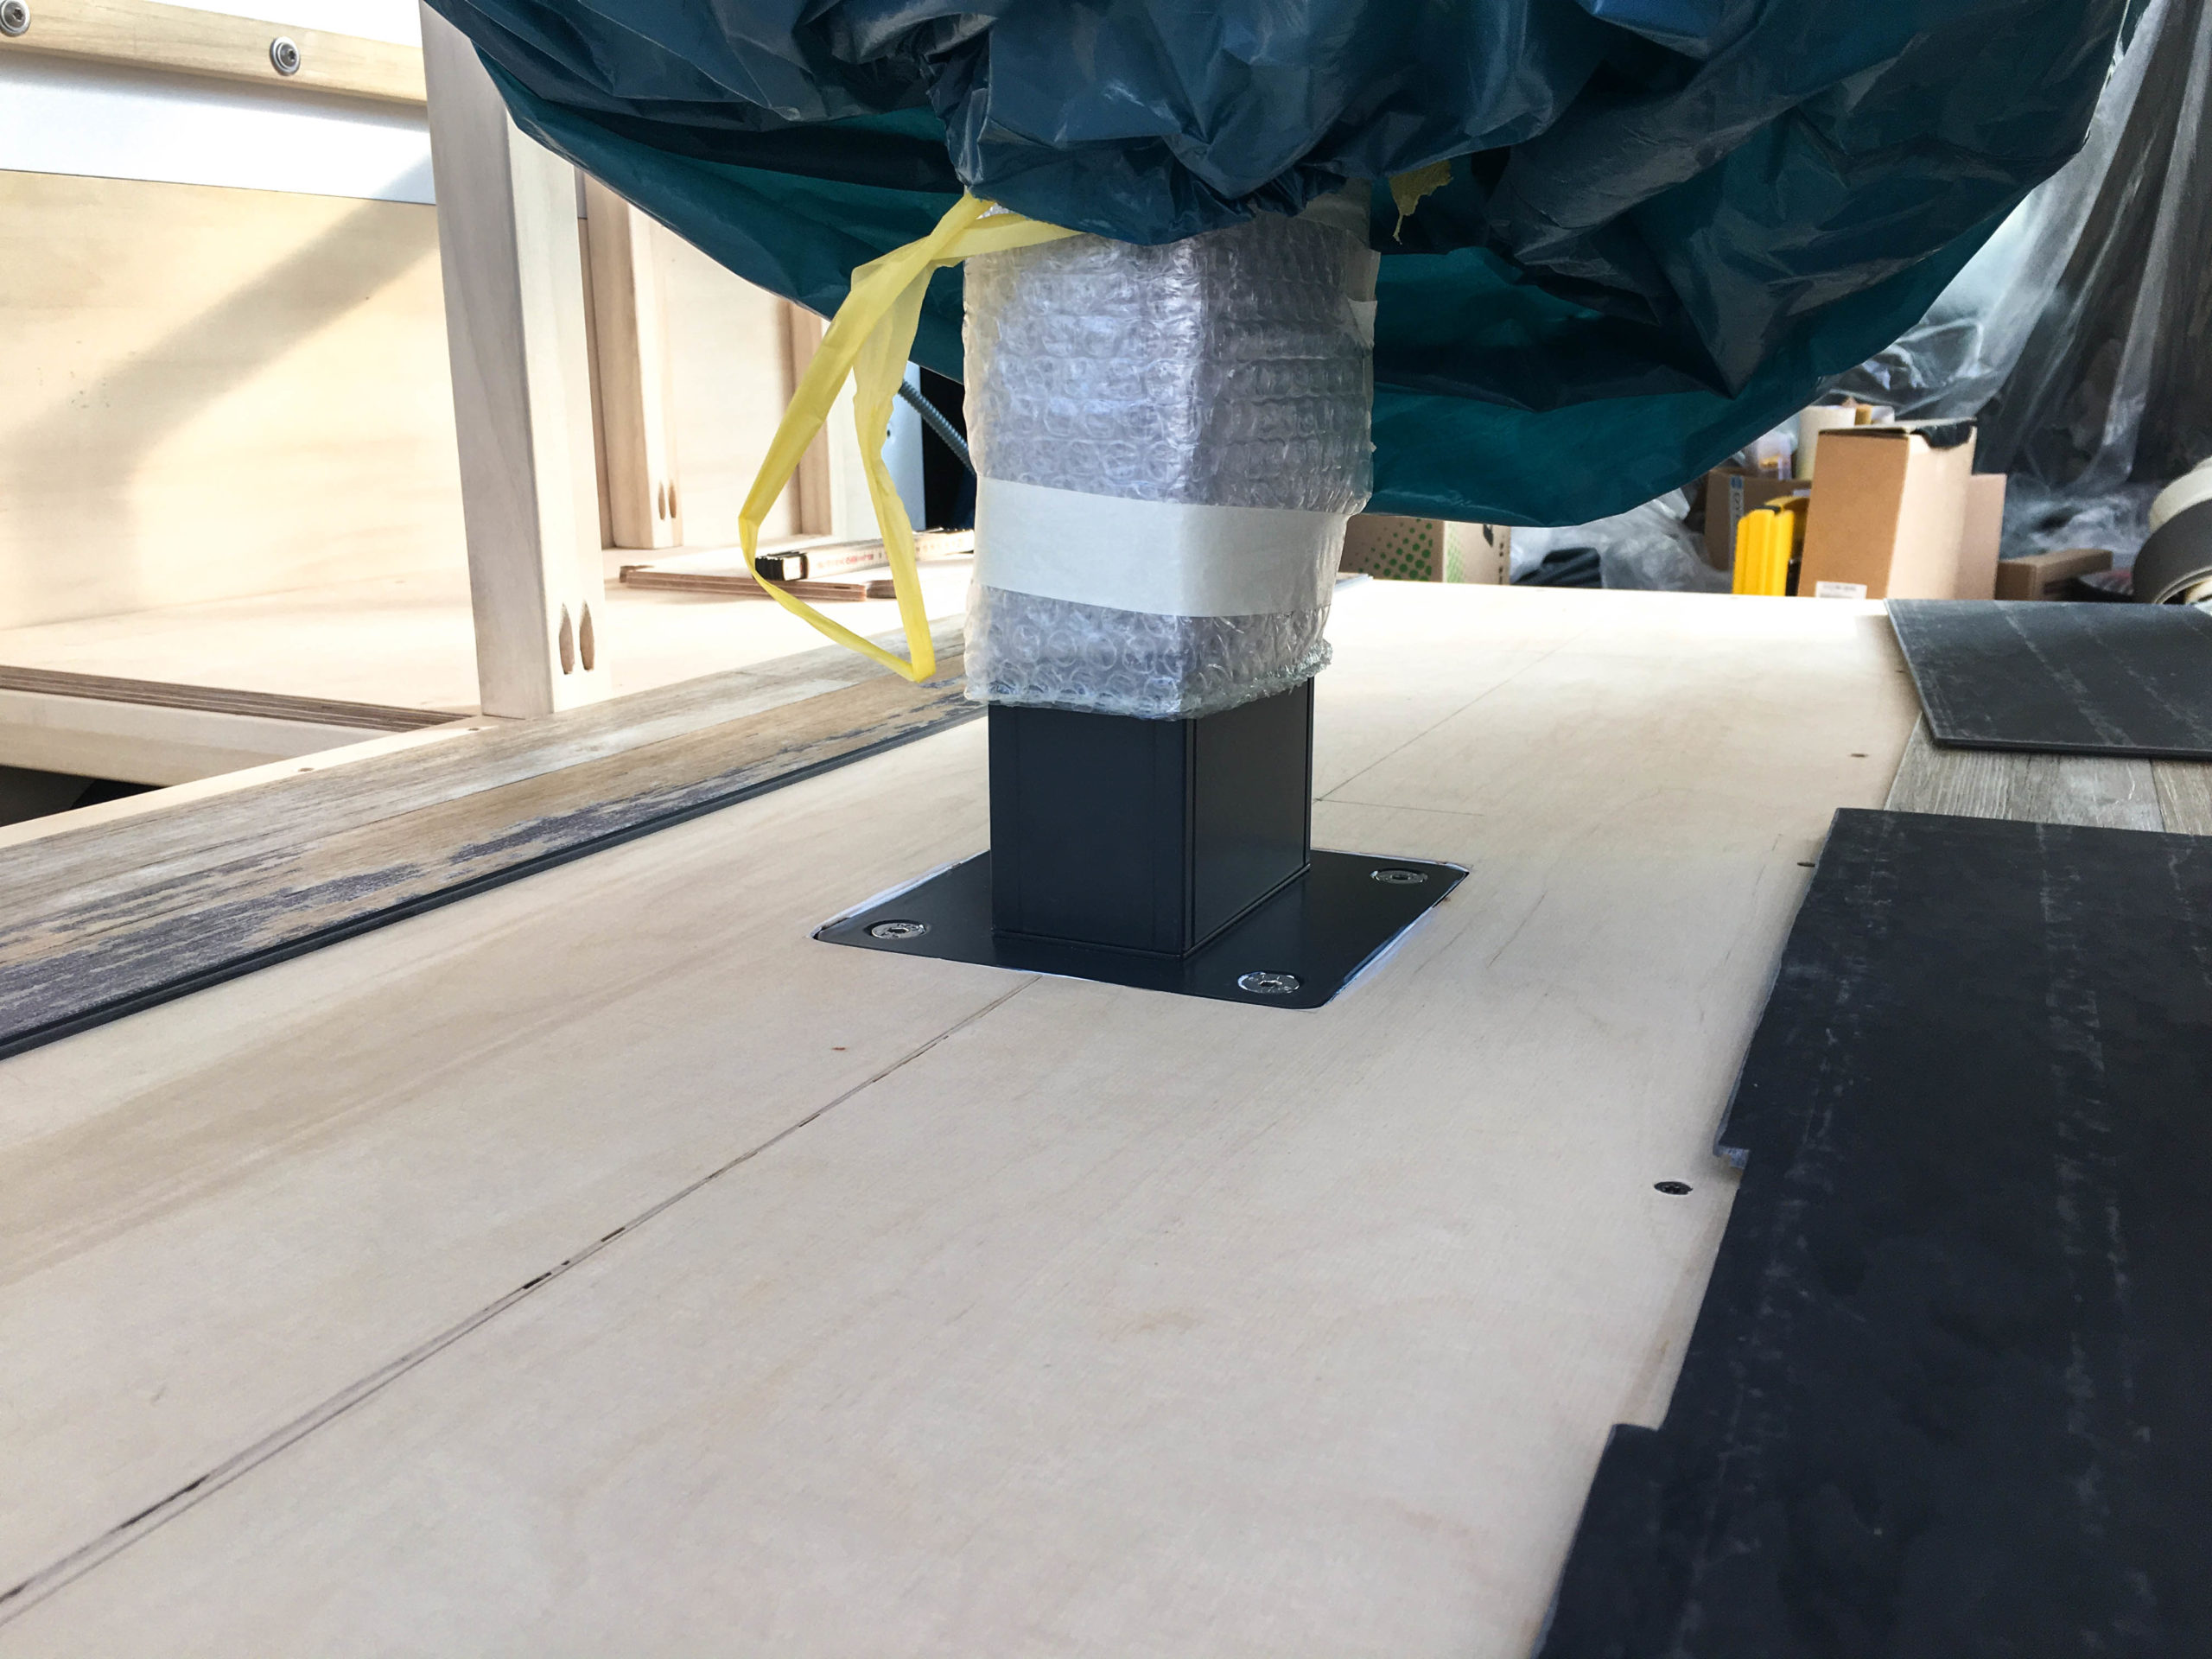
The table is fasted with an aluminium plate at the bottom using four big screws which are screwed into additionally installed studs to add even more stability. That way the table will neither move while driving nor at a (never needed) emergency breaking. We will probably lower the plate while driving, that way the center of gravity will be lower so less forces are affecting the construction.
On the platform and over the table’s foot, we laid our click-vinyl flooring, thereby the foot is „invisible“ so you literally can’t bump into it!
Here we’ll continue with the benches and their covering. The final tabletop for the bed surface will be then coming soon 😉