
Bring on the water! We want to be self-sufficient for a longer period of time with our van. So we especially need fresh and clean water. That is why we equip our Overland-Campervan with a big freshwater tank!
When it comes to fresh water supply in a van, there are different options. You can either use small, single canisters or you can install one big tank (or even more than one). The pros of one option are the cons of the other:
Small canisters are easy to remove and work great with small vans and little spaces. Compared to a big water tank they are cheaper but require extra effort because not only one tank but multiple canisters have to be refilled. It is more convenient to fill one water tank by one central access point, but therefore you eventually need another hole in the outer wall of the vehicle. When the water pump only has one tank to take water out of, it doesn’t need to be switched all the time because that can be kind of uneasy depending on the situation of installation of the canisters. If the big tank doesn’t have a partition though, the water will move back and forth while driving, this is rather not the case with a canister-system. Last but not least, a big tank usually has an overall higher capacity than various small canisters.
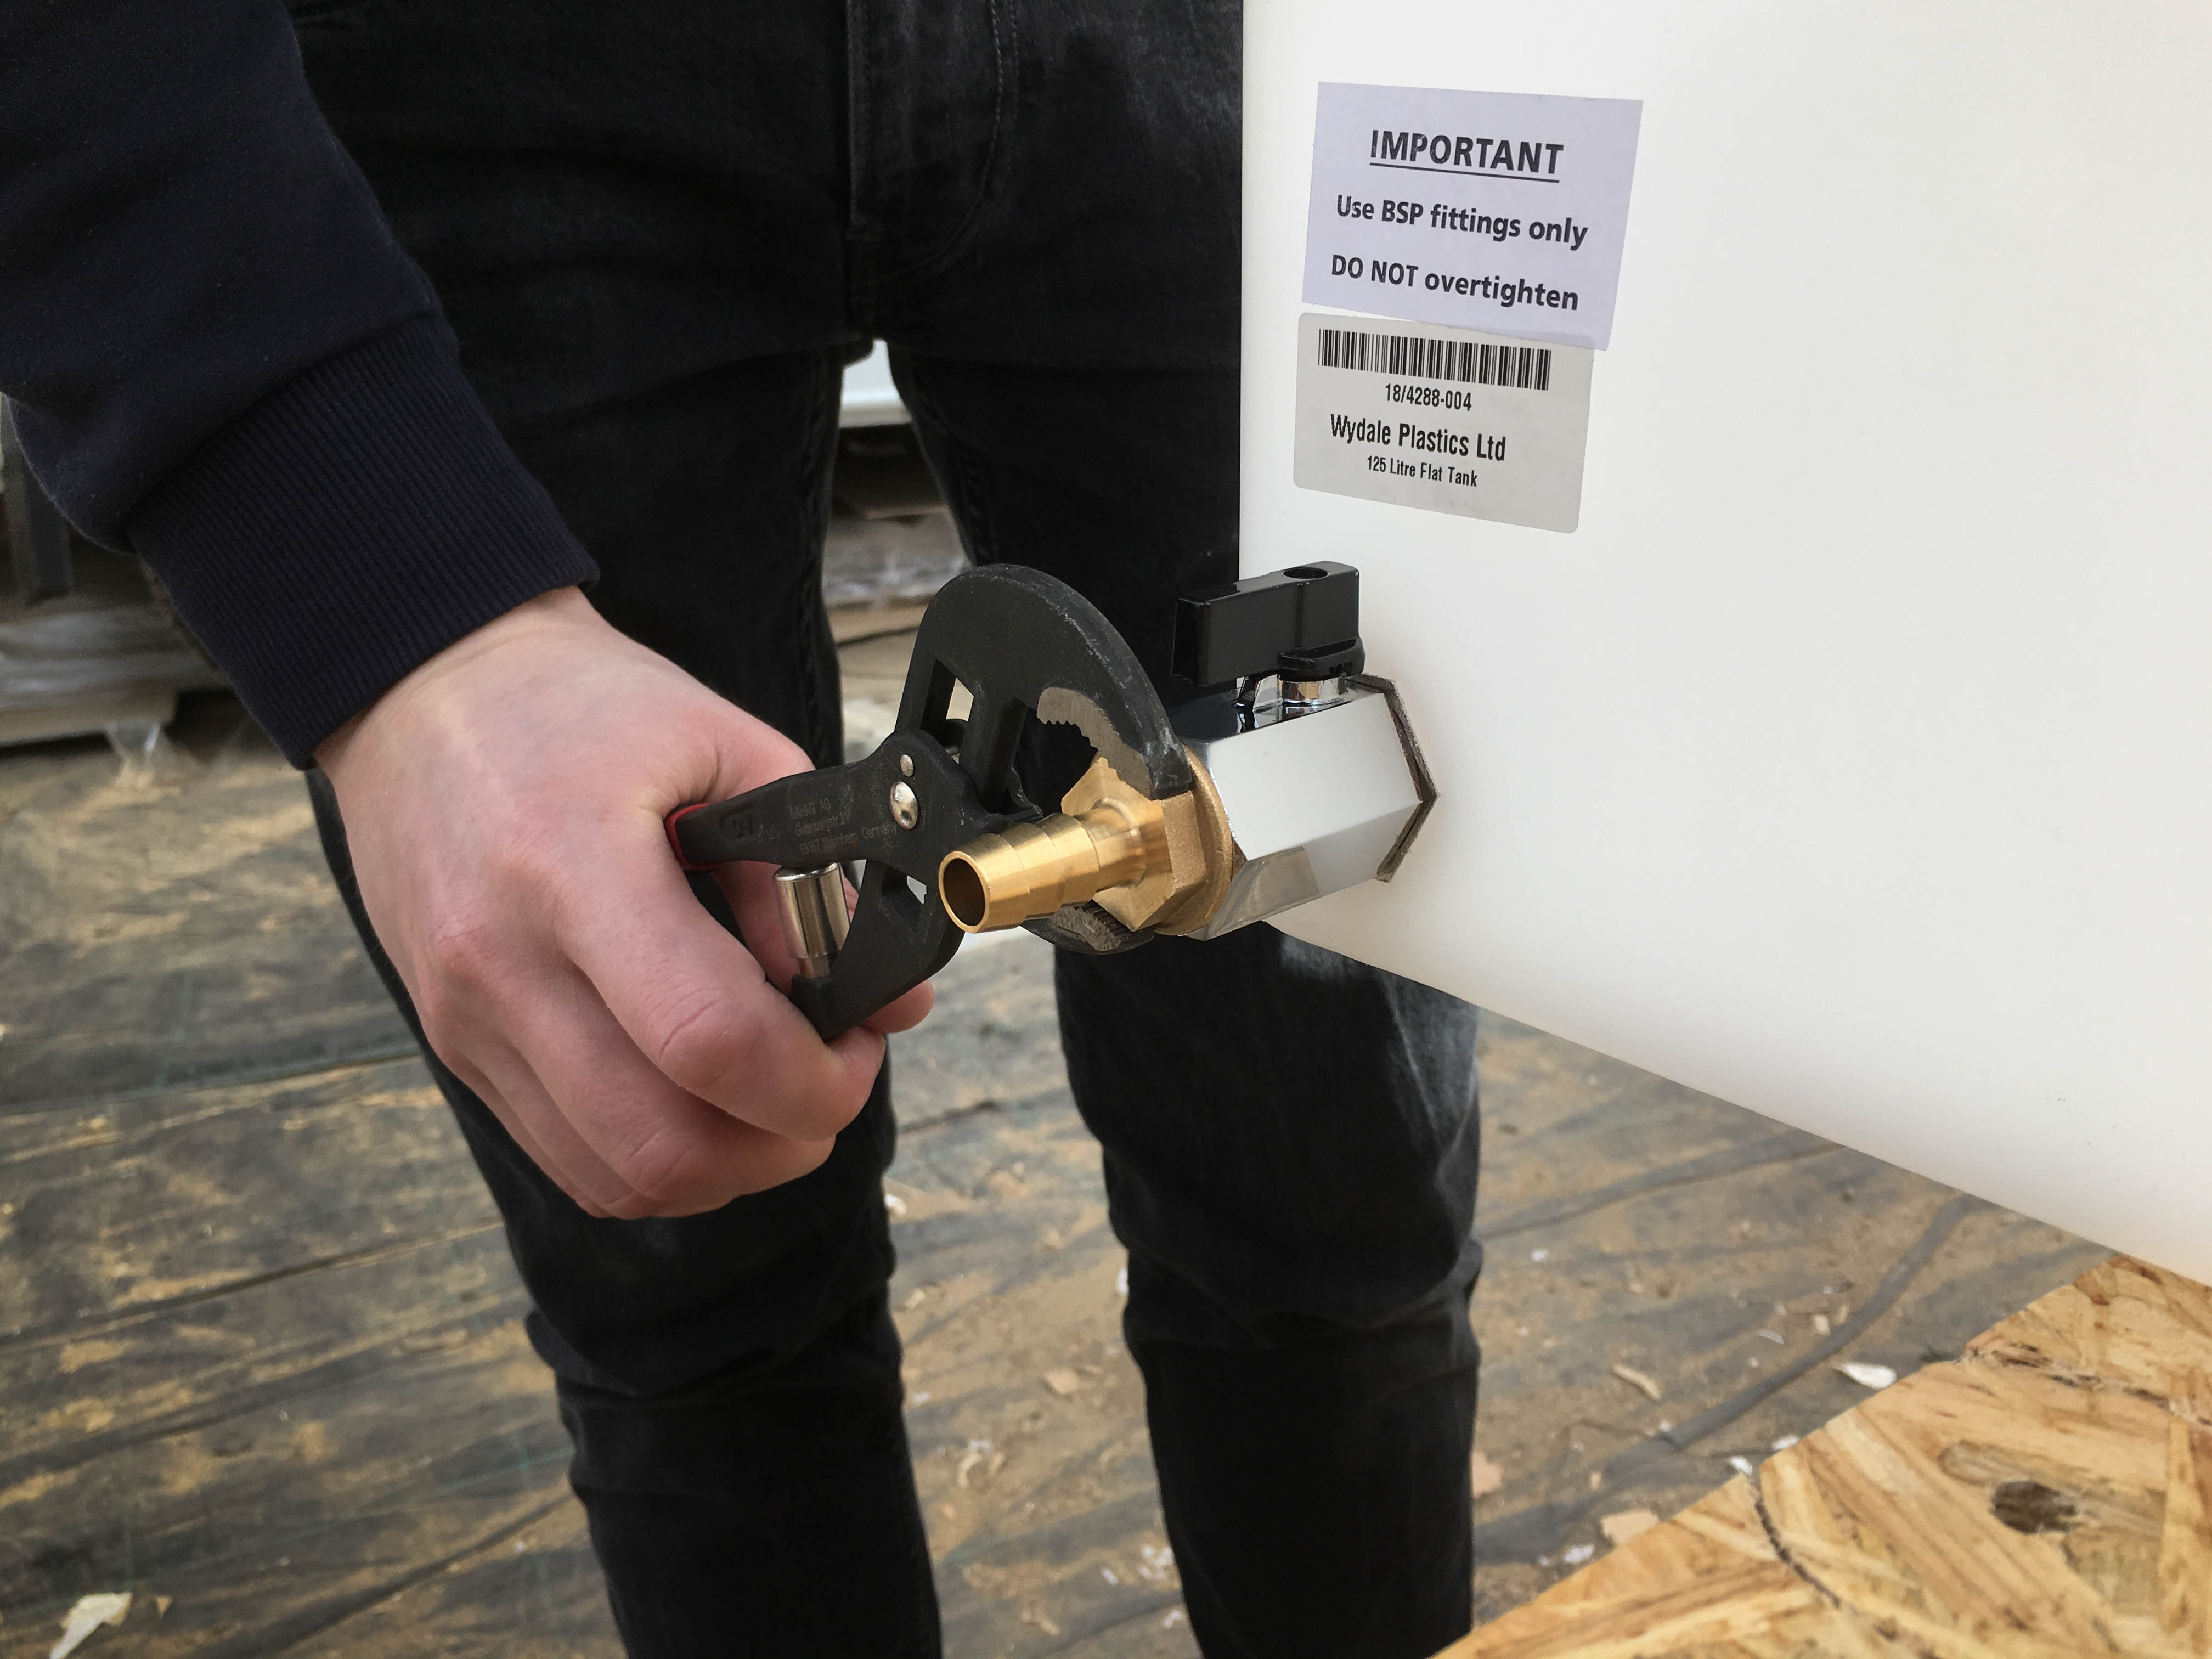
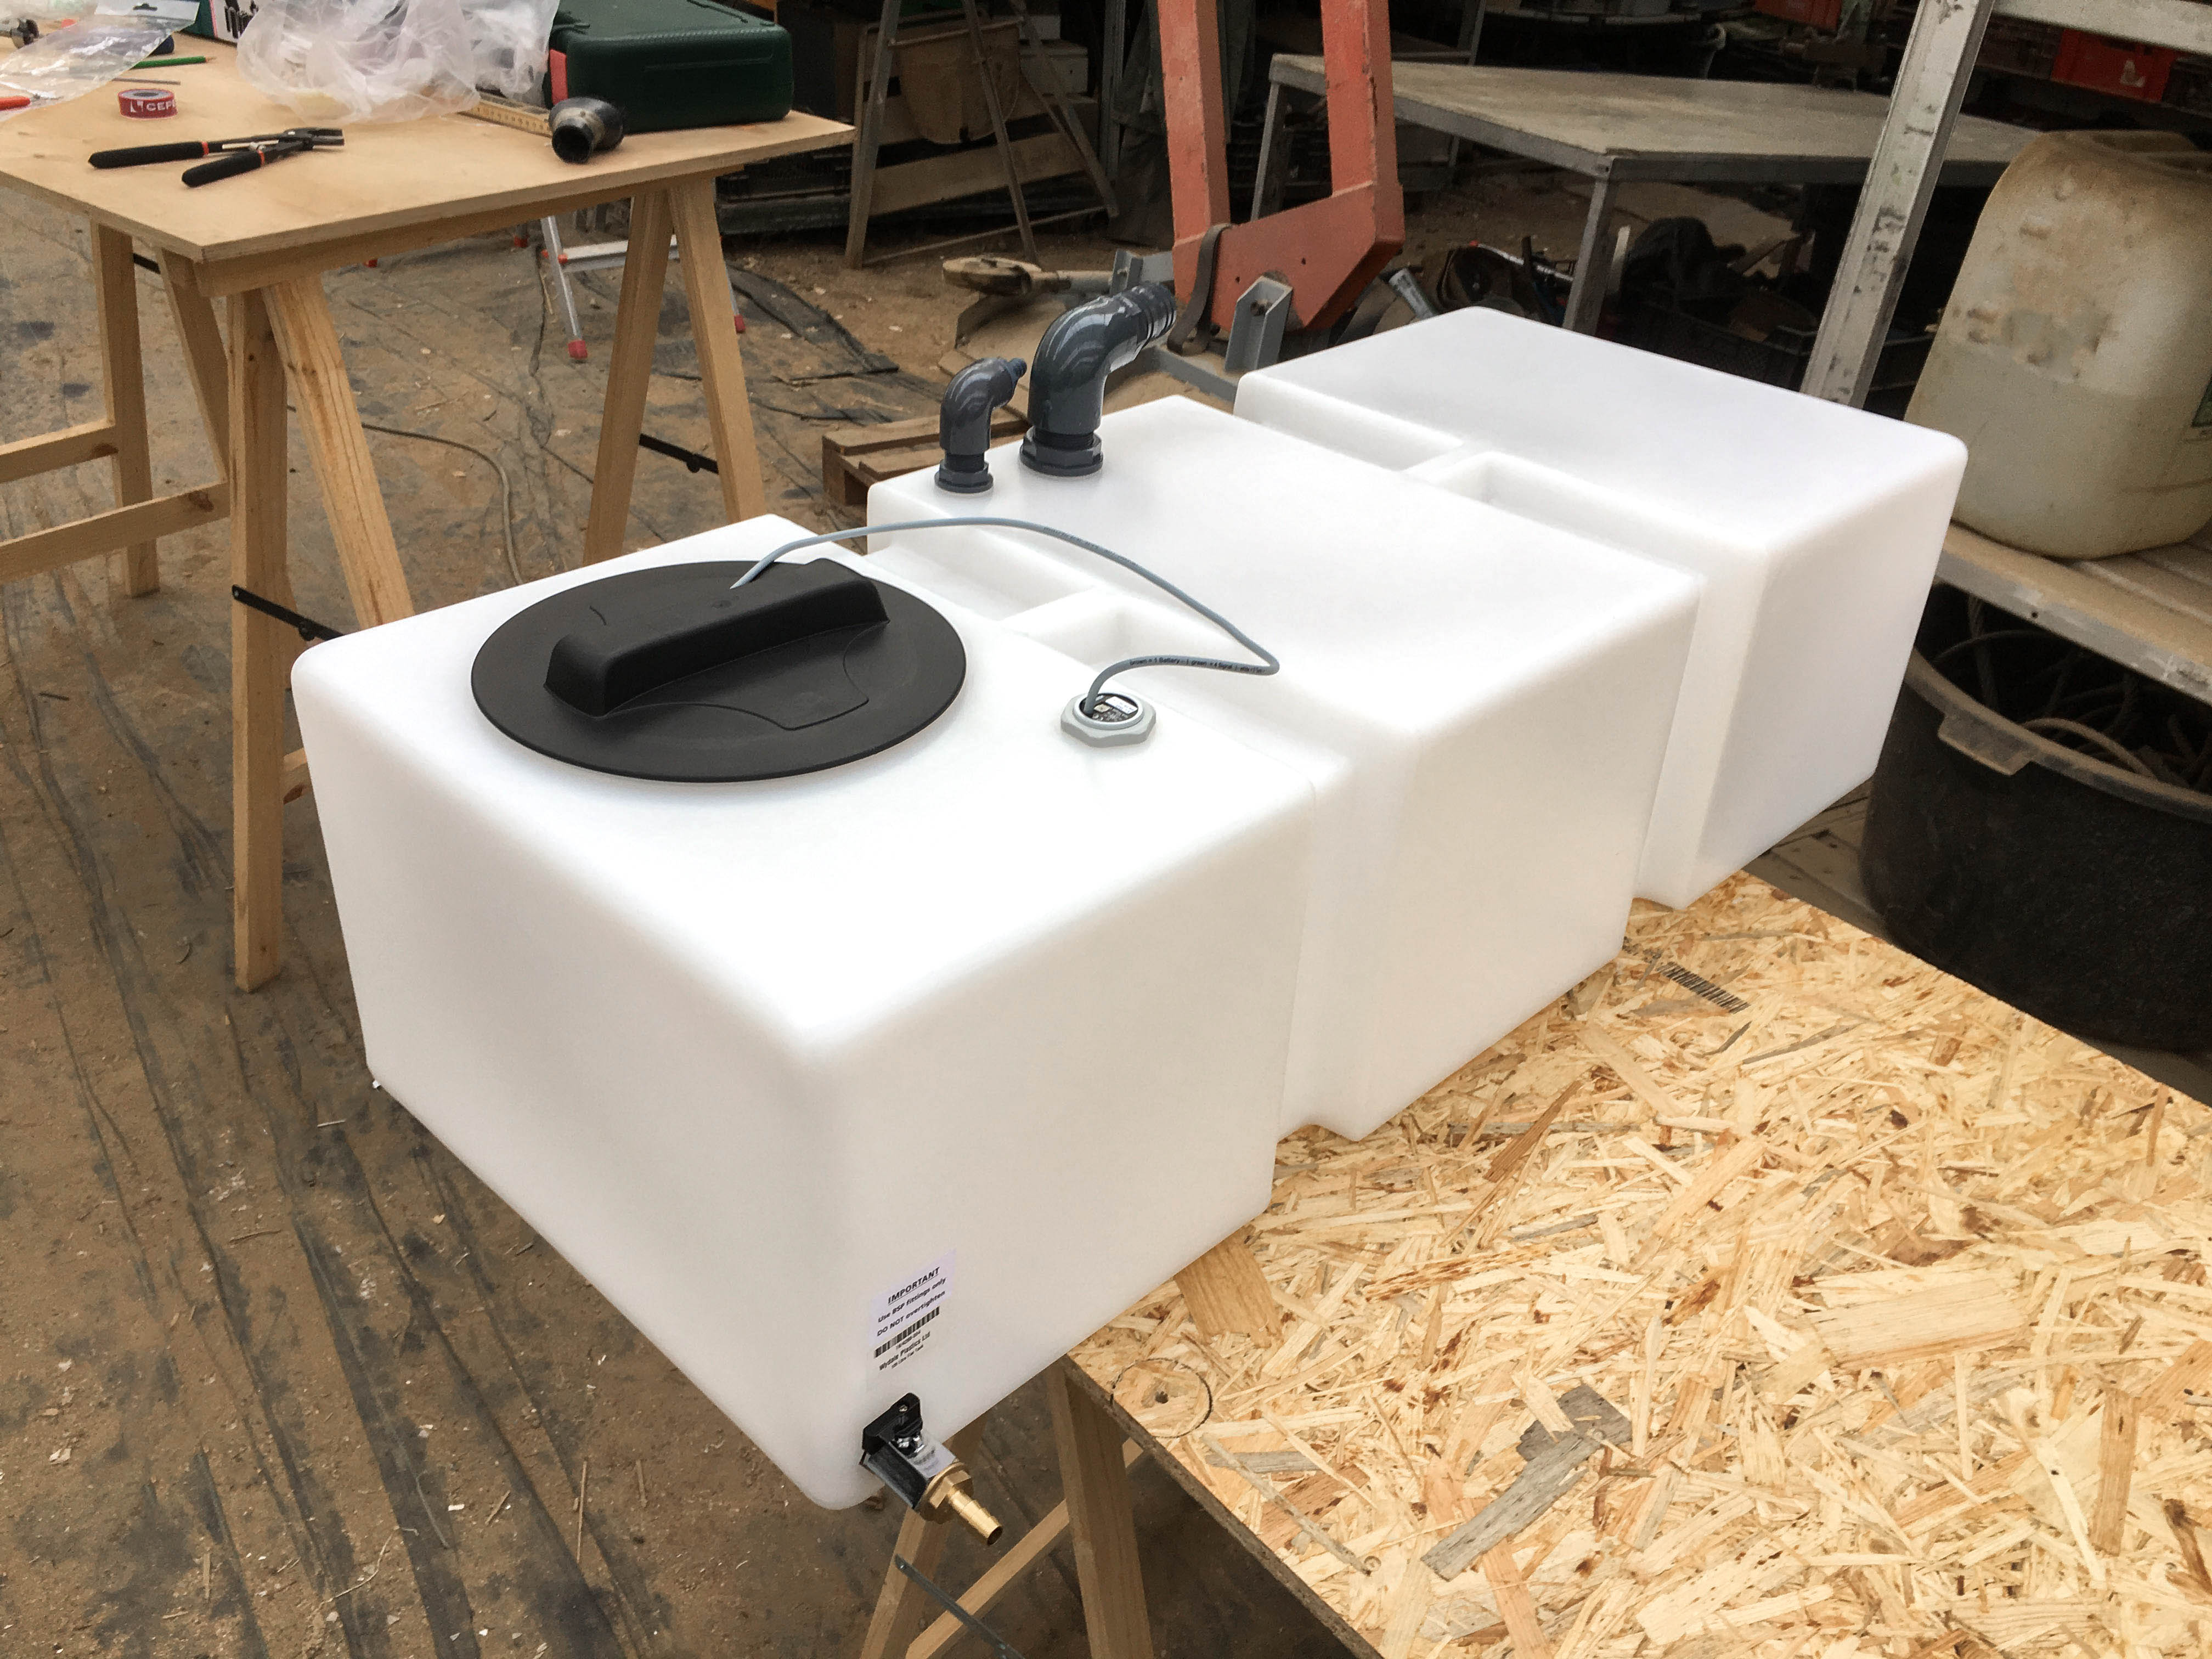
With regard to self-sufficiency and therefore capacity we chose one big watertank; a 125 liter semitransparent flat tank with a 20 cm lid, with ventilation and 3/4 inches brass connection with an internal thread. The wall thickness of the plastic tank is about 8 mm.
We got our water tank from Tanksdirekt; shipping worked great and they have various tanks in all sizes and combinations as well as lots of other supplies!
The requirements regarding the capacity
For short trips or stays on a campground with enough water supplies available, a small water-canister system is more than enough. If this is your way of traveling, a big water tank would just make the vehicle heavier and increase fuel consumption.
But we want to be self-sufficient for as long as possible and our van even has a small bathroom with a shower and toilet, we also want to cook and wash up. So we chose one big water tank over various small canisters.
The characteristics of the water tank
Water tanks are available in various colors and shapes. There are different opinions on if you should use a black or clear tank. Translucent tanks favor the growth and increase of algae and bacteria. Usually water tanks, no matter what color, are installed where you can’t see them anyways though – so there will be no light. Apart rom this you can add different things to keep the water clean. The water should be drained completely on a regular basis and the tank has to be washed to keep the water system as clean as possible.
As to the shape you would have to consider your individual situation of installation and chose your tank accordingly; may it be flat, tall, slim or wide.
The individual situation of installation in the van
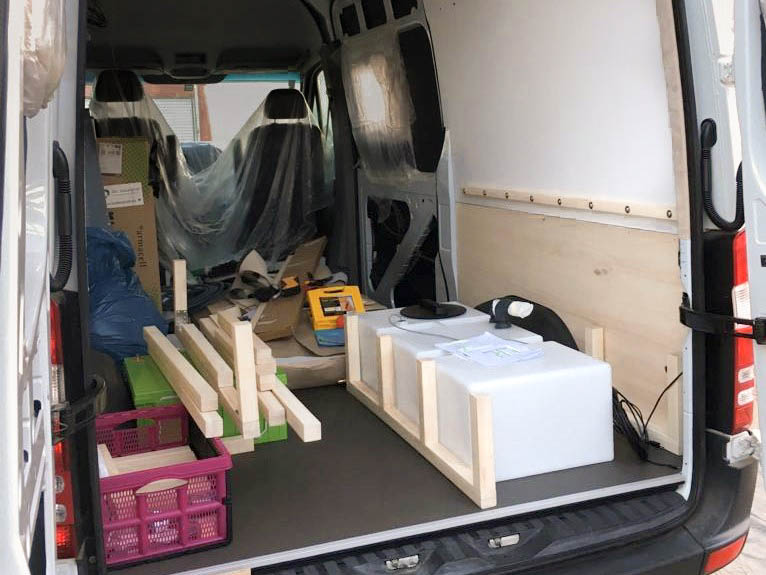
A big water tank with great capacity is big and should already be taken into account when planning the interior build. For storage, we have the area under our platform in the back below the seating area of the van. This is where we will put the water tank, so it will be long and flat to fit underneath.
As of positioning you have to consider the weight and a counterweight. Our water tank will be on one side and our batteries on the other side of the storage so when the watertank is close to full, the weight will be roughly balanced on each side.
The water tank should be fastened and have a fixed point in the direction of travel. Our frame construction for the platform will be build around the water tank so it doesn’t have any room to move. But we will additionally install lashing straps later, too.
But no matter the frame construction or anything else to keep the tank in a fixed place, the screw cap always has to be accessible, for example to clean the tank regularly.
The water intake & the ventilation
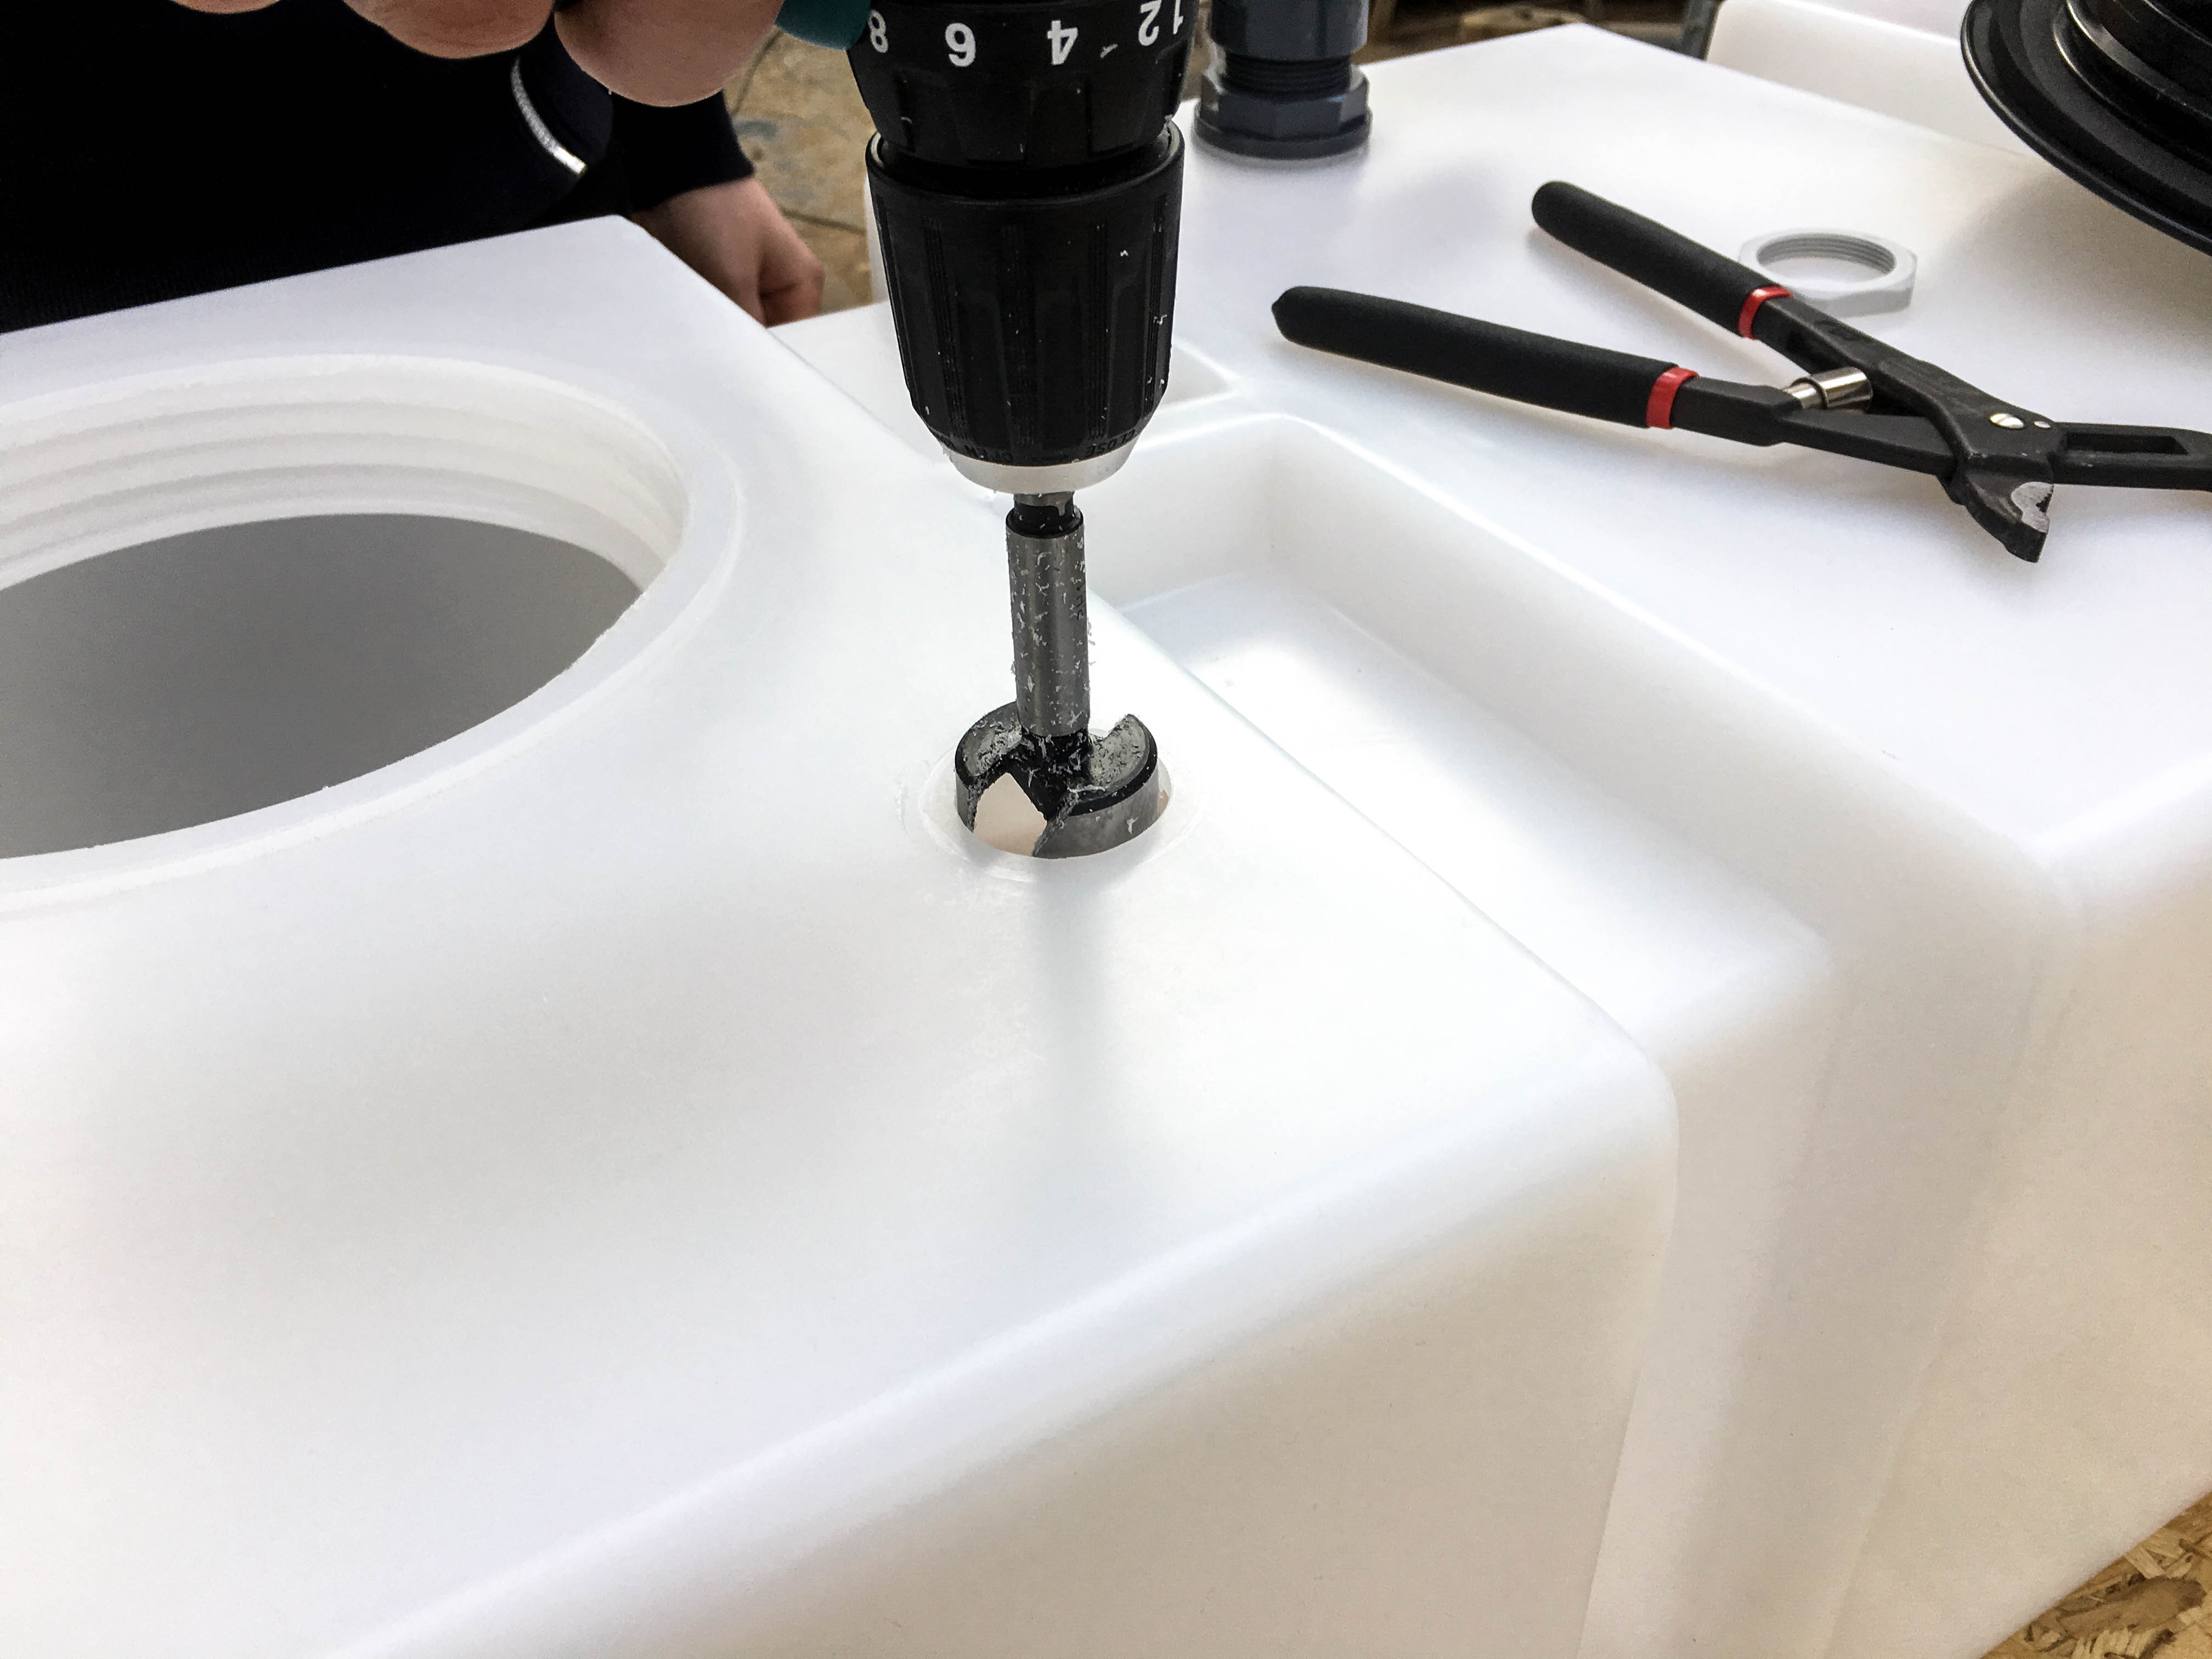
The water gets in the tank through the water intake and then for the air to get out there is a vent. These parts are available e.g. with a 90° angle and can be installed parallel and space saving next to each other.

To install the parts to the water tank we recommend a forstner bit to drill the fitting hole in the tank, teflon tape for „sealing“ and a water pump plier to tighten everything.
The filler inlet
To fill up the water tank with fresh water from the outside you need a filler inlet and then for instance use a hose or watering can to fill it. Usually the filler inlet is installed in the outside wall of the vehicle so yet another hole would have been necessary, but we really did not want that. That’s why we chose to install the filler inlet underneath our bench and waterproofed the surrounding area with PVC to protect it from splash water.
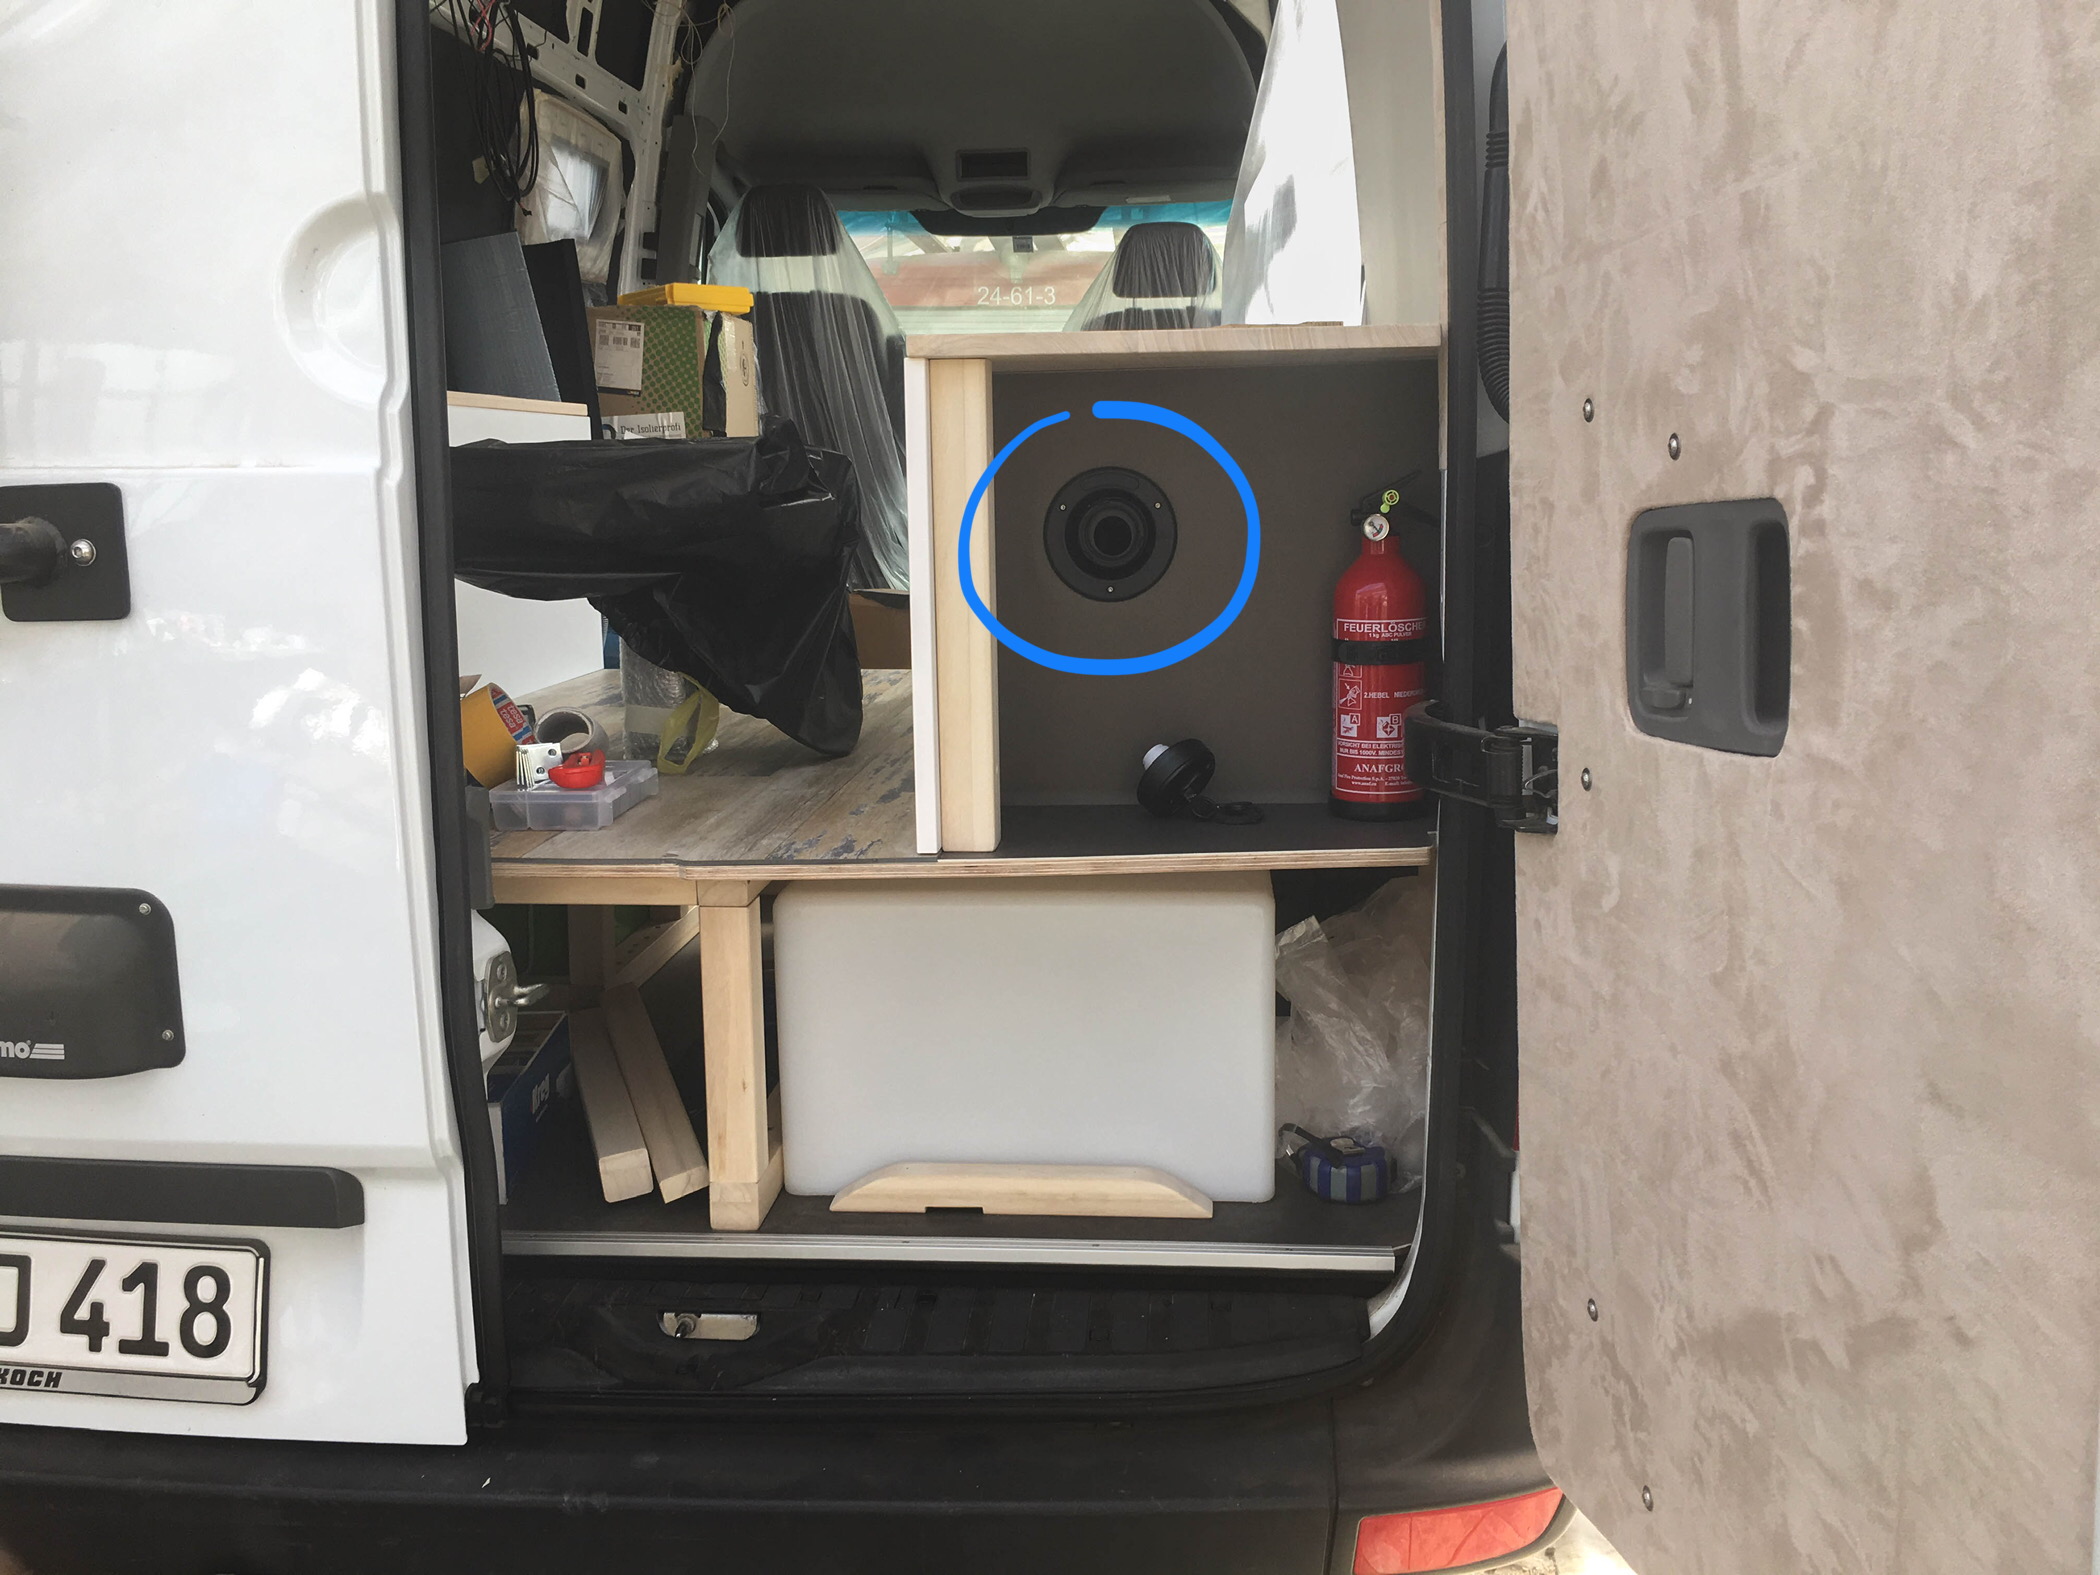
When installing the filler inlet, a slight slope has to be taken into account for the water to run down into the tank properly and not to slosh up or over while driving.
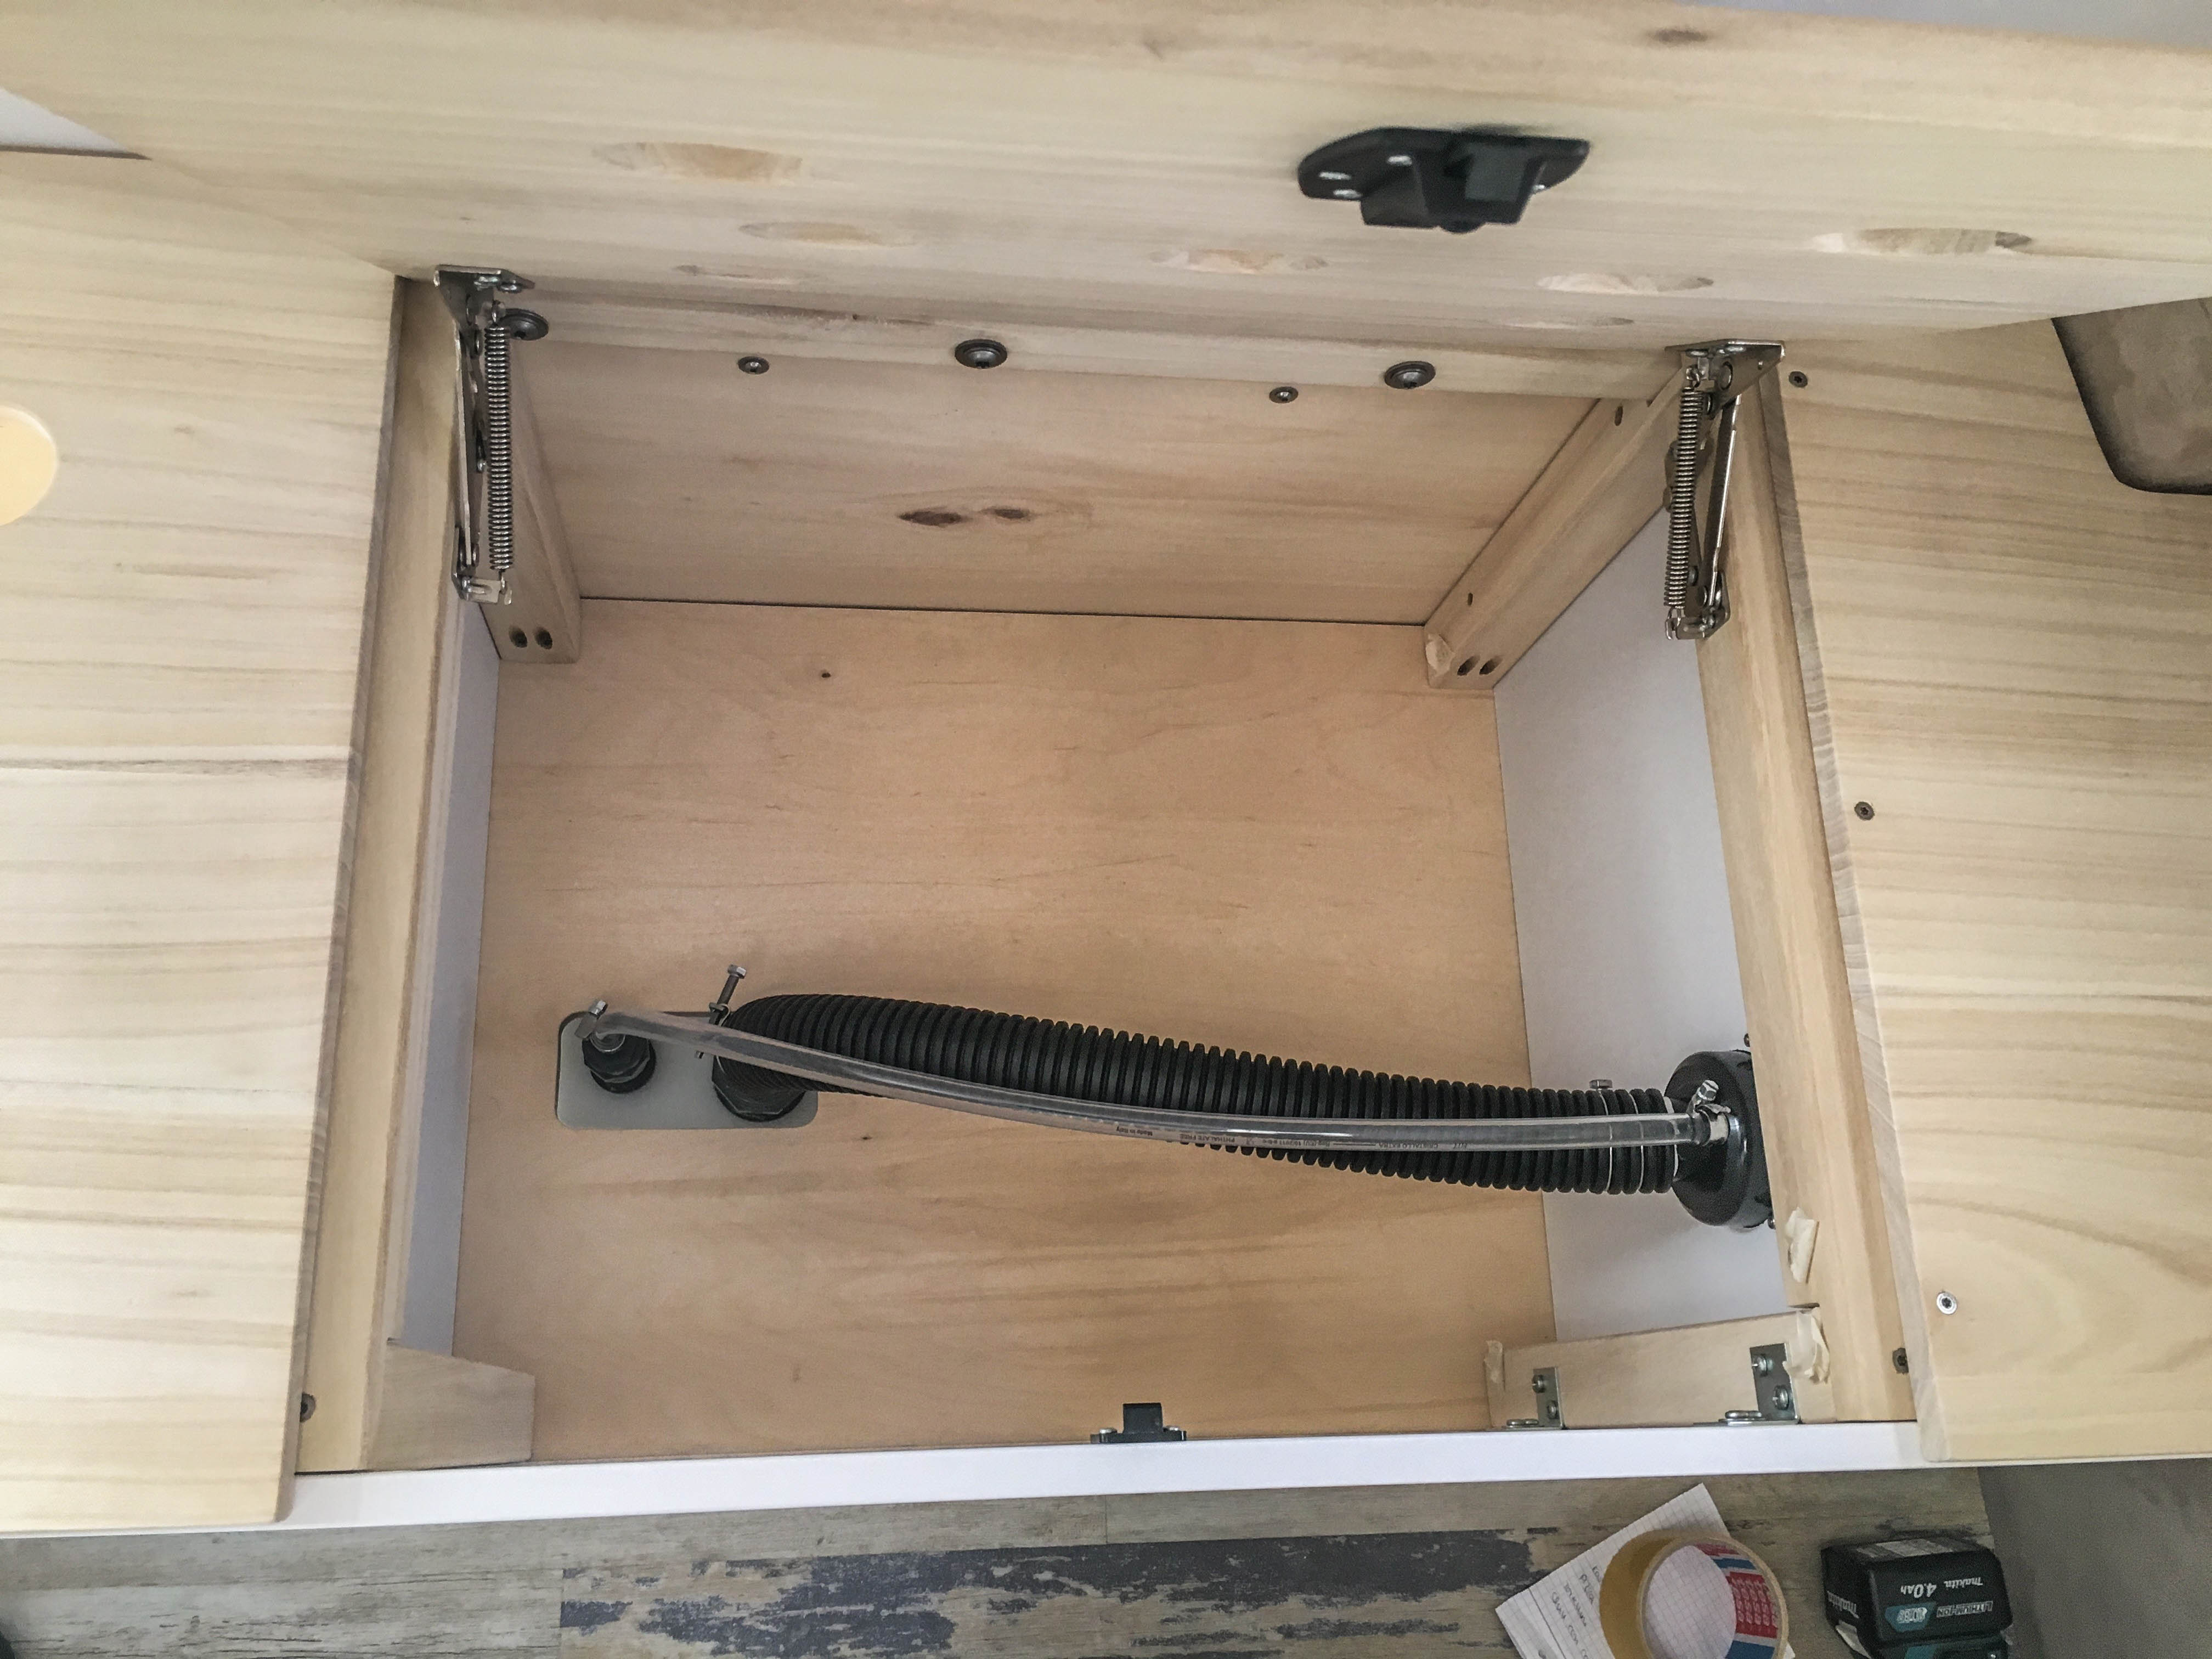
The water pipes
All pipes should be made for water only! For the pipes not to move or come off and cause water damage, the pipes are tightened with hose clamps.
The tap & the hose nozzle
The water pipes and the water pump are connected to a hose nozzle. To turn the the water supply on and off there is a separate tap.
The filling level
It’s not necessary but convenient to have a display of how full or empty the water tank is. We use the Votronic tank electrode, it can be shortened to the individual height of your tank. You just cut the two rod sensors e.g. with a metal saw, at the same length. Between the floor of the tank and the end of the sensors you should leave a gap of about 1-2 cm because of possible bobbing movement. Then just put the insulation cap back on. With the adjustment on top, the height of the tank will be set to 100 % „full“. Therefore just measure the height of the tank and adjust „Tank Height“ to the measured value.

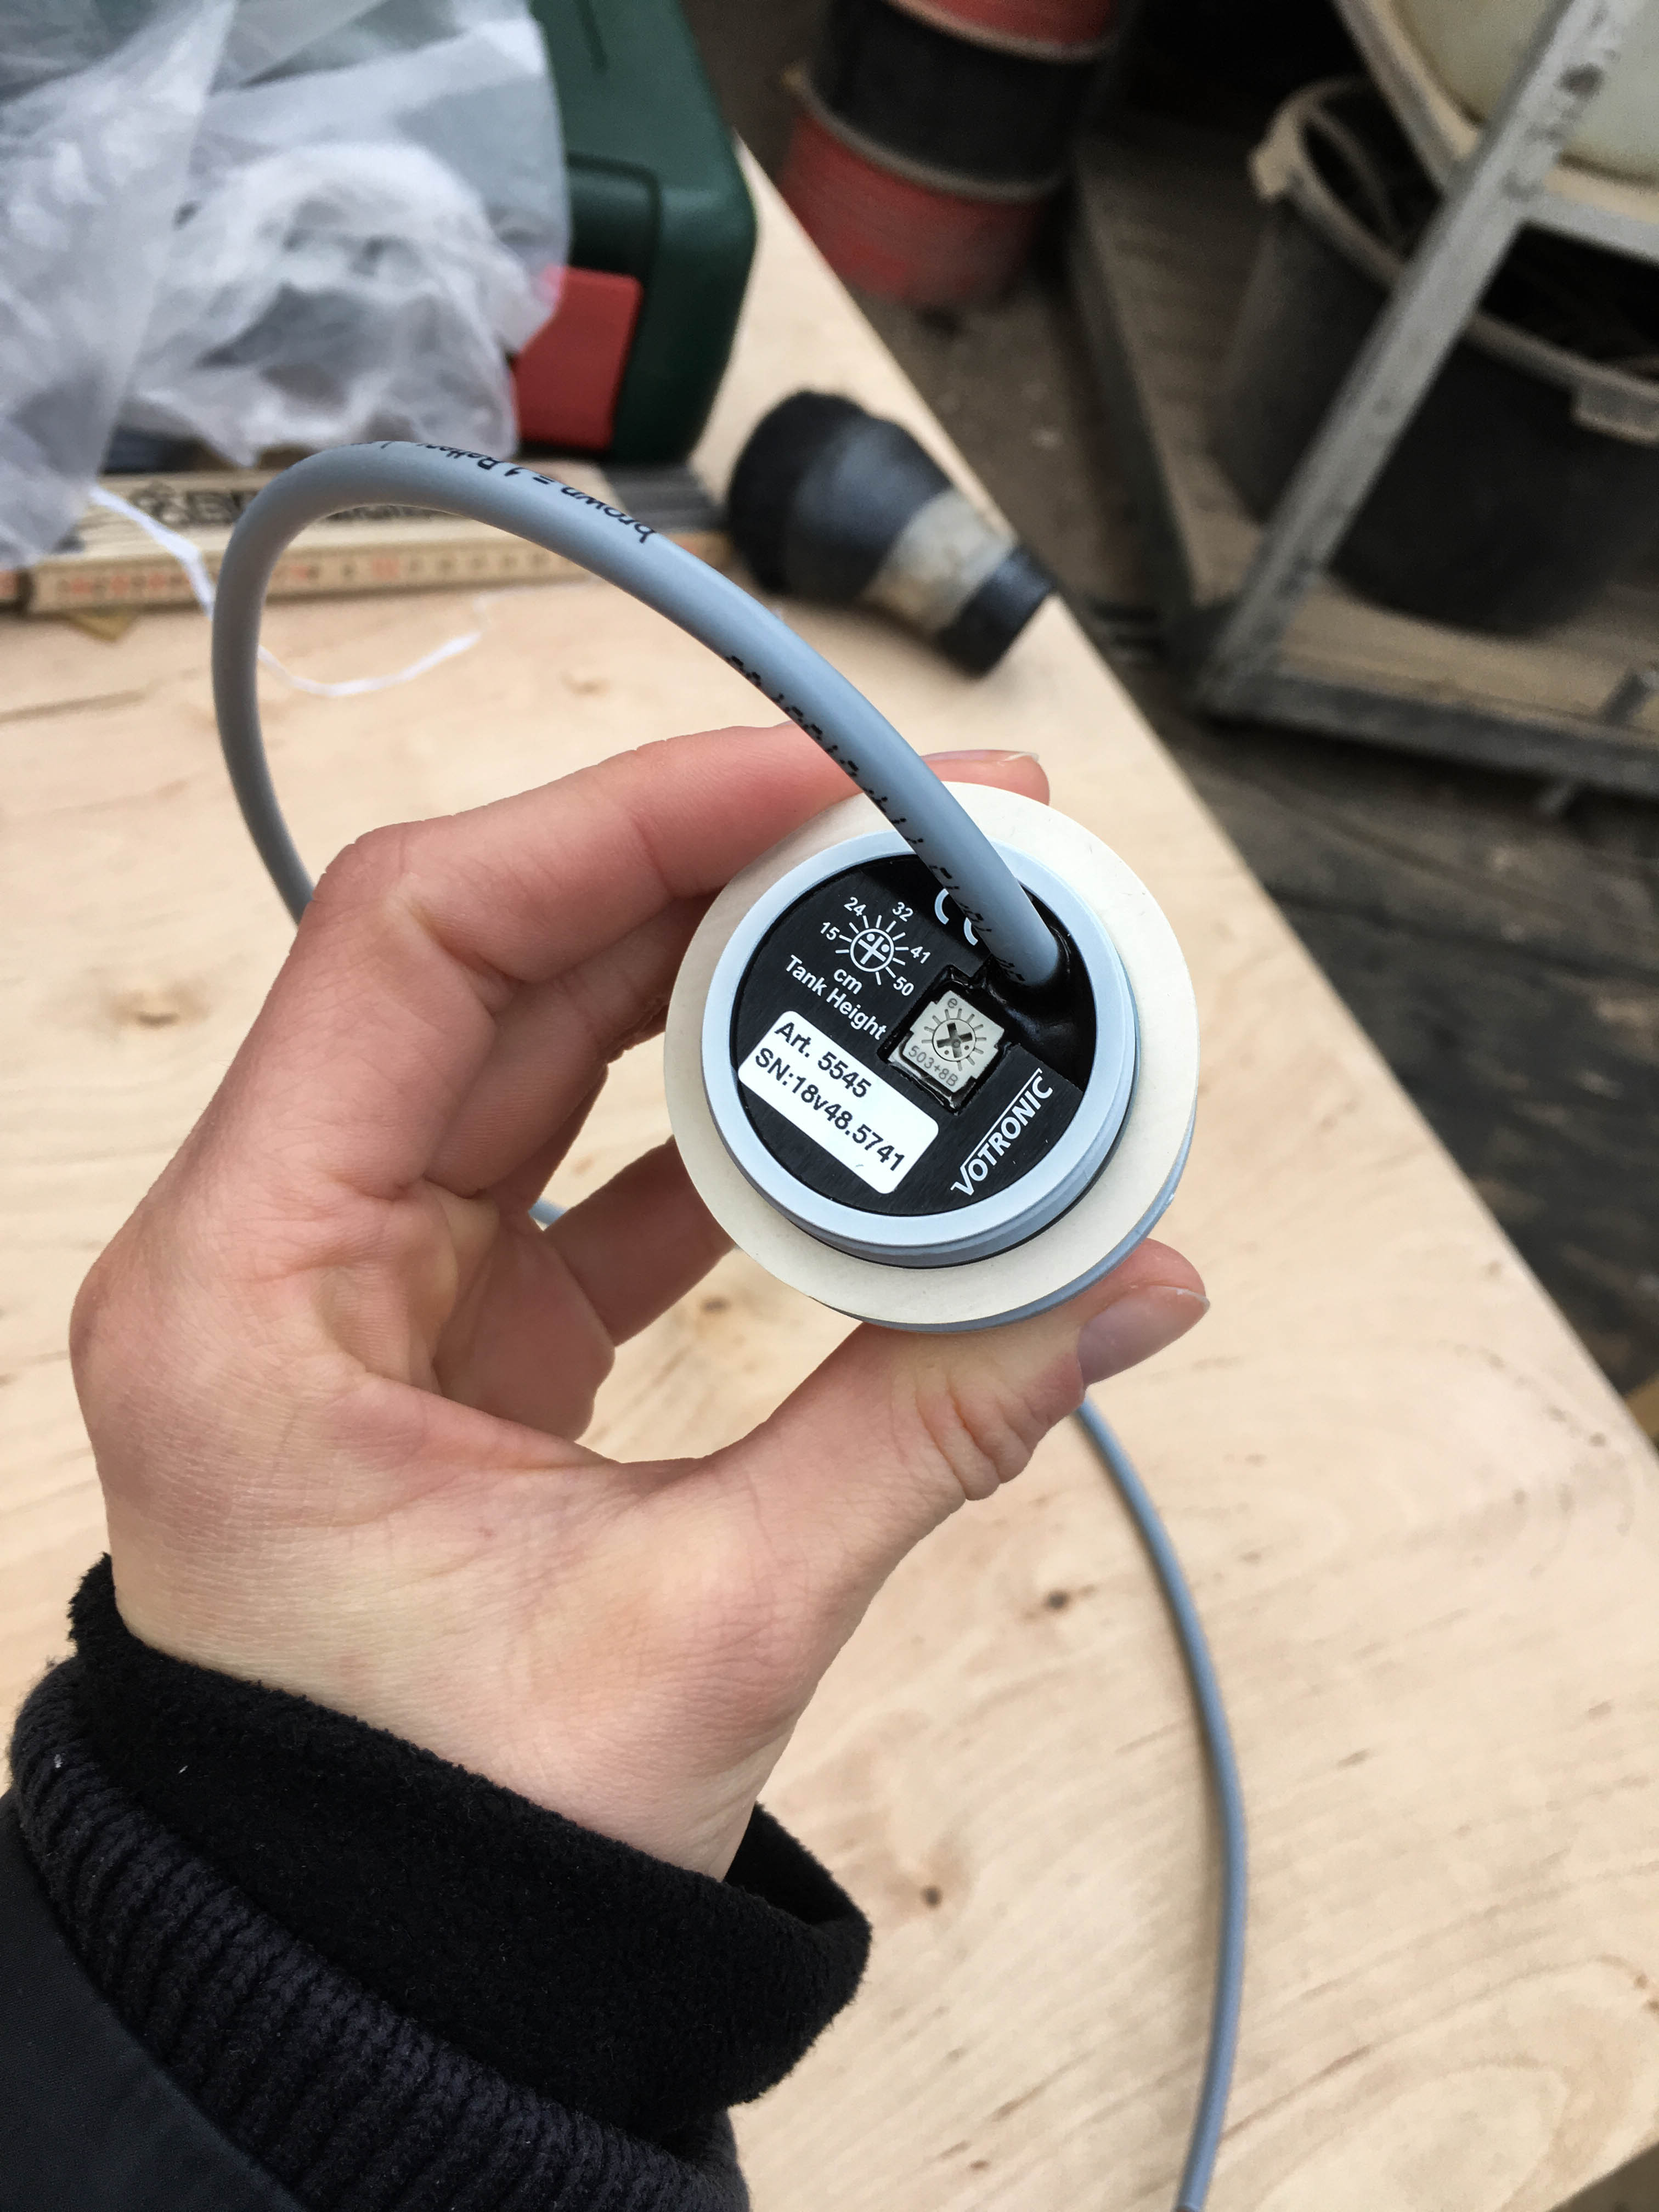
The information is then provided to the board computer so you always know how much water you have left 😉 We used the same electrode for our grey water tank to also have its water level on display.
Done!
Where to put the used water though? Into the grey water tank of course! 😉
Useful extras and accessories for the water tank:


