
If the doors do not close correctly anymore, they have to be readjusted. We had to change the door hinges to install our spare wheel holder, so they are actually the reason we had to readjust the Sprinter’s back doors. We show you how to do it in 7 steps!
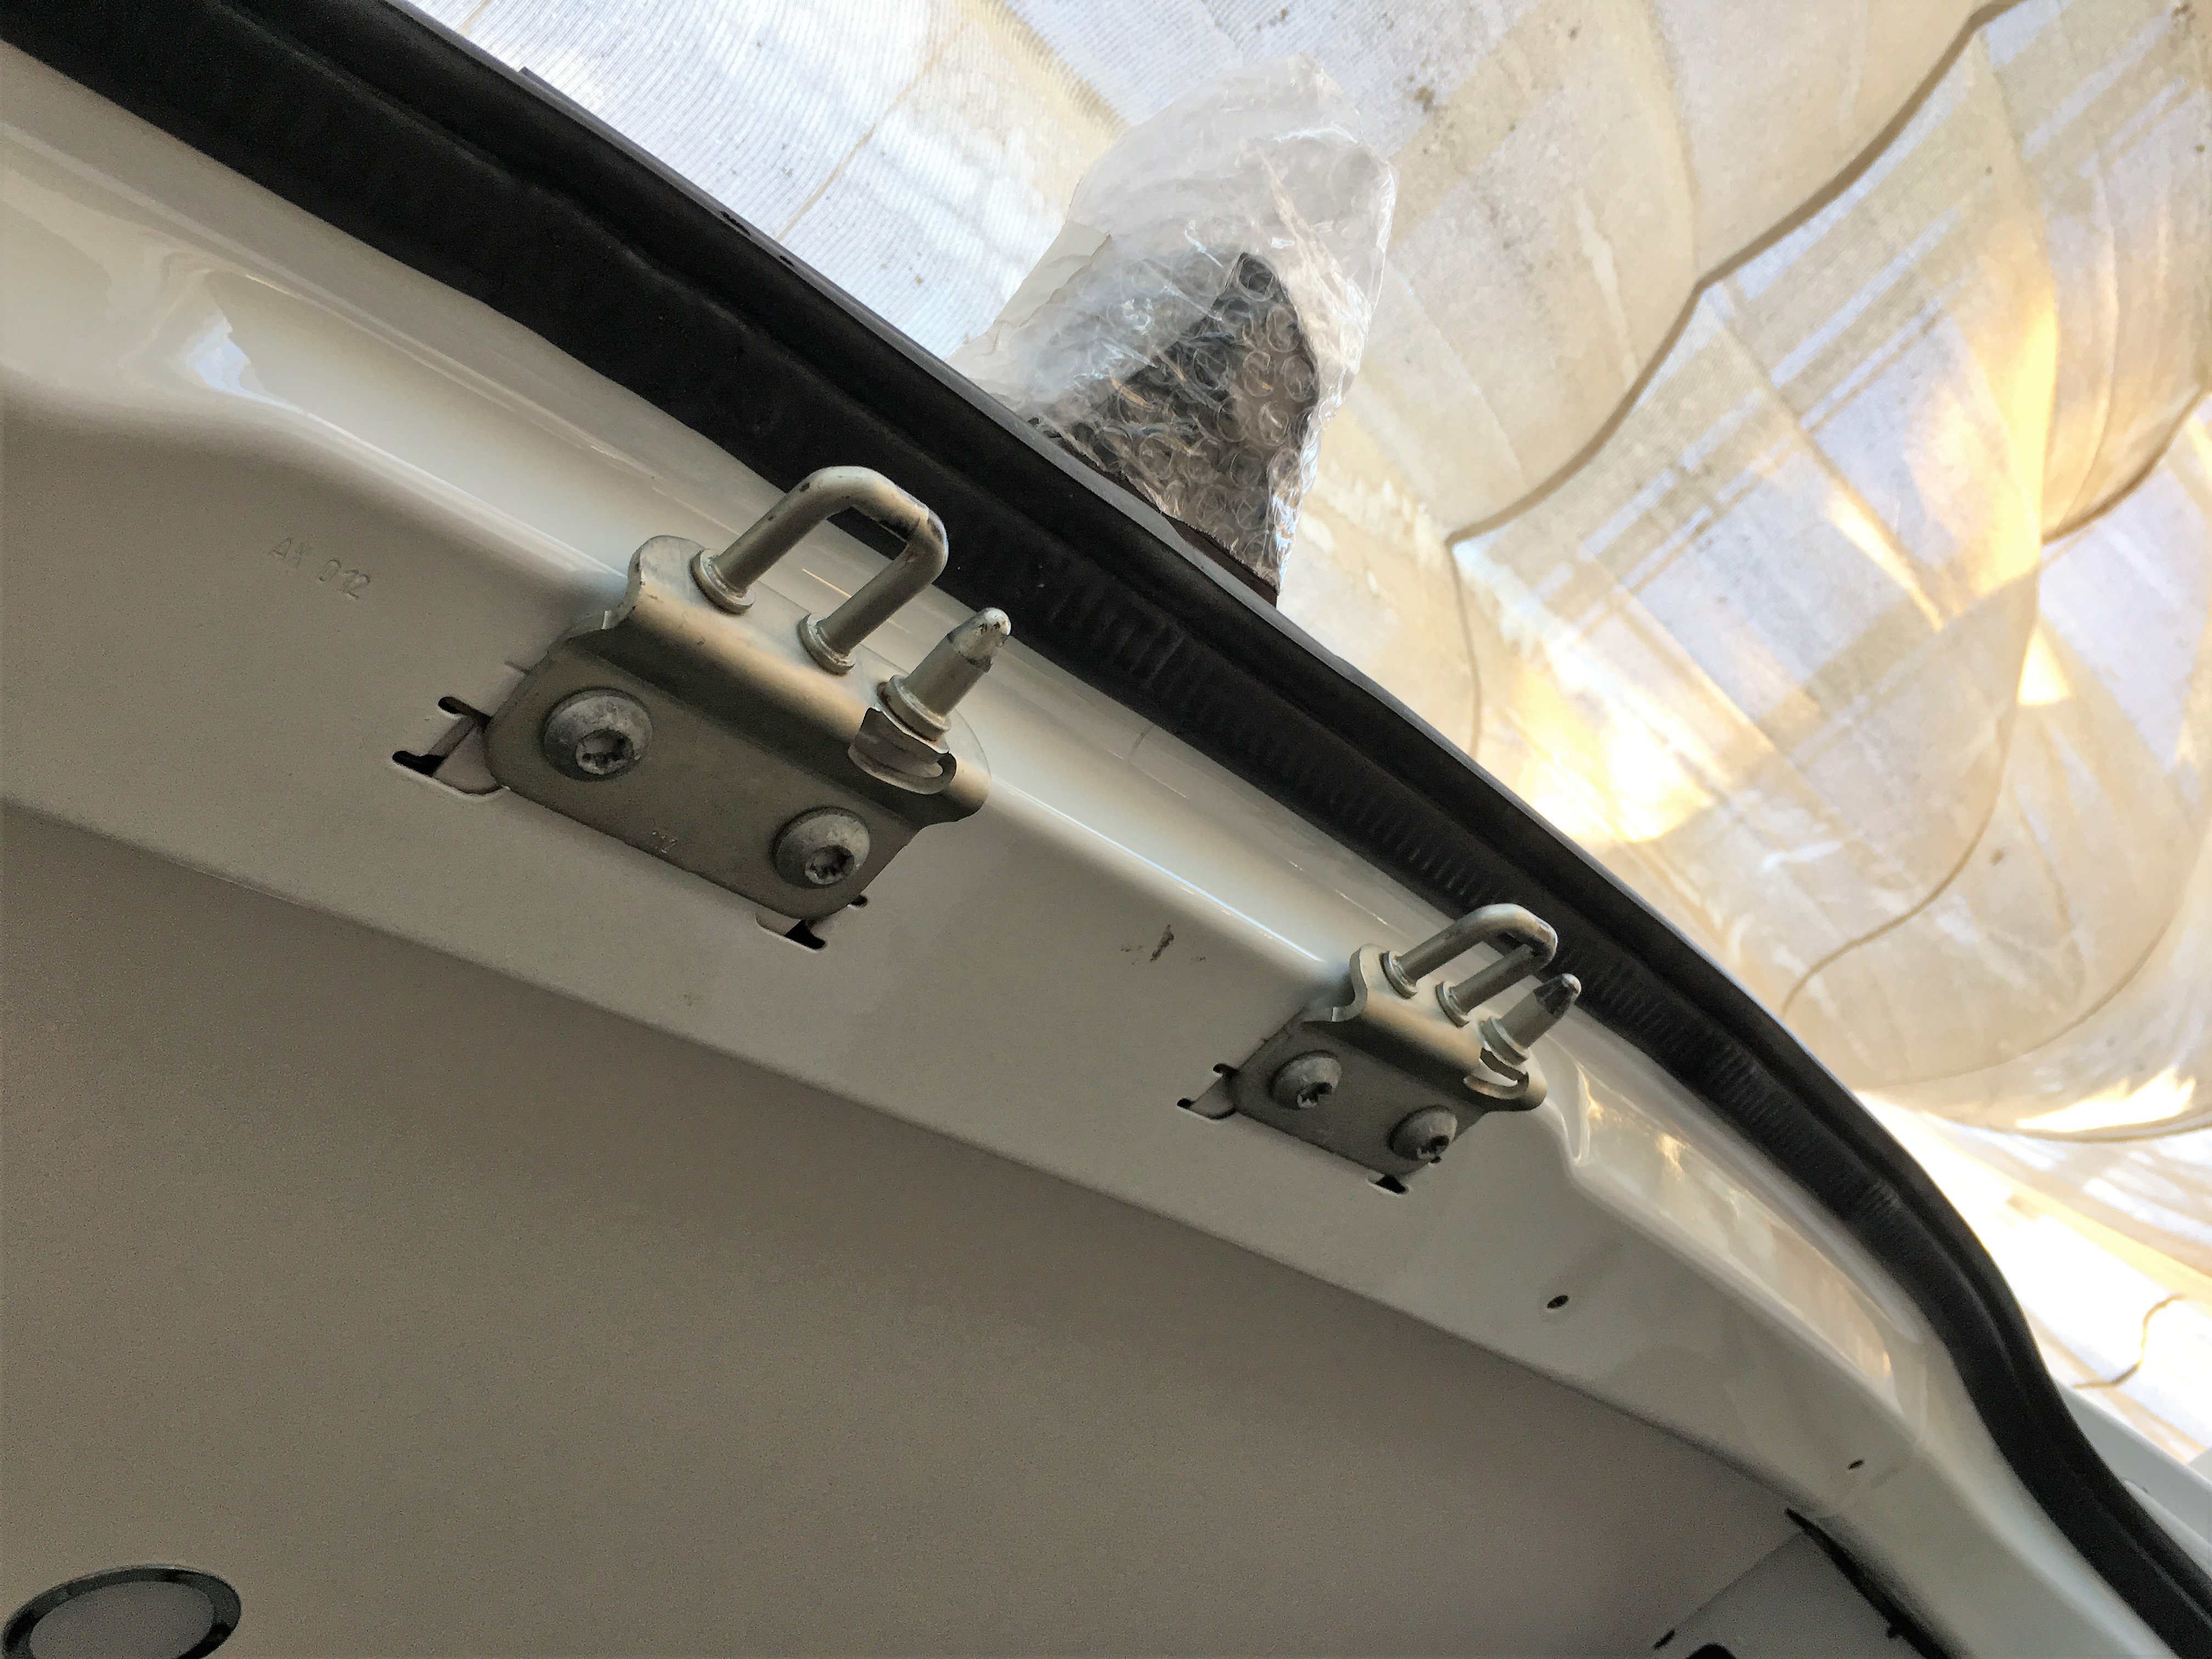
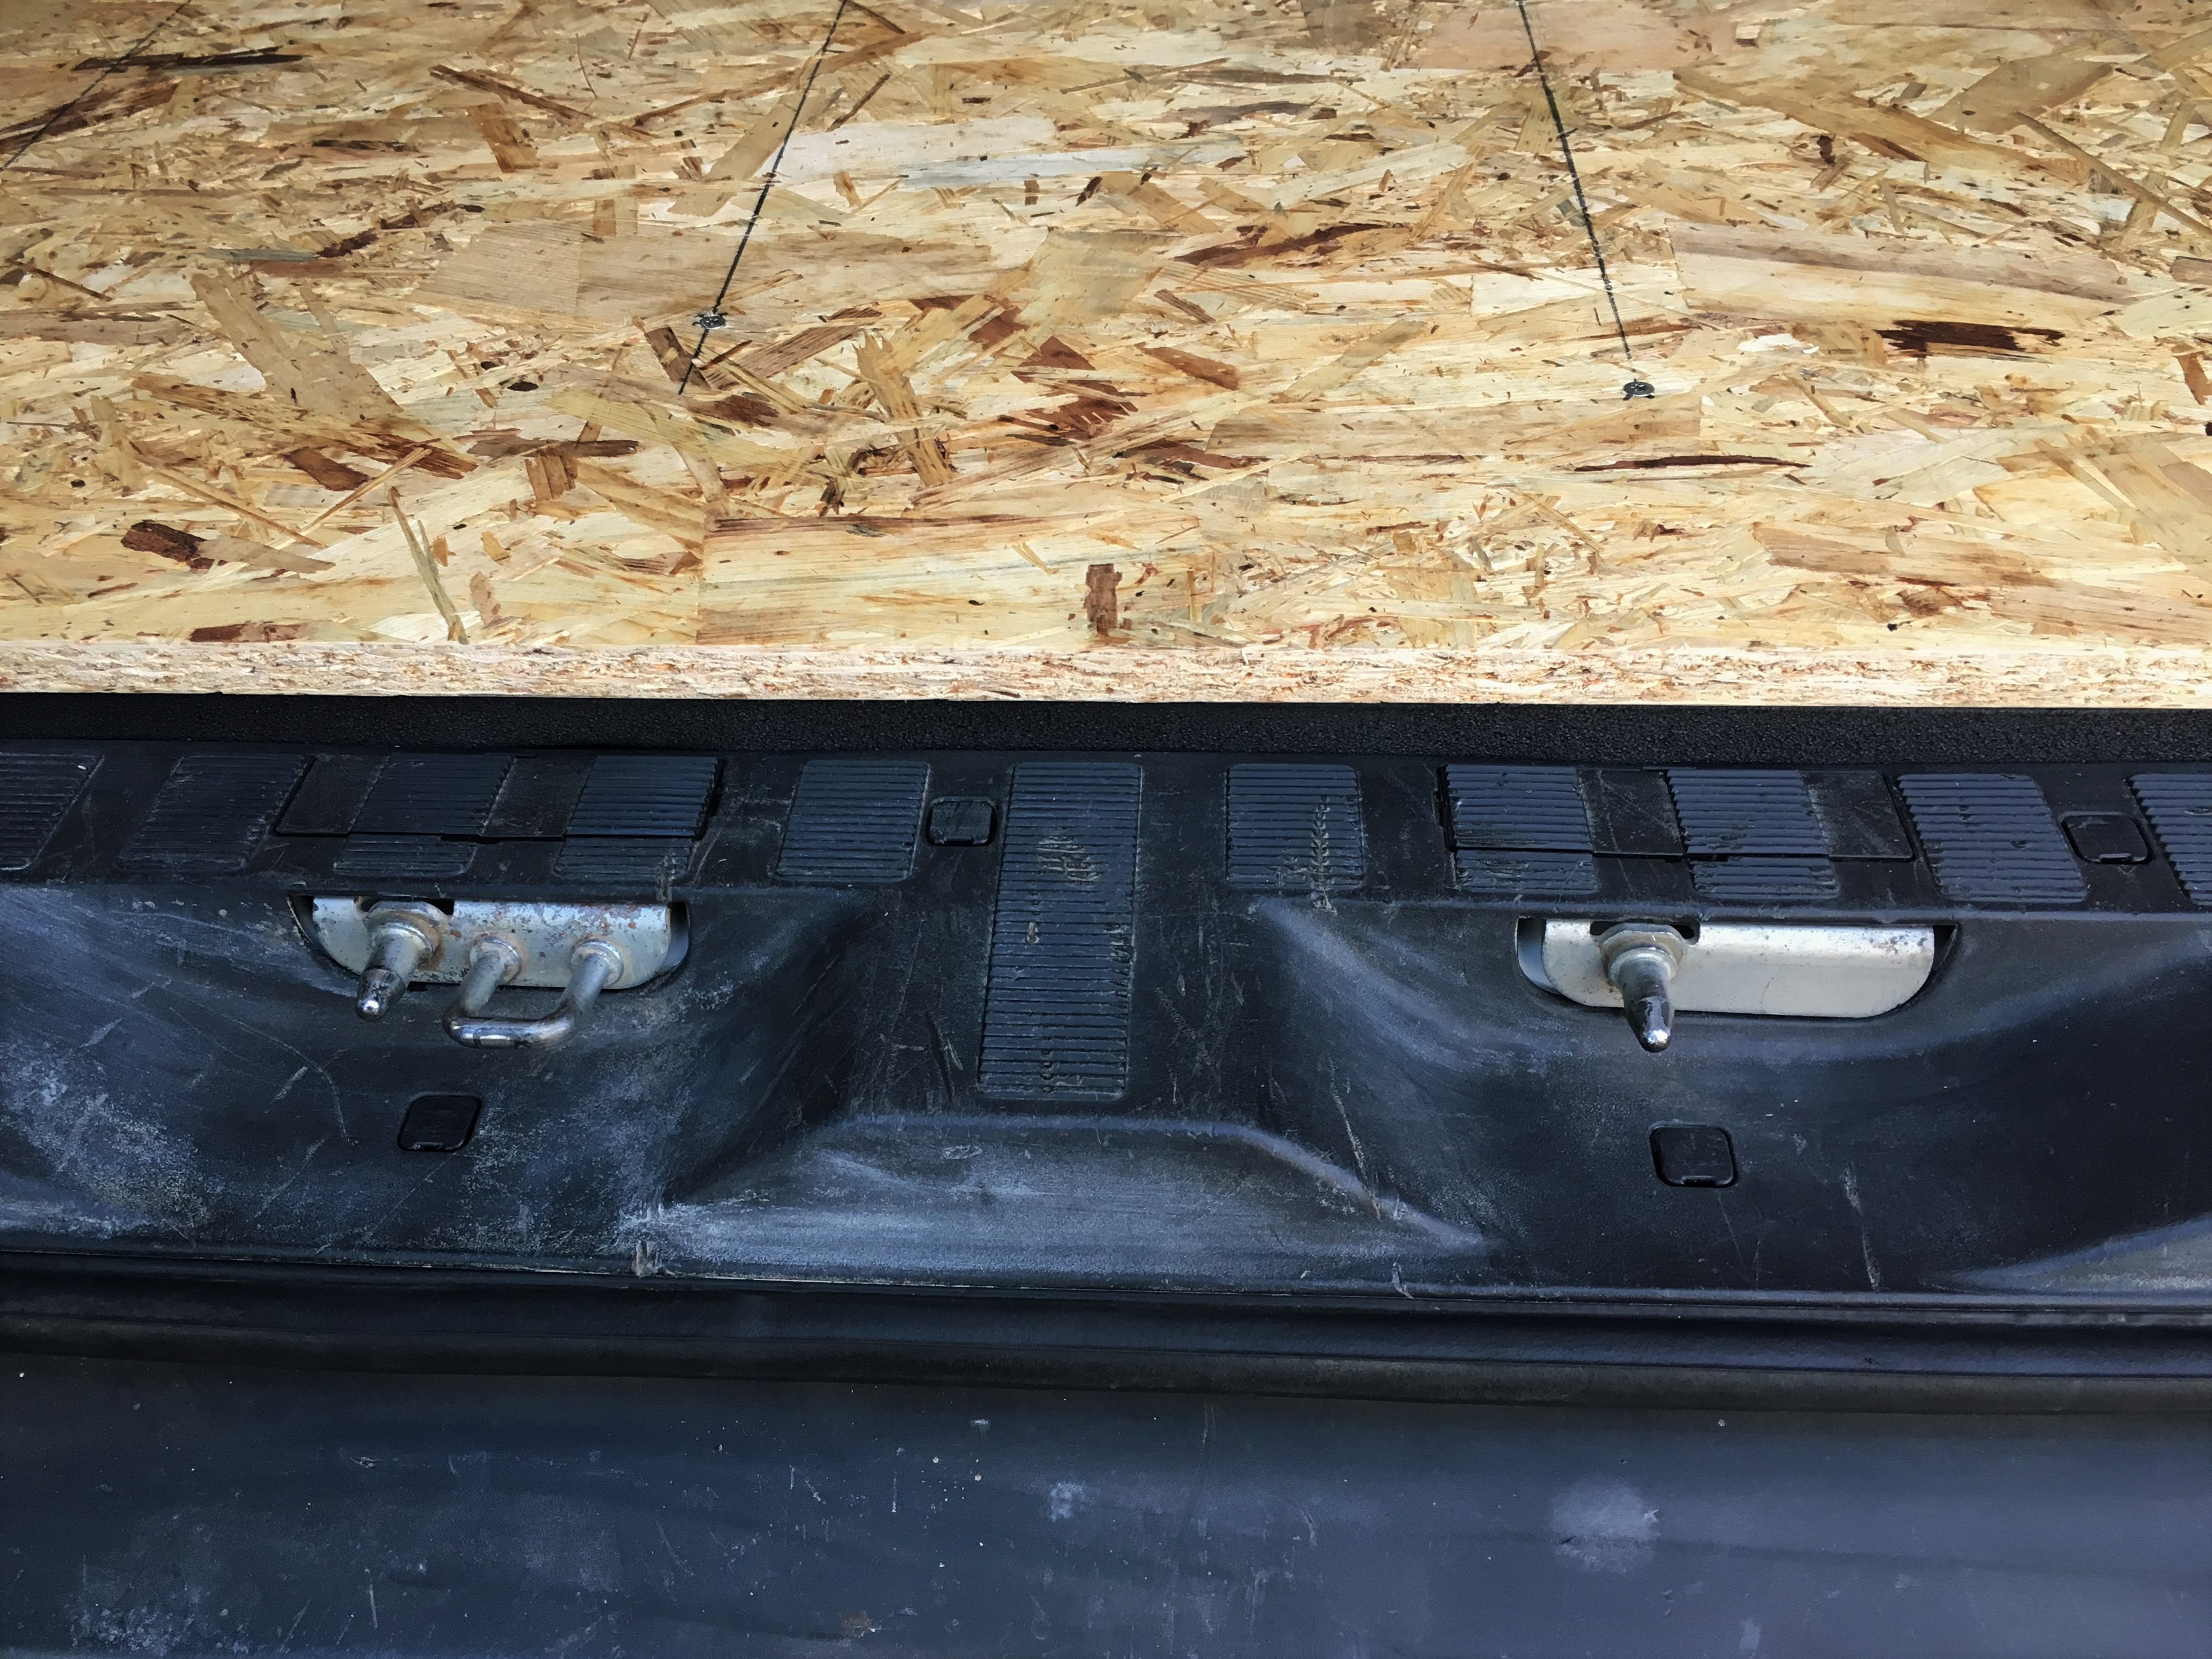
STEP 1
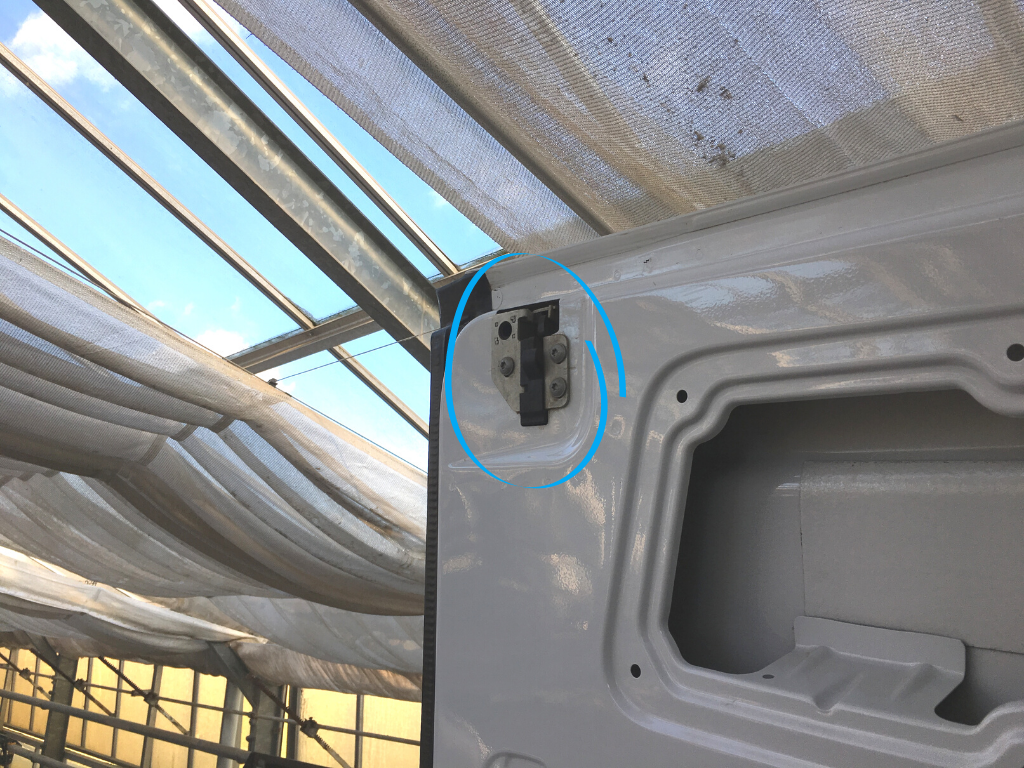
Start off by removing the four closing hooks with guide mandrels (two at the top and two at the bottom), so the doors will not be pushed back into the wrong position while readjusting. The two top hooks can be unscrewed easily.
The two bottom closing hooks with guide mandrels are partly covered by the black bumper; to reach the screws, the small, wavy plastic covers have to be levered. They can easily be put back in later.
When readjusting the back doors of a Sprinter, always adjust the left door before adjusting the right door, because the left door is closed first, the right door and its settings depend on the left door.
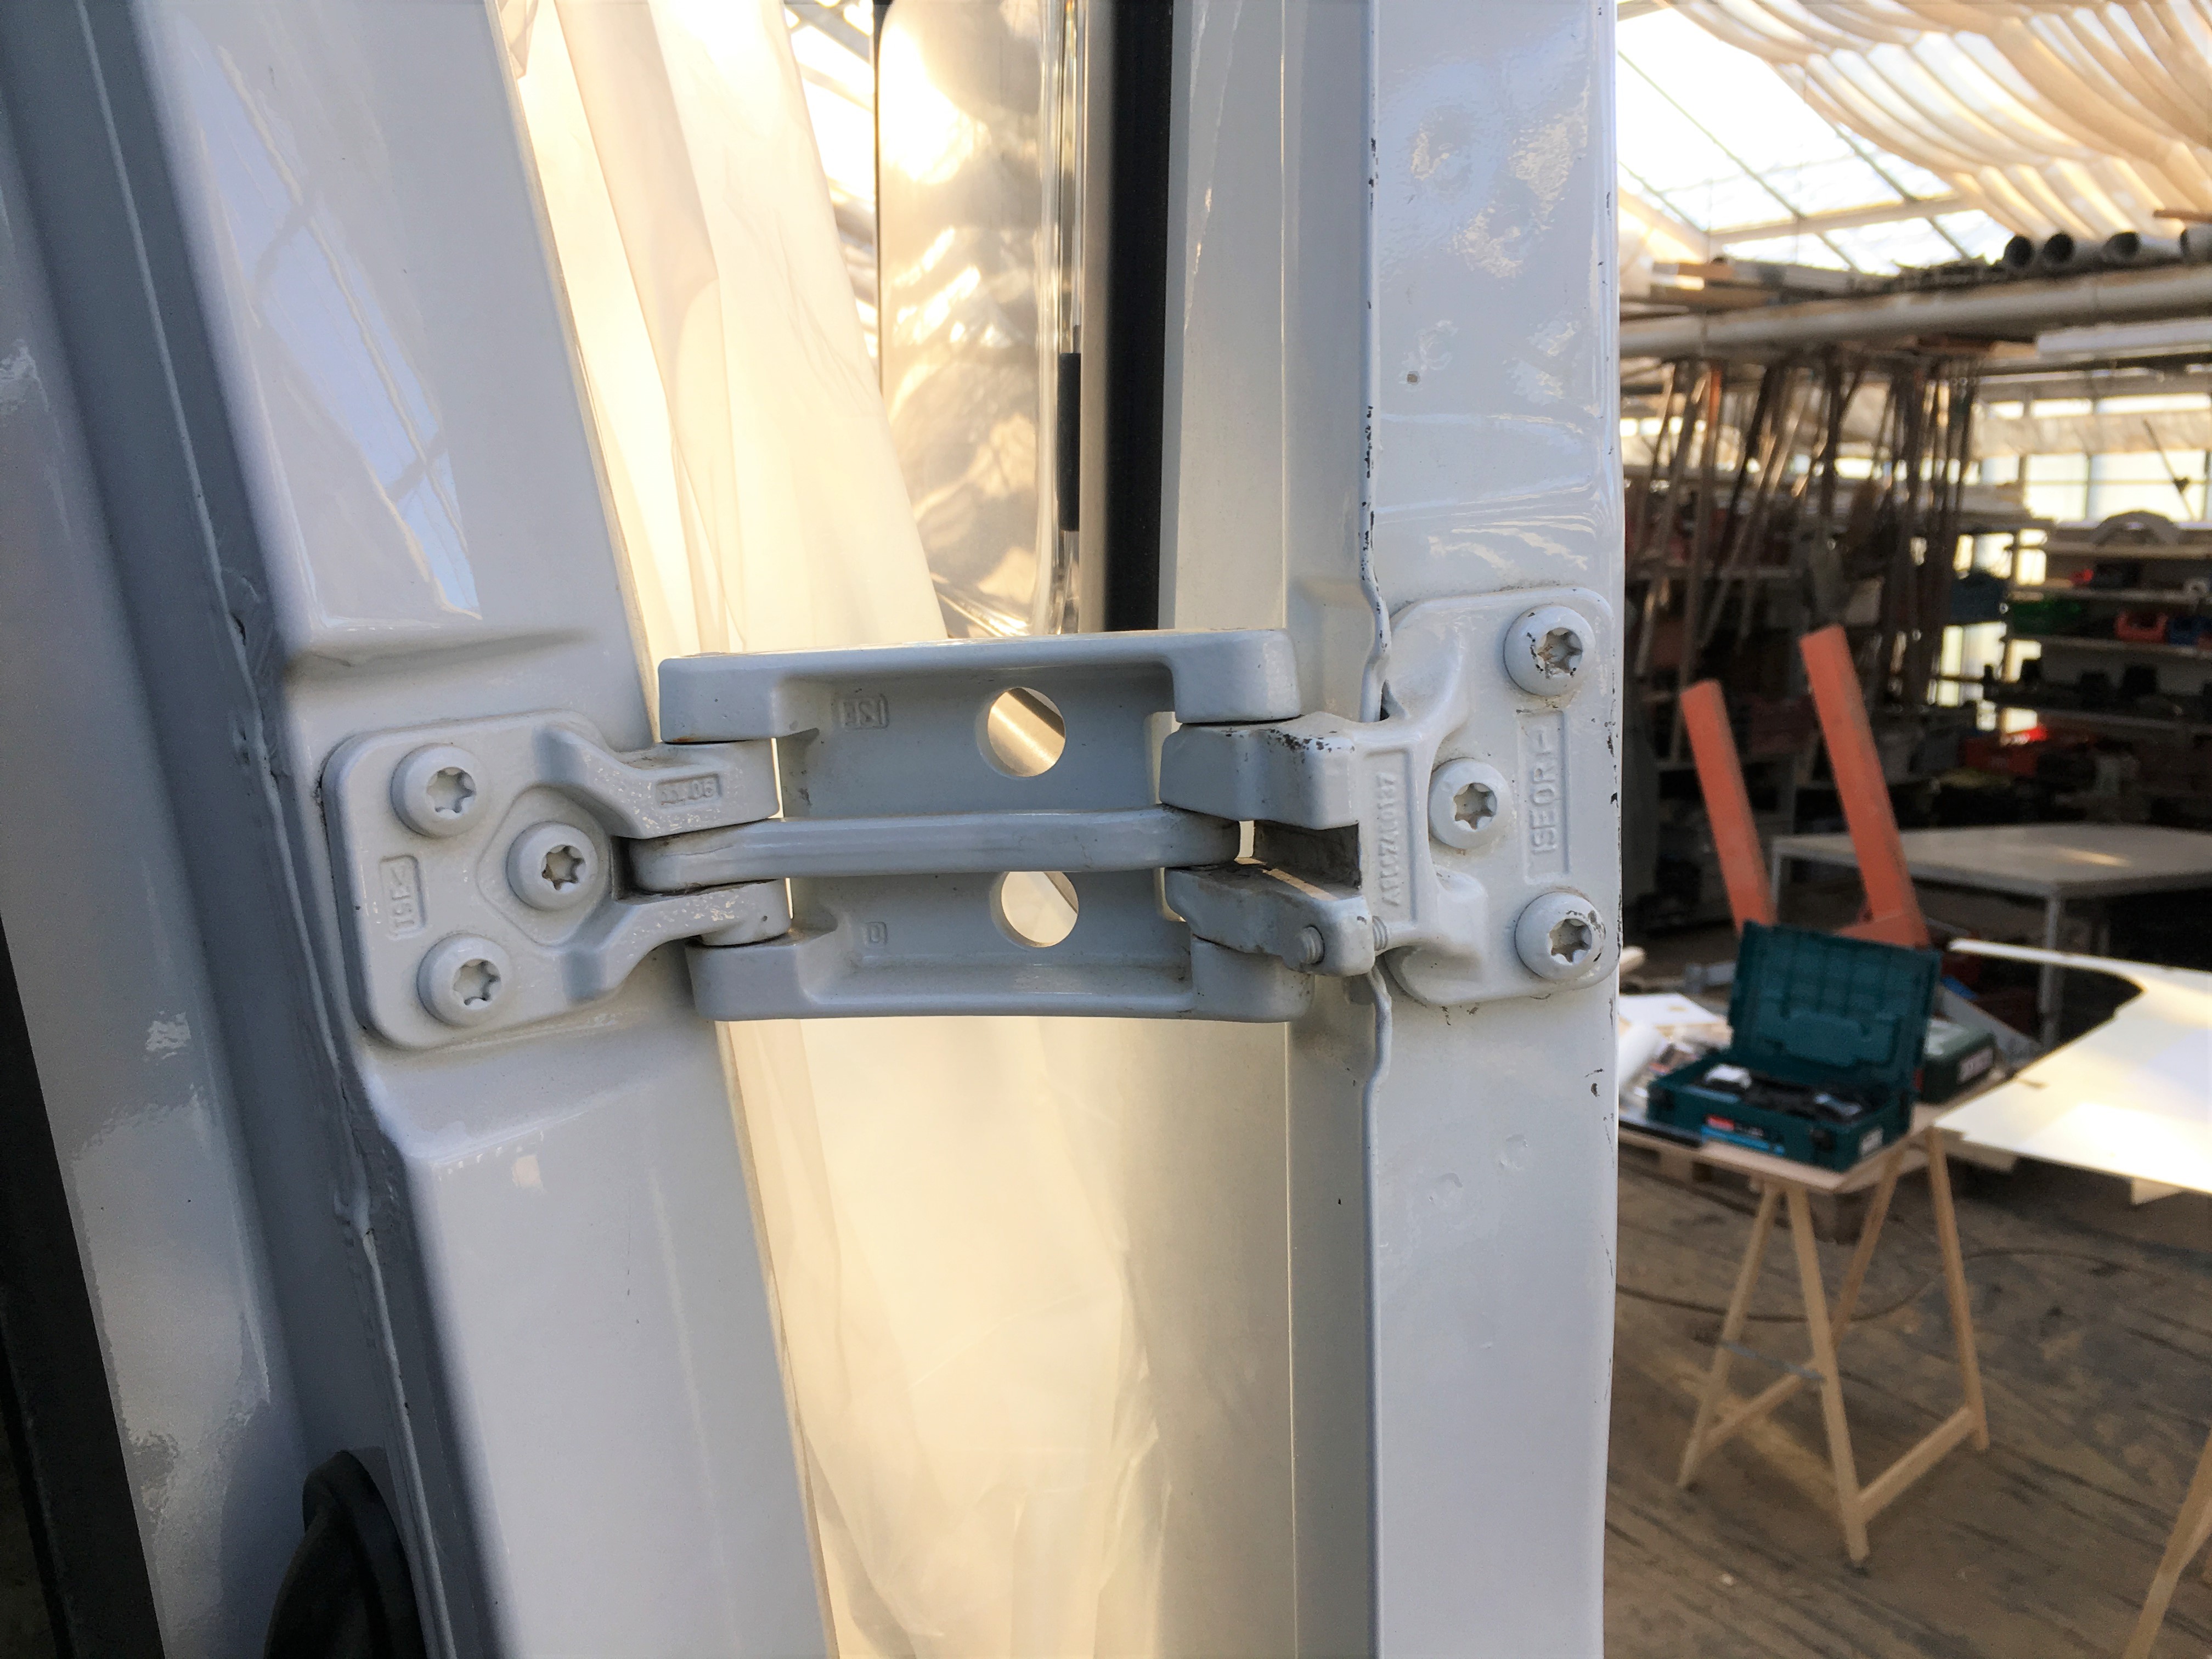
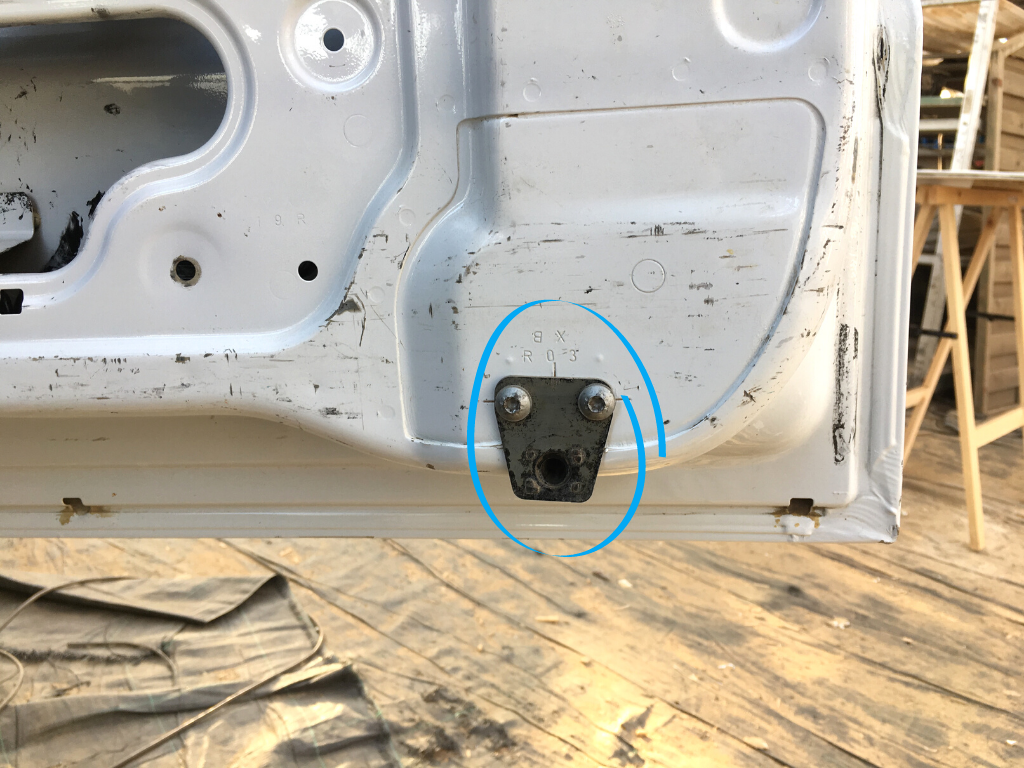
STEP 2
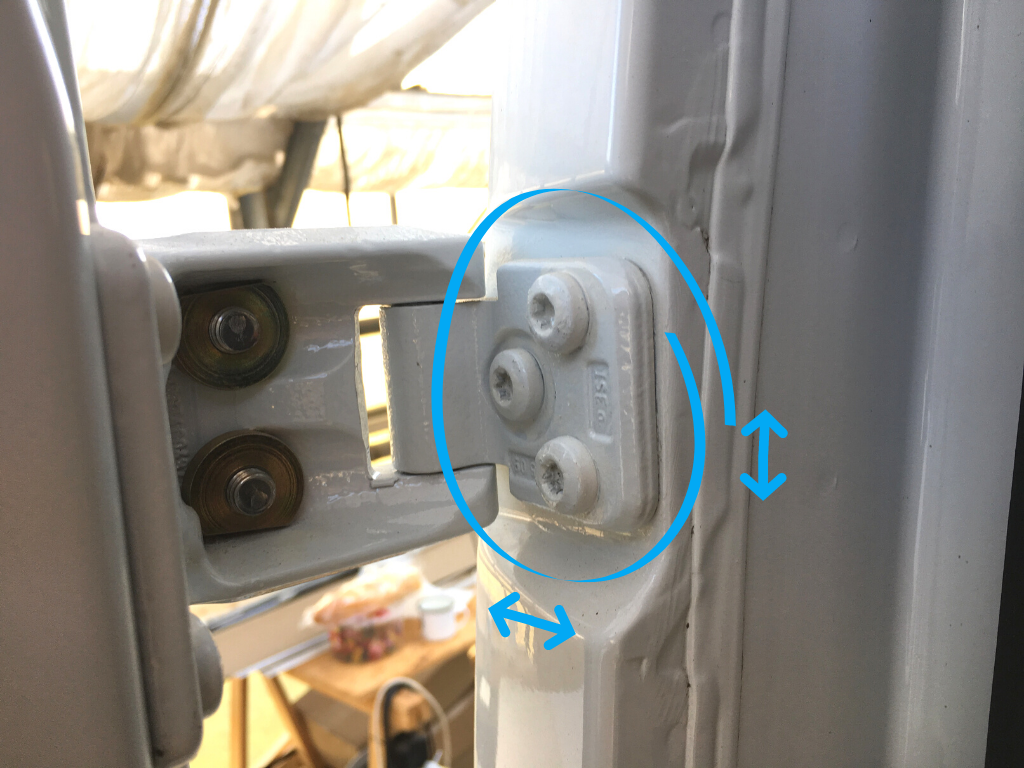
Installation depth of the back doors: Open both doors 90 degrees. The four door hinges are each mounted with three screws at the D-pillar of the vehicle and with another three screws at the door.
For now start with the left door and loosen the screws of the left hinges at the door; but only as much so the door can be moved back and forth slightly.
Now you can determine how deep inside the vehicle the door is positioned. To find out the right so called installation depth, close the door and see if the door and the bodywork are in one line with another. You can check this with your fingers or by means of a feeler. There should not be an edge or any other misalignment between the door and the bodywork. The rubber seal should not be pushed in any way. At the top, the door is in contact with the rubber seal though at the bottom it sticks out slightly. When the door is in the right position, tighten the screws of the hinges at the top and bottom with a torque wrench and a torque of 23 Nm.
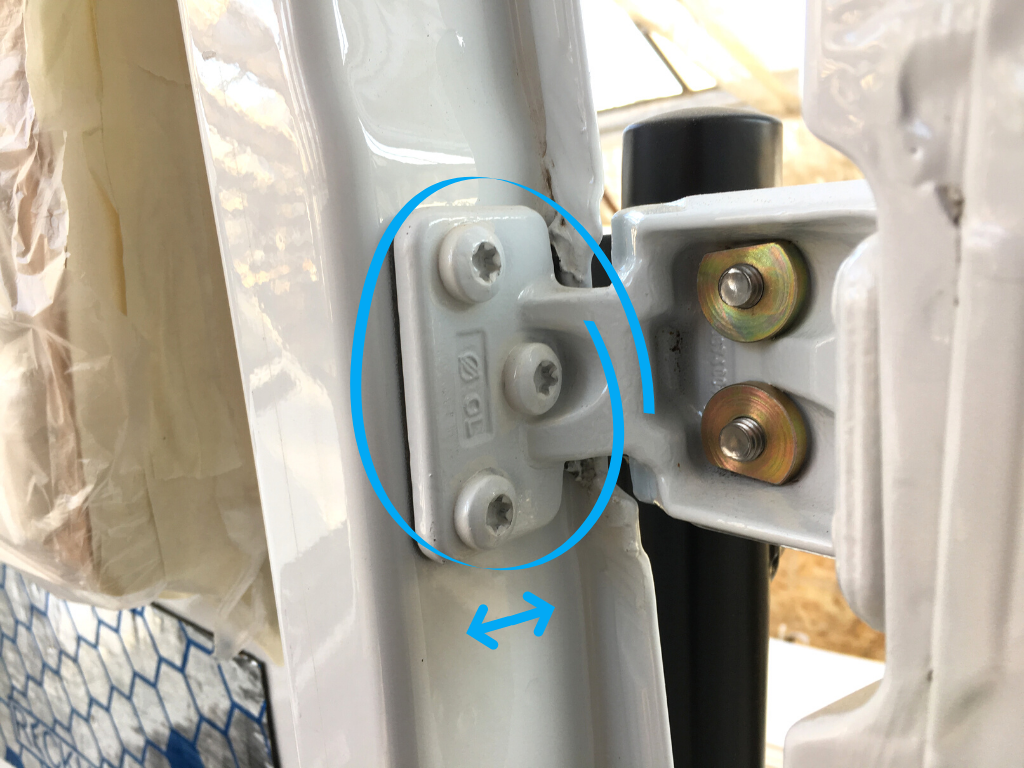
STEP 3
Adjusting the side position and height: This step is similar to step 2, but this time loosen the screws of the left hinges at the D-pillar.
Only loosen the screws as far as the door is adjustable but does not move by itself. You can now actively, with some strength, move the door up and down as well as to the left and right; until the door is straight in the middle. After the right alignment of the door, also tighten the screws of the hinges with a torque of 23 Nm.
STEP 4
Adjusting the door locks at the top and bottom: In step 1 all four closing hooks with guide mandrels were removed. Now you have to put the left ones each at the top and bottom back in (cf. pictures step 1). Now the door locks, which grip into the closing hooks when closing the door, have to be loosened.
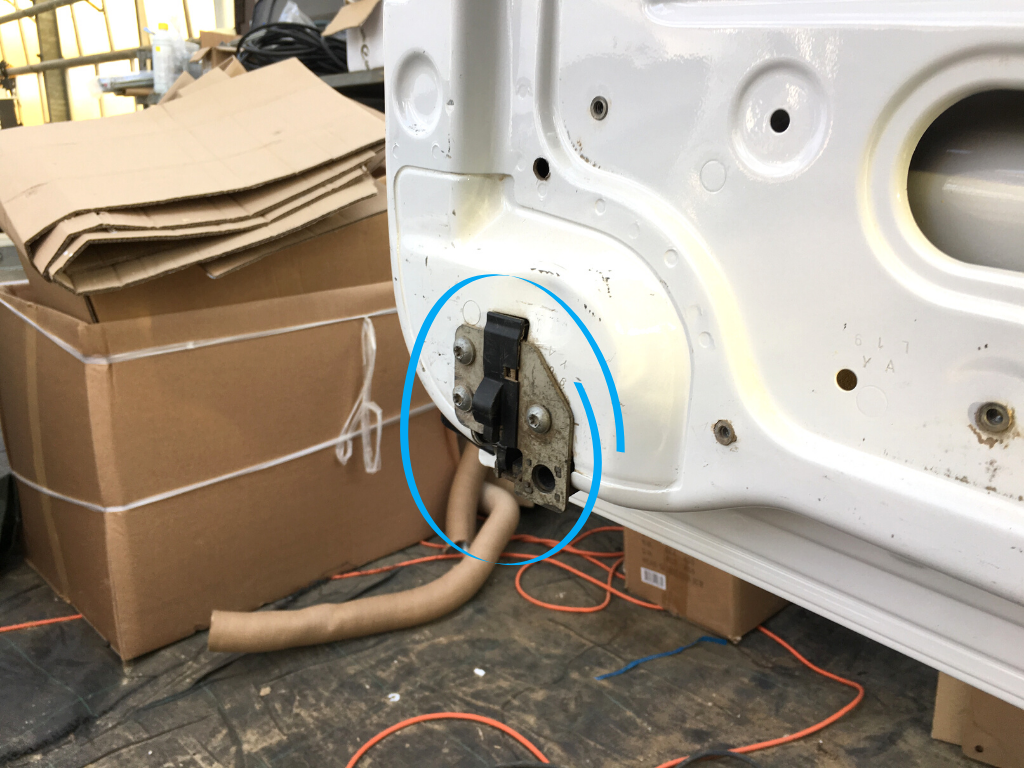
Close the door and match the alignment of the door to the roof. You can move the top guide mandrels back and forth to do so. When everything is positioned well, tighten the top closing hook with a torque of 20 Nm and the top door lock with a torque of 10 Nm. Then match the alignment at the bottom and also tighten the screws with the torques as mentioned above.
STEP 5
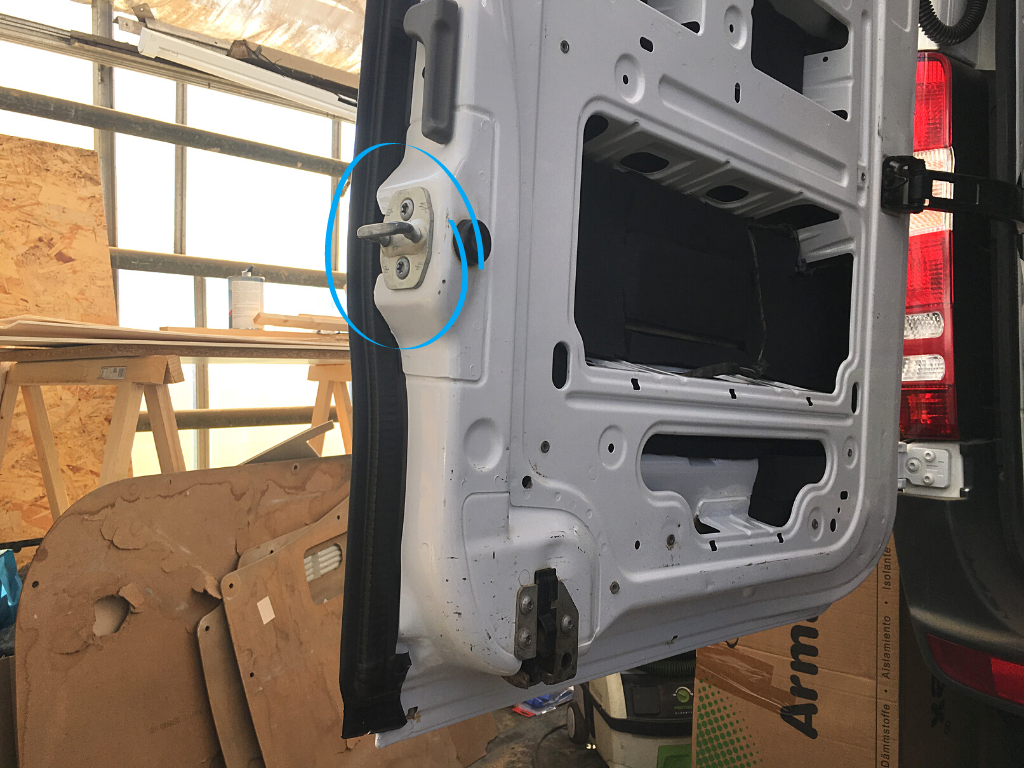
Adjusting the right door: To adjust the right door, the closing hook of the middle door lock (which is at the left door) has to be removed.
Repeat steps 2-4 at the right door.
When everything is in place, put the closing hook of the middle door lock back on. Close both doors and take your gaze from the inside to the middle and the door lock. The closing hook has to grip into the lock without the doors being actively lifted or lowered . When the doors casually snap shut, the closing hook at the left door has to grip into the door look at the right door easily. Tighten the screws with a torque of 8 Nm.
STEP 6
Checking the spring elements: The spring elements on both doors have to give a little way to muffle the movement of the door and to prevent any noise while driving.
STEP 7
Clearance: The gap between the door and the bodywork (left and right) is approximately 5,5 mm. The gap in the middle approx. 6 mm and the gap at the bottom approx. 10 mm. This should only vary by max. 1 mm.
DONE!
As always, it took longer than expected; roughly 2-3 hours of screwing, unscrewing and tightening until the doors were readjusted and now closing correctly again 😉
These are the tools we used to adjust the back doors:

