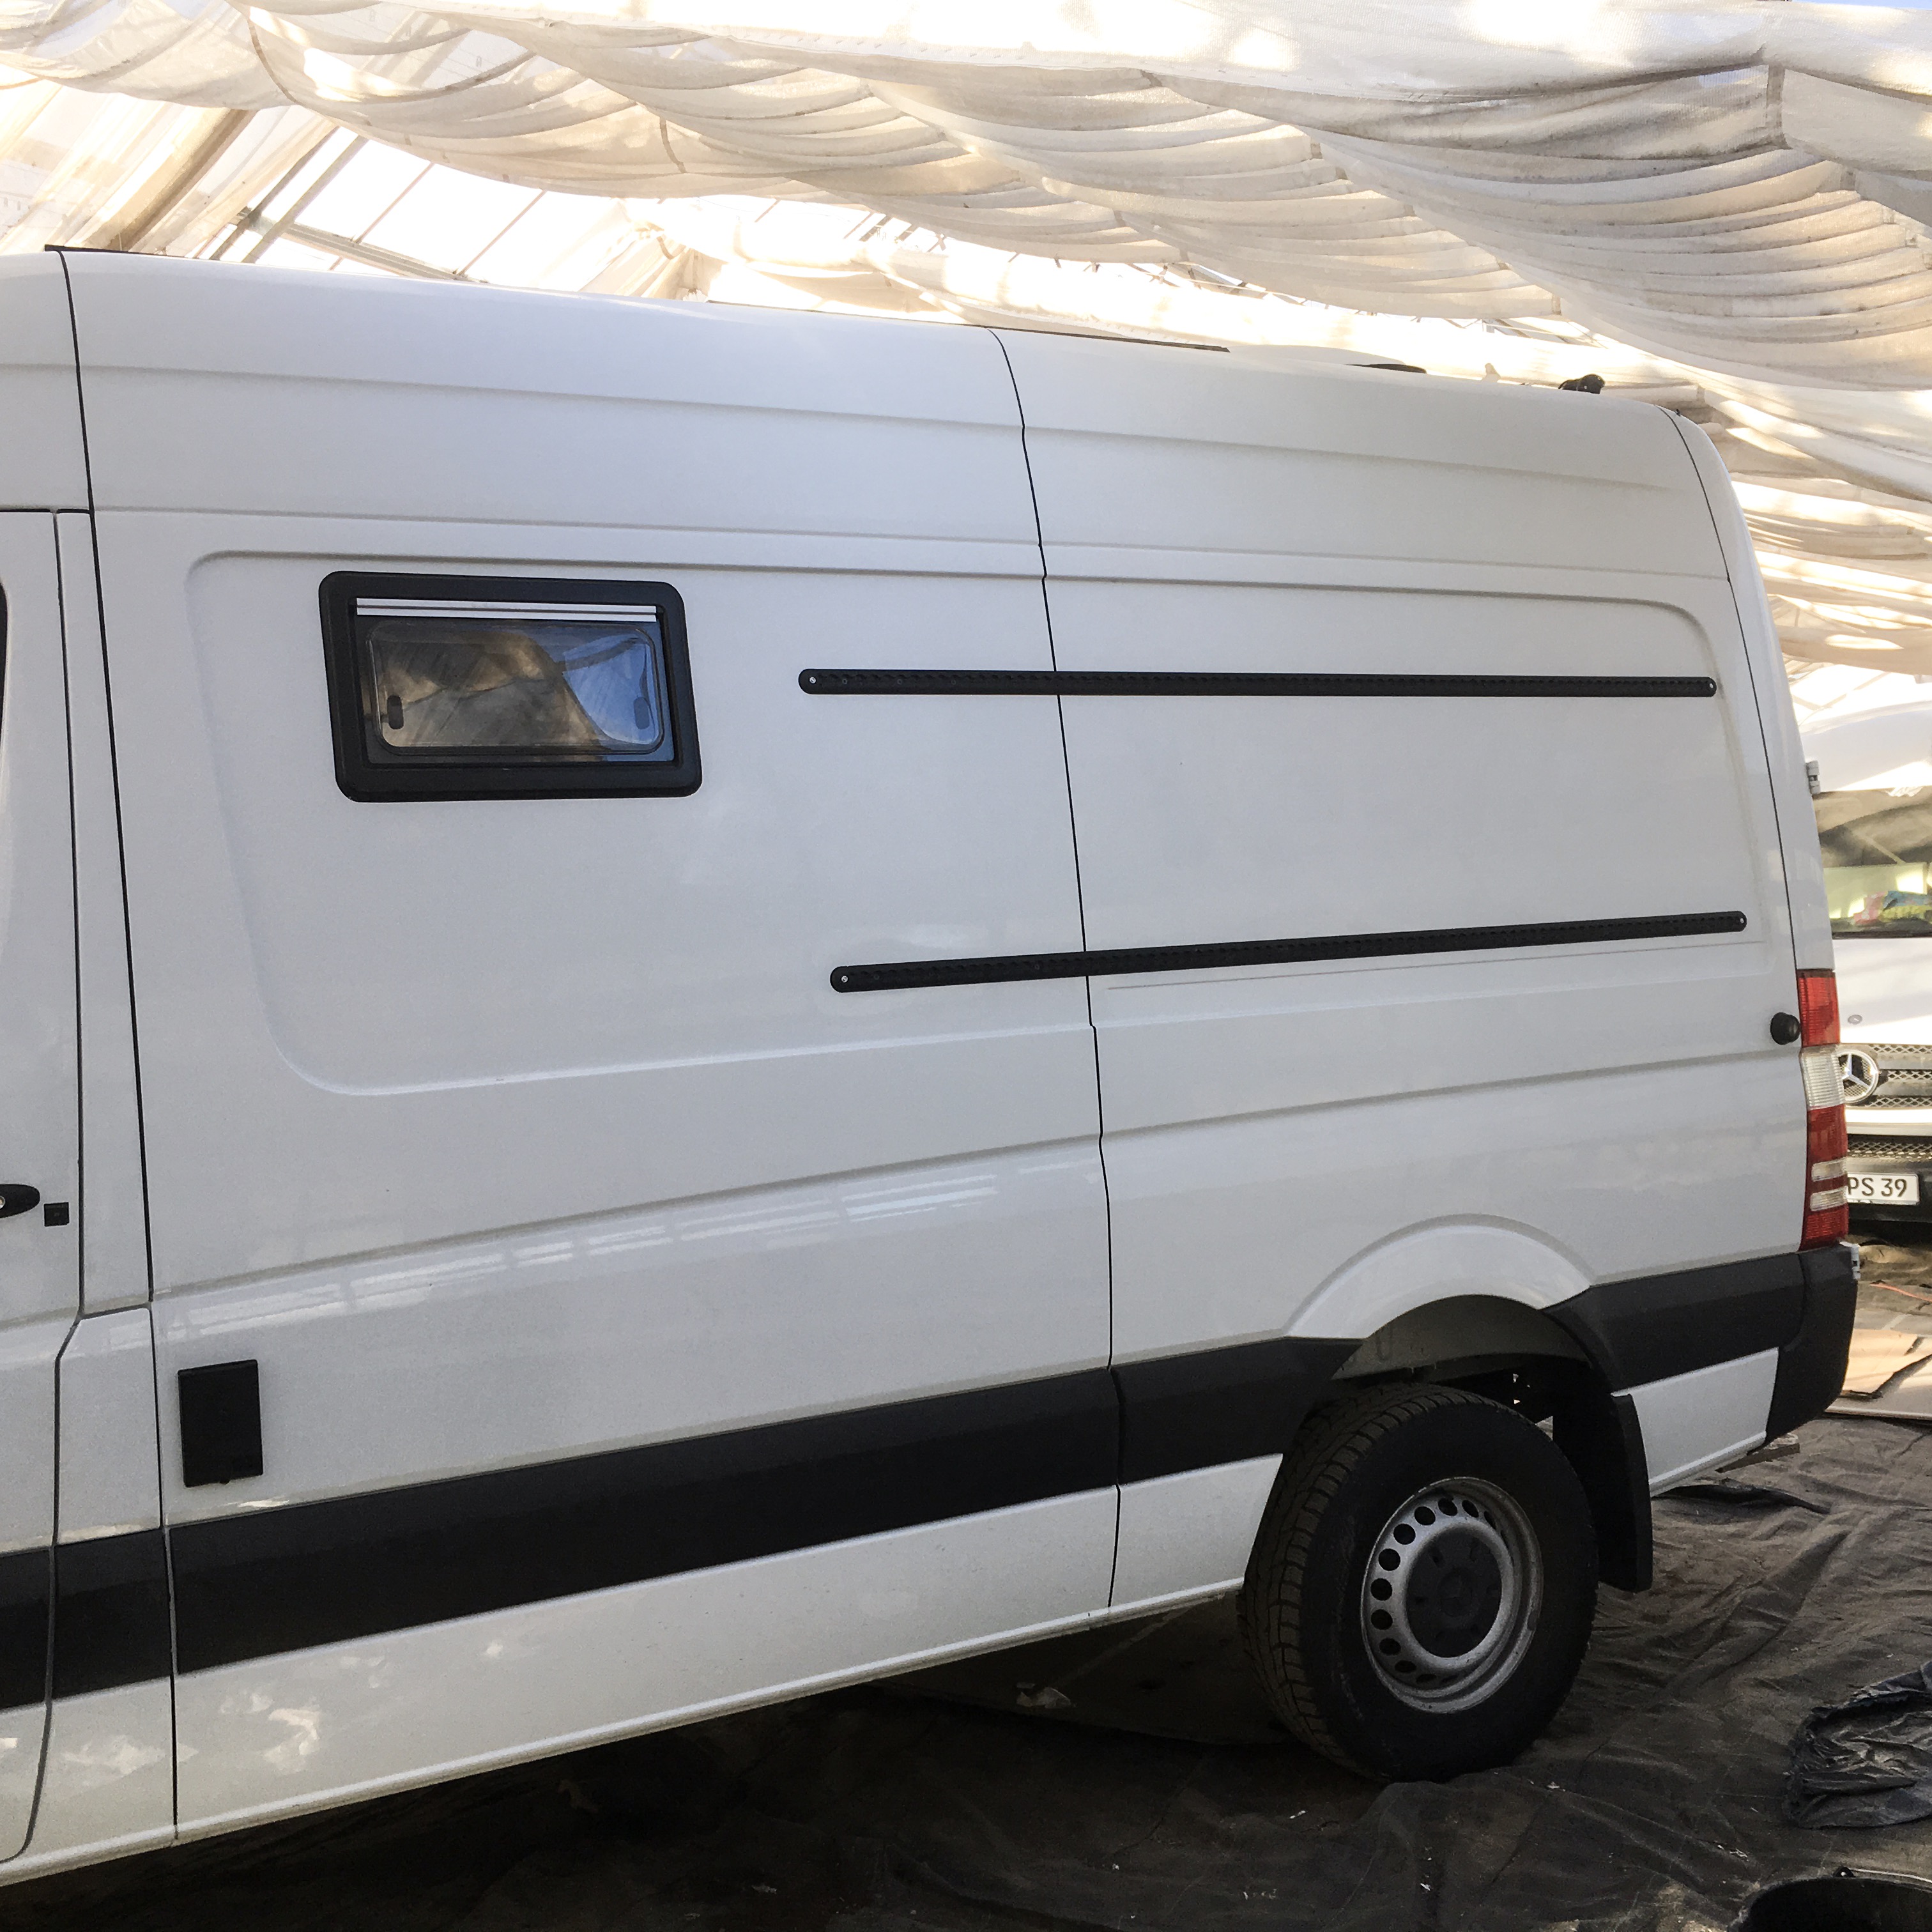
To expand storage and save room inside of the vehicle, we want to fasten equipment e.g. sand ladders and canisters on the outside. The required brackets are called lashing tracks which we installed to our Camper.
Cargo can be secured with lashing tracks, this is how you can secure gear or equipment to the outside of the Camper and extend the storage.
The tracks are available in different lengths and shapes. For the looks, we chose black lashing tracks.
2x lashing track (half round, drilled)
Length: approx. 2 meters (plus end caps)
Material: aluminum
Weight: 1060 g
Width: 42 mm
Height: 10 mm
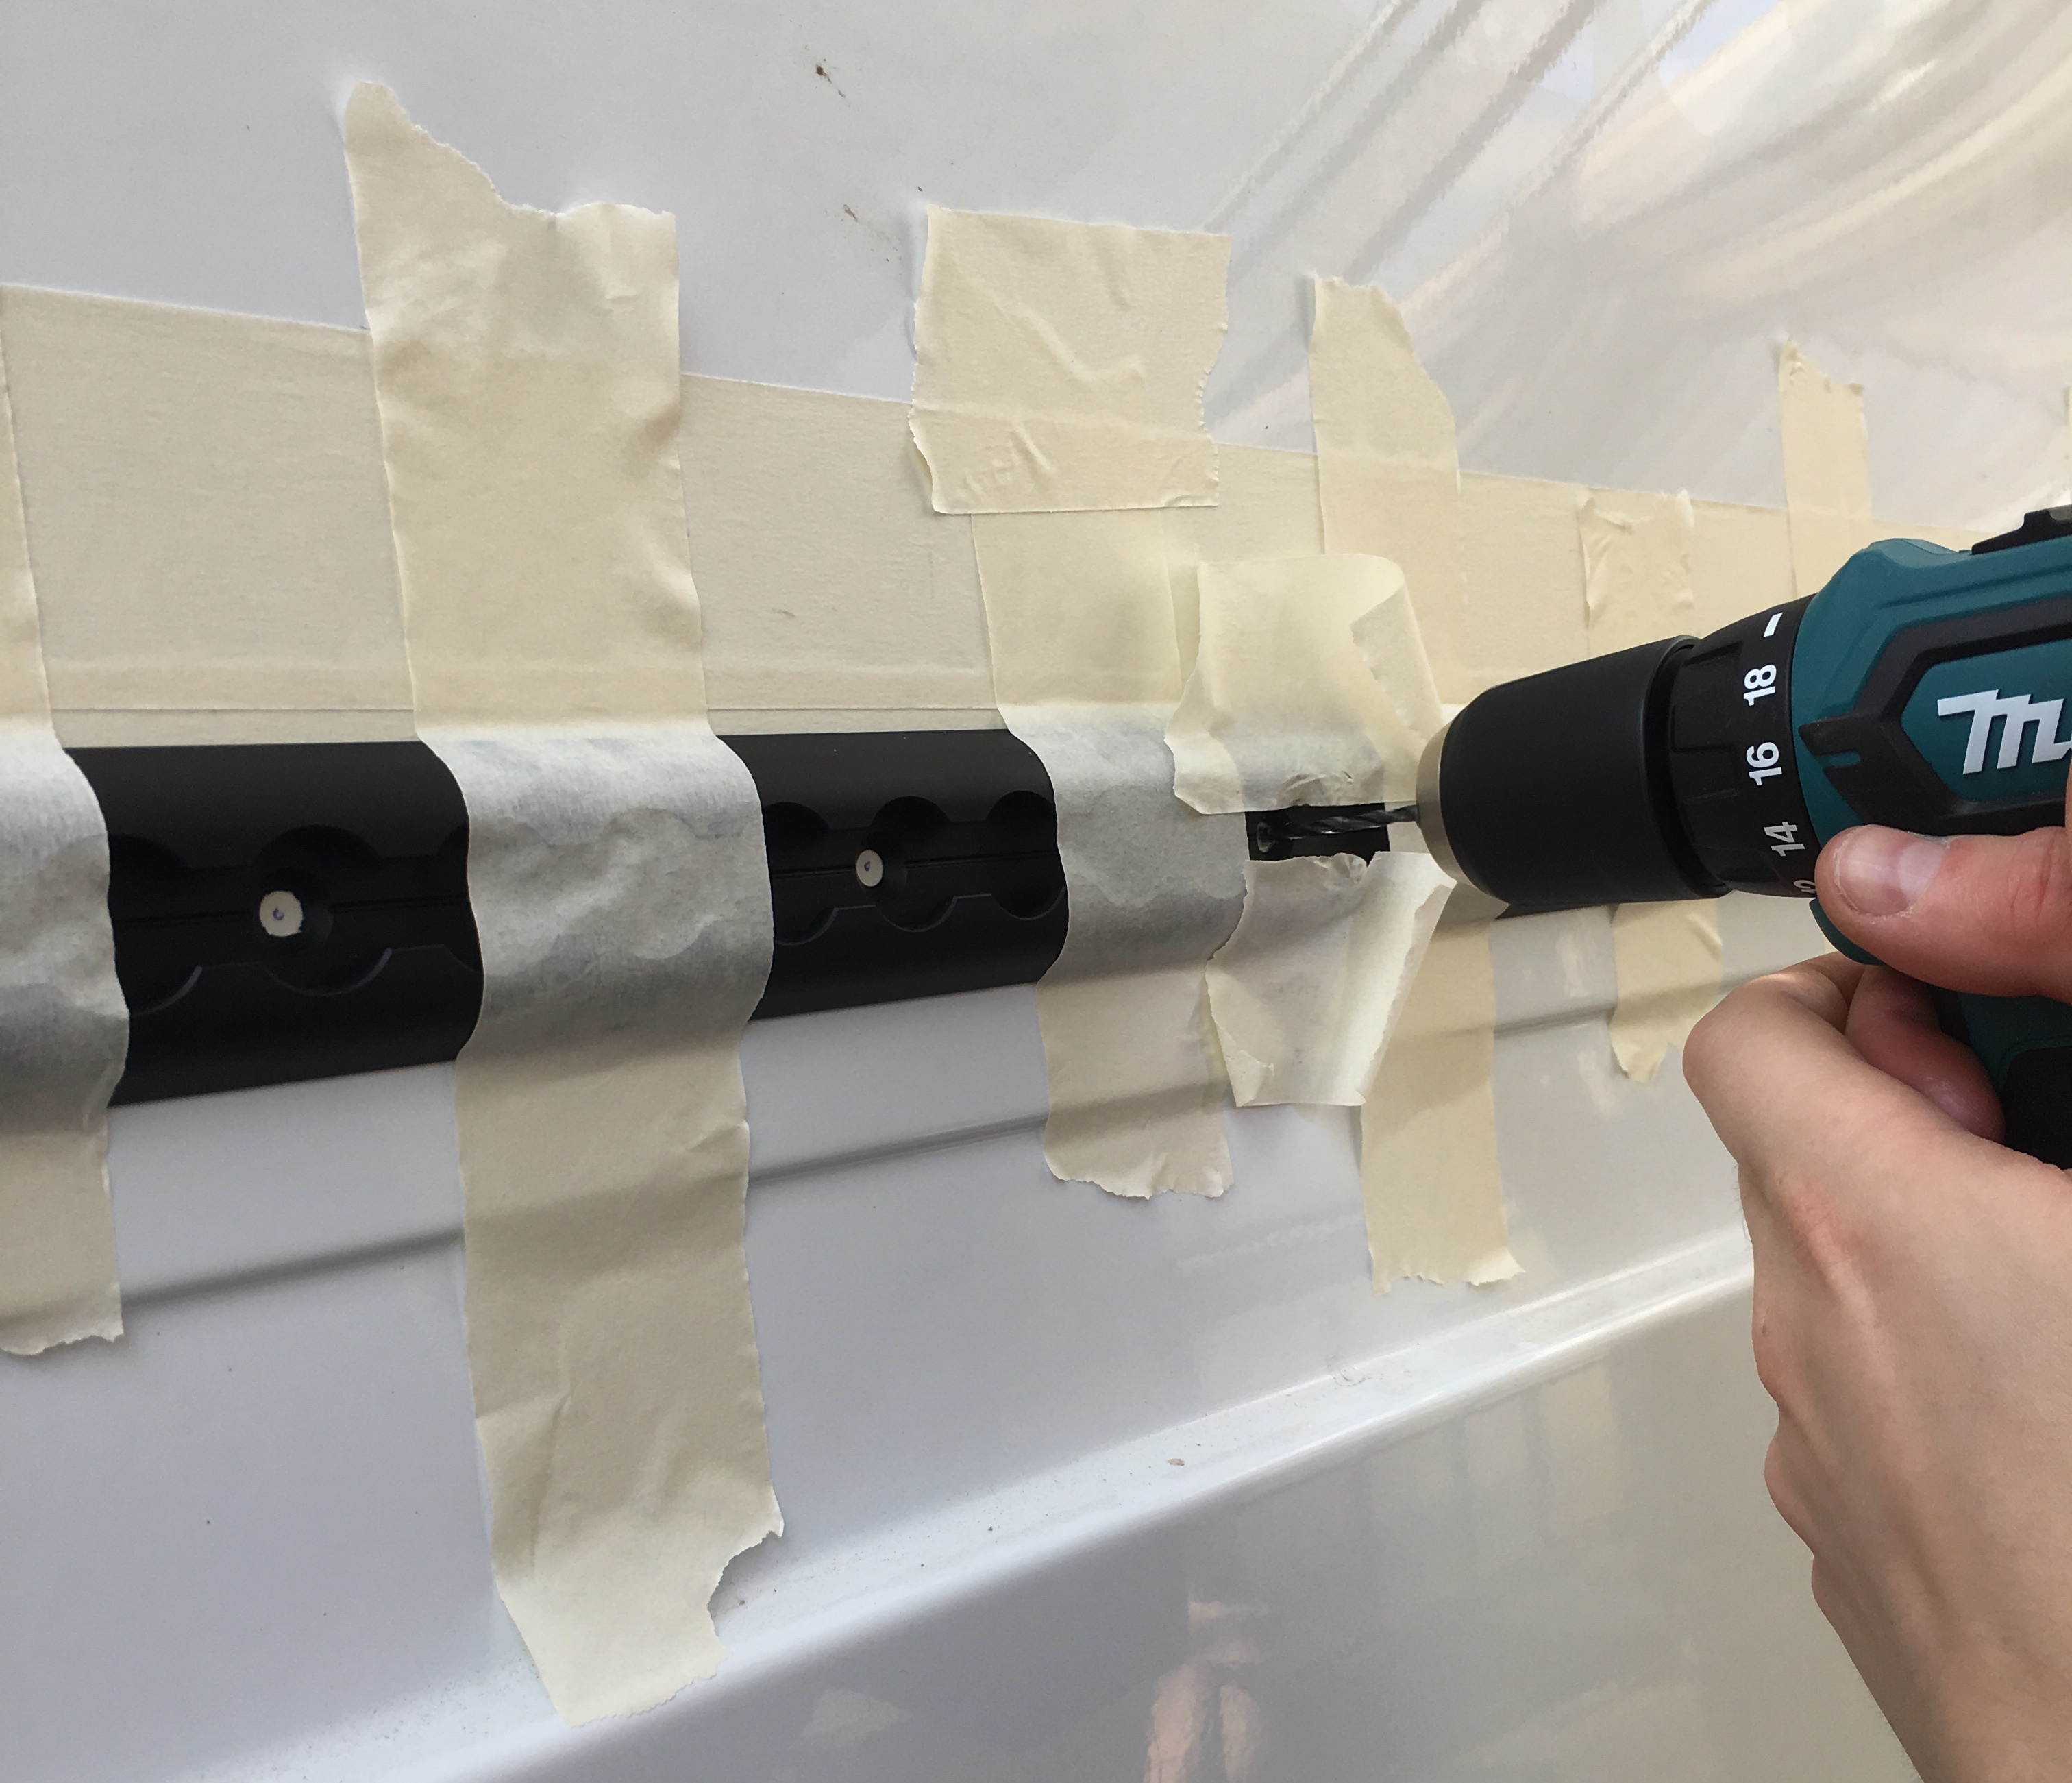
Distance between holes: 100 mm (which means we have to drill 20 holes per track!)
To determine the distance between the two tracks, we checked the distance of a bracket for sand ladders. For the exact positioning concerning the height we always had the stringers on the inside in mind because we did not want the drilling (and the screws) to be unreachable.
When it comes to measuring, there is always minimal deviation, especially when something is as long as these 2 meter lashing tracks. To not shift with this many drilling holes, we taped the tracks to the vehicle and then drilled the holes – this worked really well!
After deburring the holes we applied primer for corrosion protection from the inside as well as from the outside.
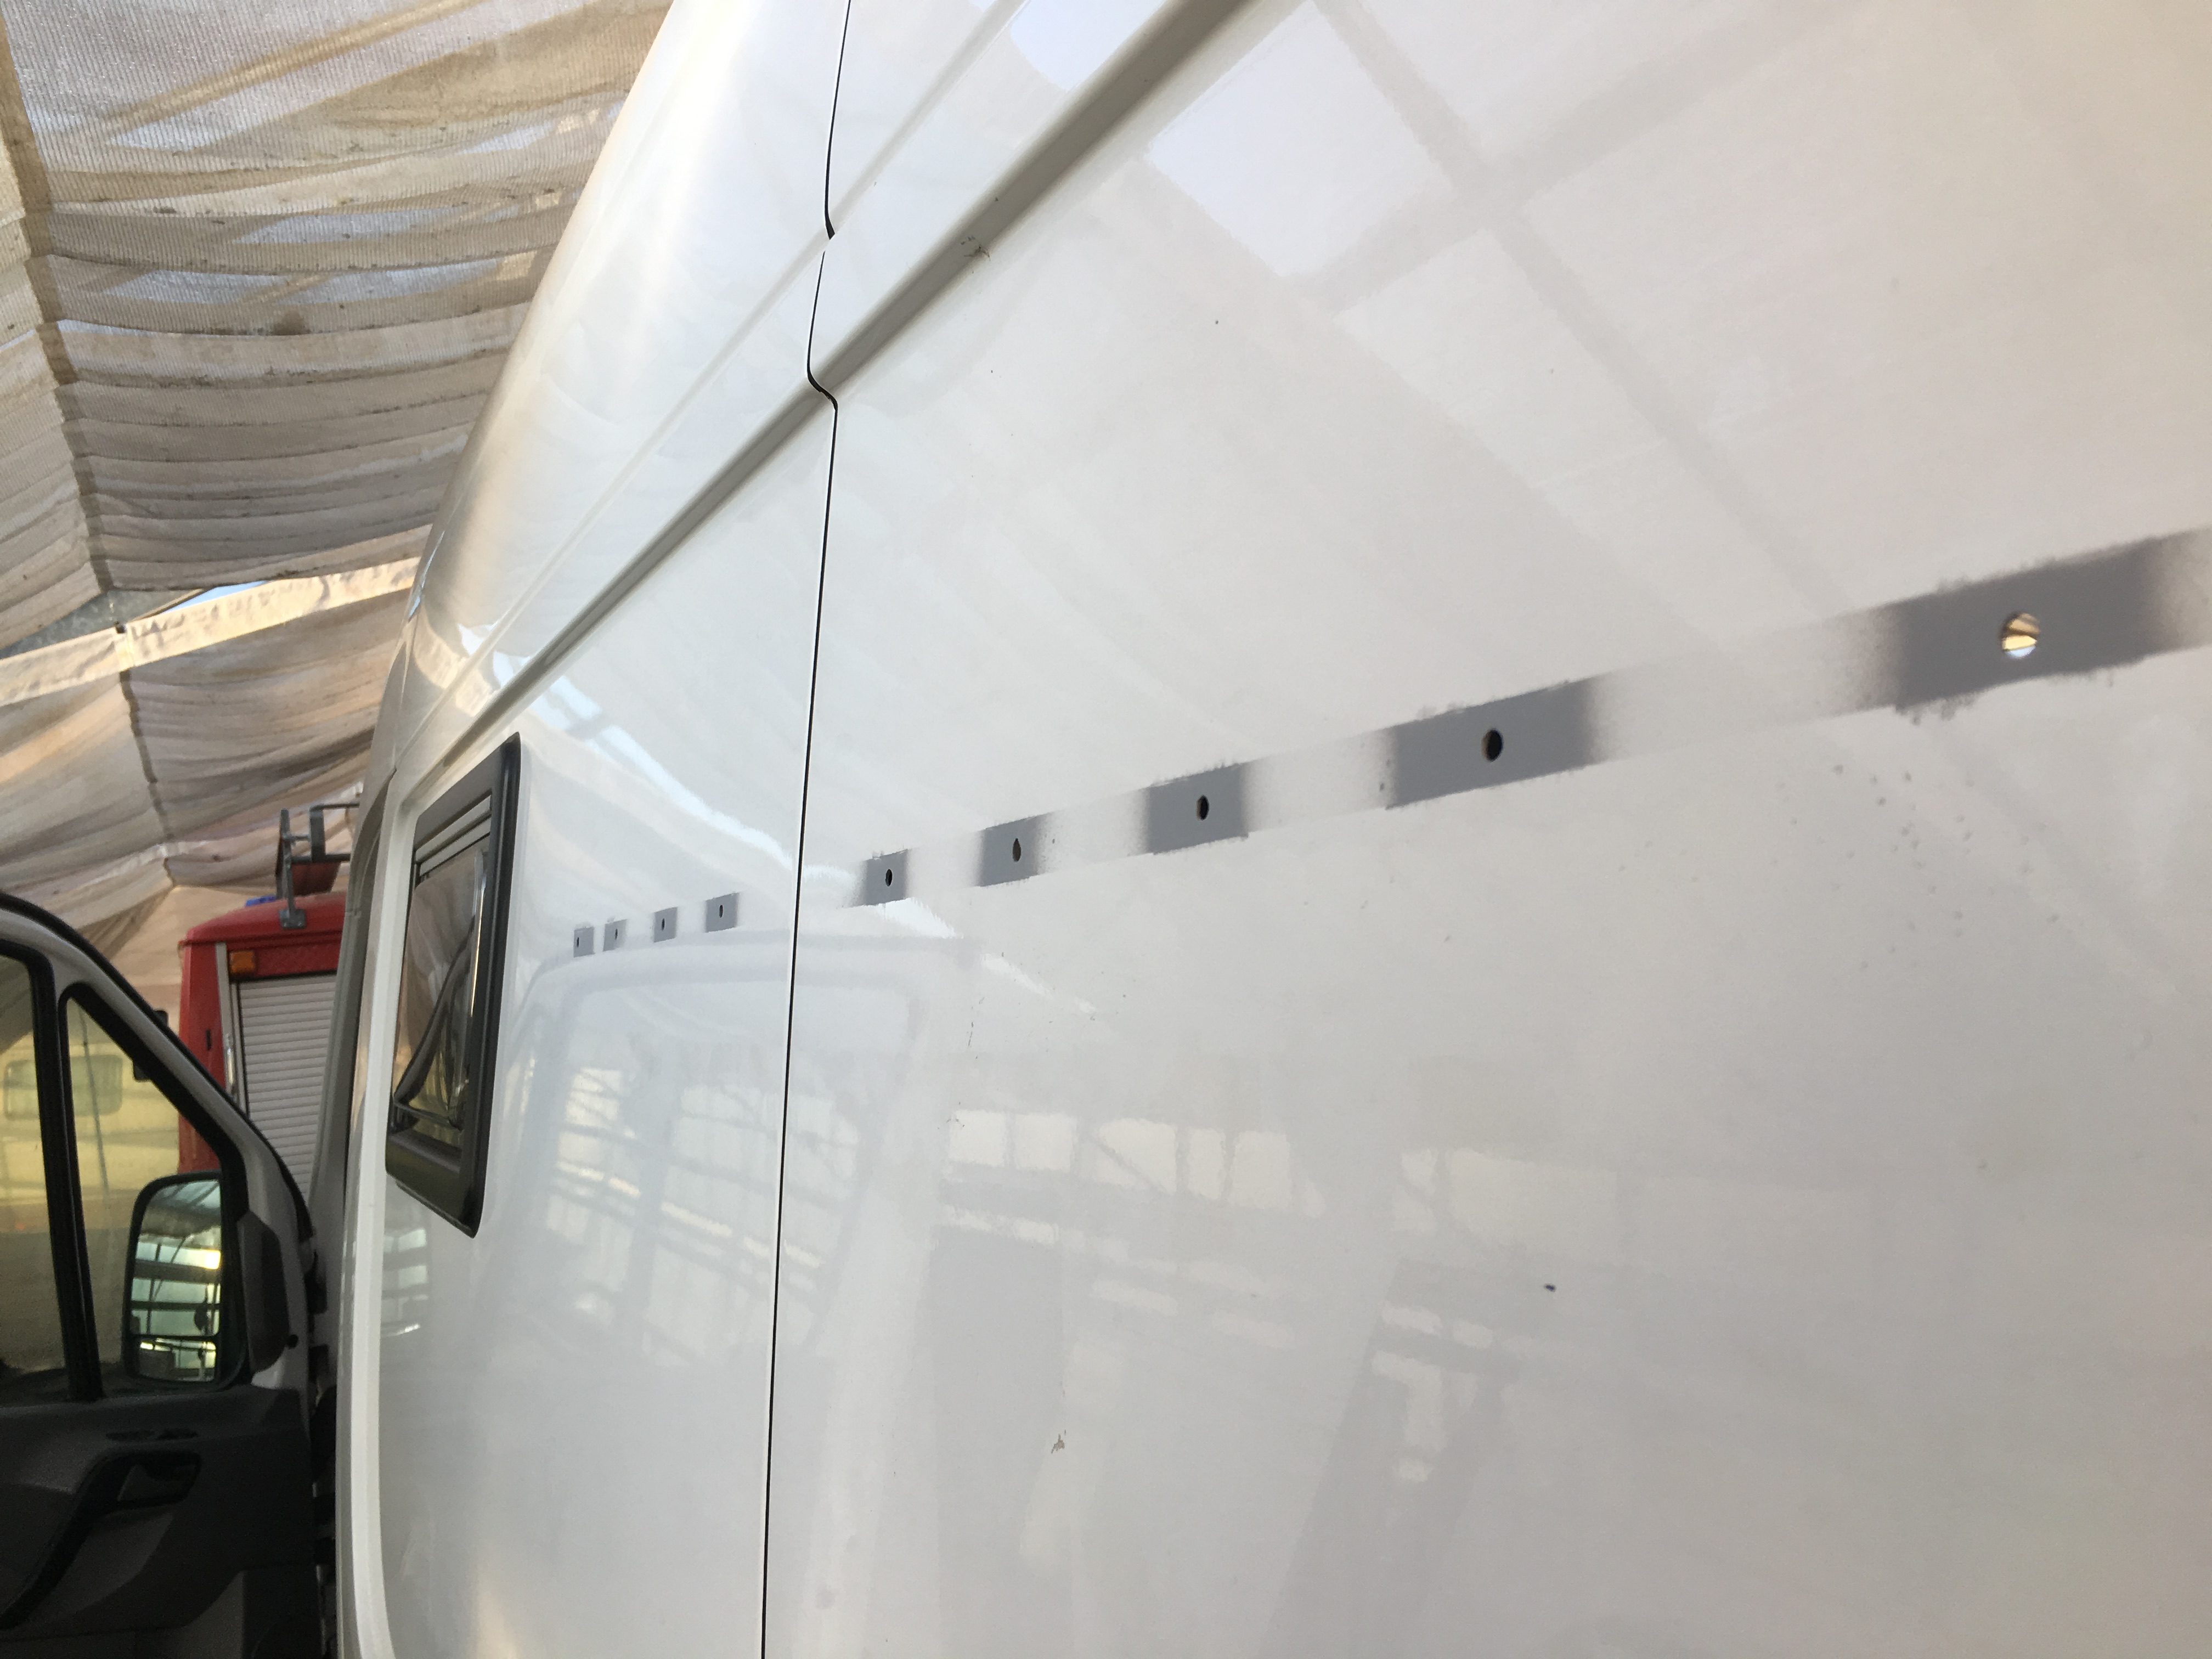
After cleaning the adhesive surfaces on the vehicle and the lashing tracks, we generously applied black Sikaflex 252i (but not too generous, because we did not want it to overflow) to the tracks and glued them to the vehicle additionally to the screwing.
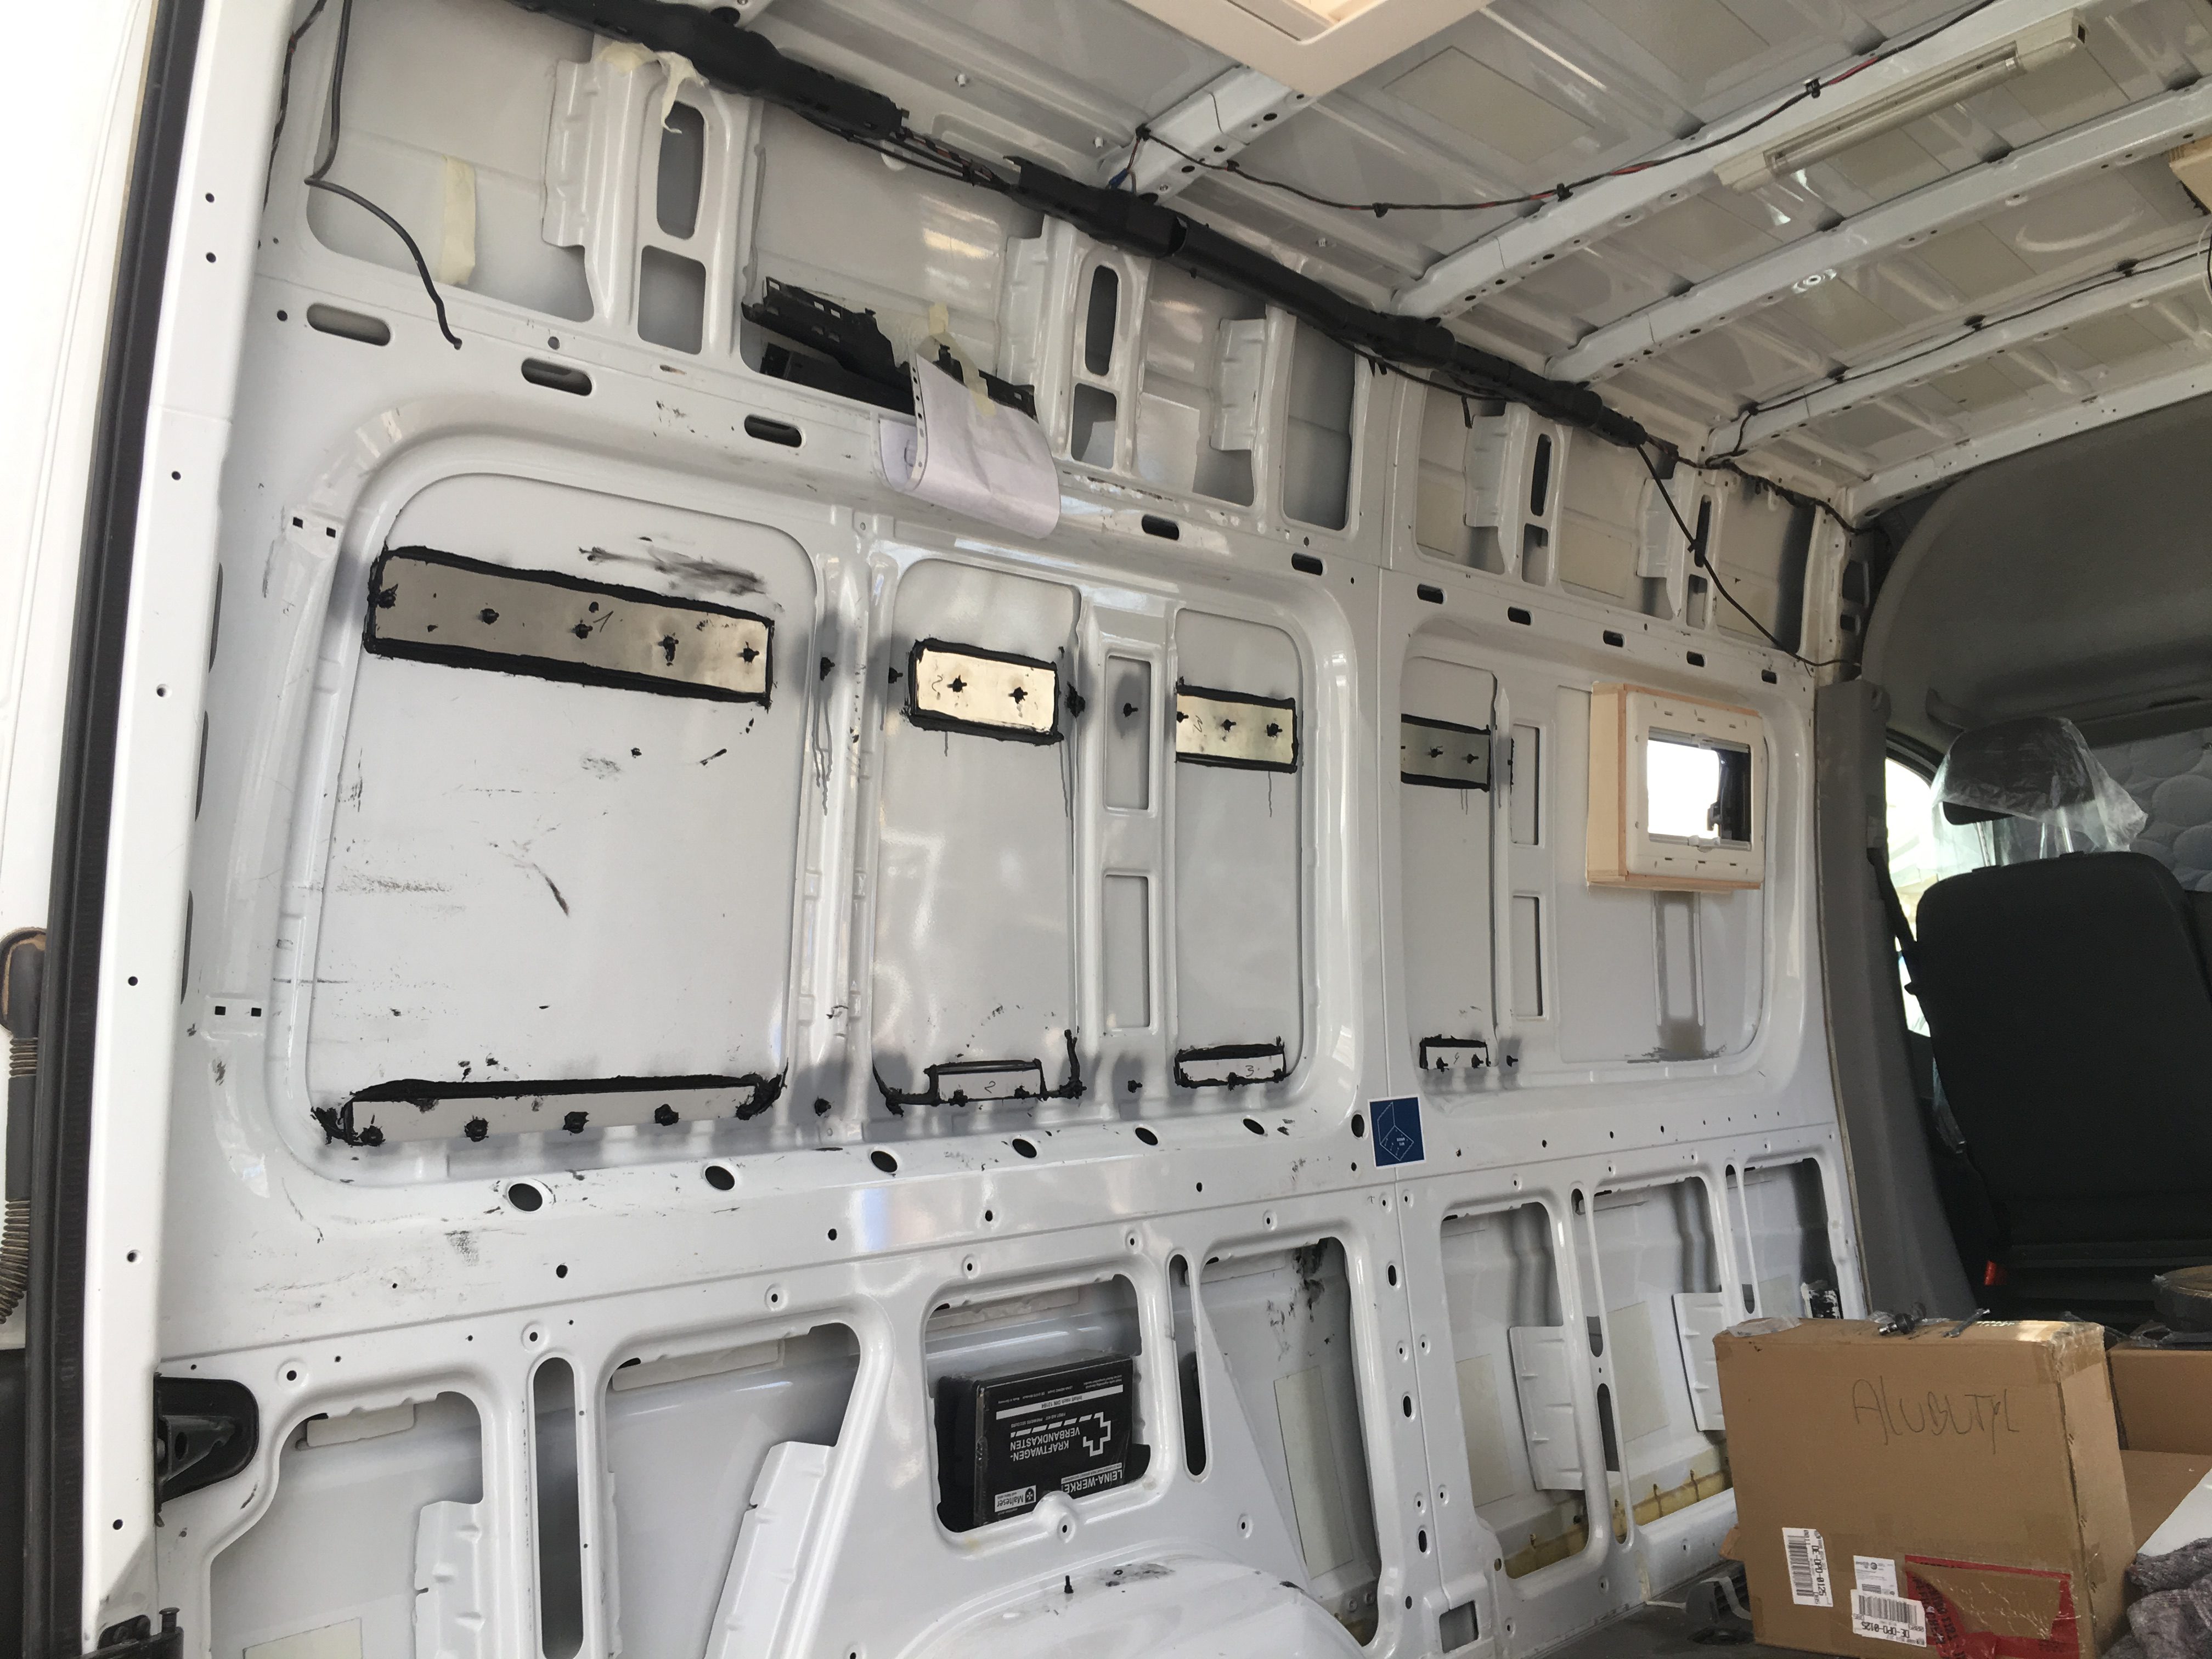
The lashing tracks have to hold a lot of weight, so to stabilize the walls of the vehicle, we mounted pieces of aluminum as thick as 1,5 mm to the inside. These pieces had to be trimmed to a fitting size and the holes had to be drilled beforehand, then followed some cleaning before gluing them to the inside walls.
Now the lashing tracks were glued to the outside and the aluminum pieces glued to the inside, we then had to screw everything together and counter the screws with a nut.
We recommend gluing and screwing at the same time, so you want someone to help you with this: Person 1 glues the lashing tracks from the outside as Person 2 glues the aluminum pieces from the inside. The holes all have to be on top of each other so Person 1 can then insert the screws from the outside and Person 2 secures them from the inside.
Et voilà: With these beautiful lashing tracks, our Sprinter now has a little more storage space for sand ladders, canisters and gear!